Table of Contents
Batch printing work plans
Description
You can use cross-course work plans in batch printing, for example for route and column planning.
Application
Highlight in the Project management the entry in the directory tree Course administration, open the menu Print and select the entry work schedules.

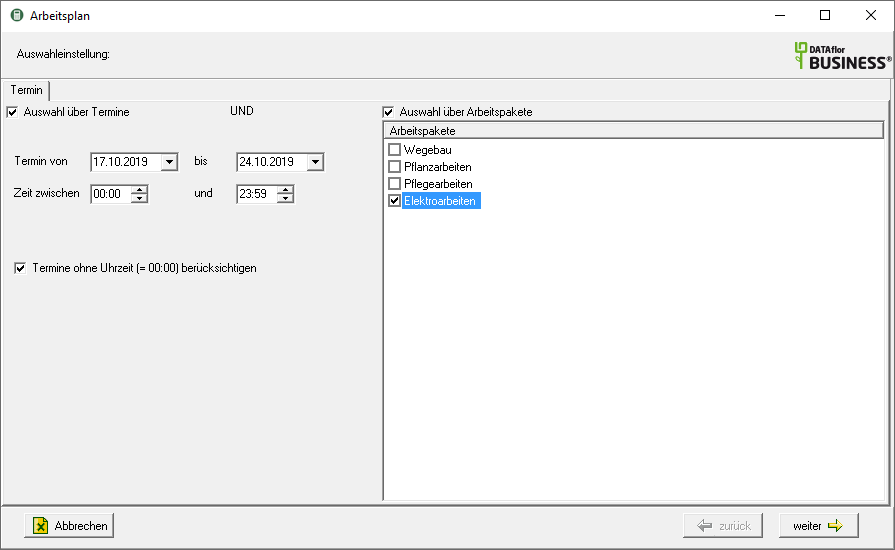
The following dialog opens. Select the period and the work packages for which you want to create the batch print and confirm with [Continue].

The following print menu opens.

Print settings
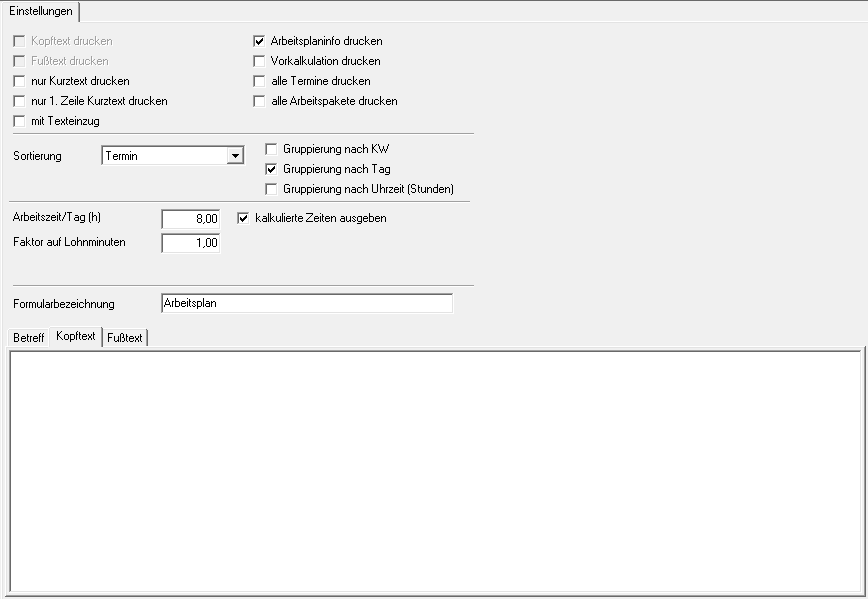
Make the following settings:
Preview
Each printout can be checked again before printing. The display of a preview is preset by the program. If you do not want to see a preview, deactivate it  The option.
Variant
For each form you can use the designer to create different Print variants shape. By clicking  select the variant that you want to use for the printout.
Document no.
In order to enable an exact differentiation between this and other copies in case of later queries, you can assign a document number here. Apply the next free number in the number range by clicking on  or enter a document number manually.
Operator sign
The operator symbol should be an abbreviation from the name of the employee who is responsible for this LV. This can be, for example, the first two letters of the surname or the initials of the employee. The program enters the operator code of the logged on user here, which is saved in Address manager was stored in the user data.
Contact Person
The full name of the employee who is the contact person for all queries should be entered here. The program enters the name of the logged in user here, who is in the Address manager was stored in the user data.
Telefon-Nr.
If this employee has his own extension number and you want to prevent the customer from having to go through the switchboard first, the direct extension number of the employee can be printed out here. The program has the telephone number here. of the logged-in user, which is saved in Address manager was stored in the user data.
output
By clicking  choose whether you want to print the routing or as a Fax or e-mail want to send.
printer
By clicking  select the printer you want to use for printing. Only printers installed under Windows are available for selection. You can also use the function for printing different copies Advanced Settings... is available for storage, management and analysis.
Include in building file
Have a license for the module DATAflor Construction file, you can save the work plan as a PDF document.
Paper feed
If your printer offers several paper trays, select by clicking on  the slot from which the paper is used for printing.
print from / to page
Here you can specify the pages to be printed out. If you want to print the entire routing, do not make any changes in these fields.
Copies
If you need several copies of the work plan, enter the required number here.
Settings tab
Activate the respective option by ticking the box  .
.

only print short text
You can enter short and long text independently of each other. Select this option to print only the short texts.
only print 1st line of short text
Only the first line of the short text is printed.
Print work plan info
The texts that you have in the LV for the position / hierarchy / LV on the tab are output on the routing Extras or in the print menu.
For example:

Print preliminary cost estimate
The pre-calculated partial services for the position are output with a time estimate.
For example:

Min and
By clicking  select the sorting criterion you want.
grouping
Choose whether to group the data on the routing by calendar week, day, or time.
Working time / day (h)
Based on the set working time per day in hours, the number of required working days is calculated from the total time in hours on the list.
Factor on wage minutes
Enter the factor that is calculated on the calculated time approaches.
Output calculated times
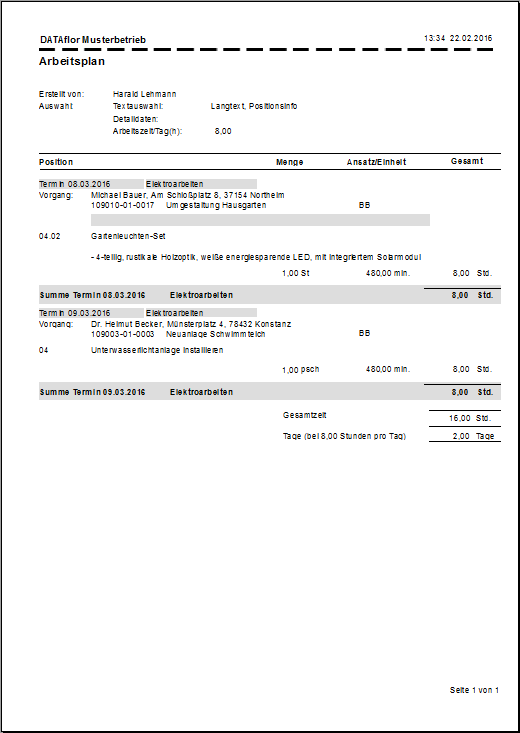
Outputs the calculated time for each position and, at the end of the work plan, the total time in hours and days.
Form name
To use a different form name for the printout, enter the name here.
Print preview and printing
After you have entered all the necessary information for your printout, click in the menu Print settings on  or alternatively use the key combination Ctrl + P.
For example:

