Table of Contents
Hierarchies
Hierarchy levels serve to structure and order a specification of services. The GAEB-compliant designations are used as standard: lot, title, component, section, subsection. In addition, the names of the hierarchy levels in the LV data can be determined and used individually.
Creation of a hierarchy
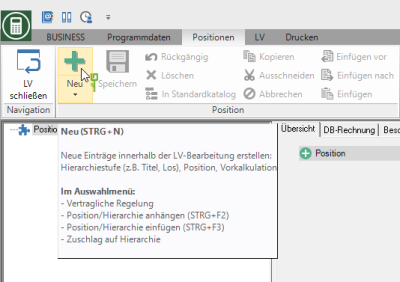
Position the mouse pointer on the entry positions and click on ![]() in the menu Project management. You can also right-click the function in the context menu New… or you can alternatively use the key combination Ctrl + N.
in the menu Project management. You can also right-click the function in the context menu New… or you can alternatively use the key combination Ctrl + N.
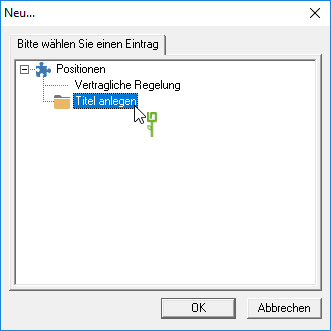
The following dialog opens. Select the entry Create hierarchy level and confirm with [OK].
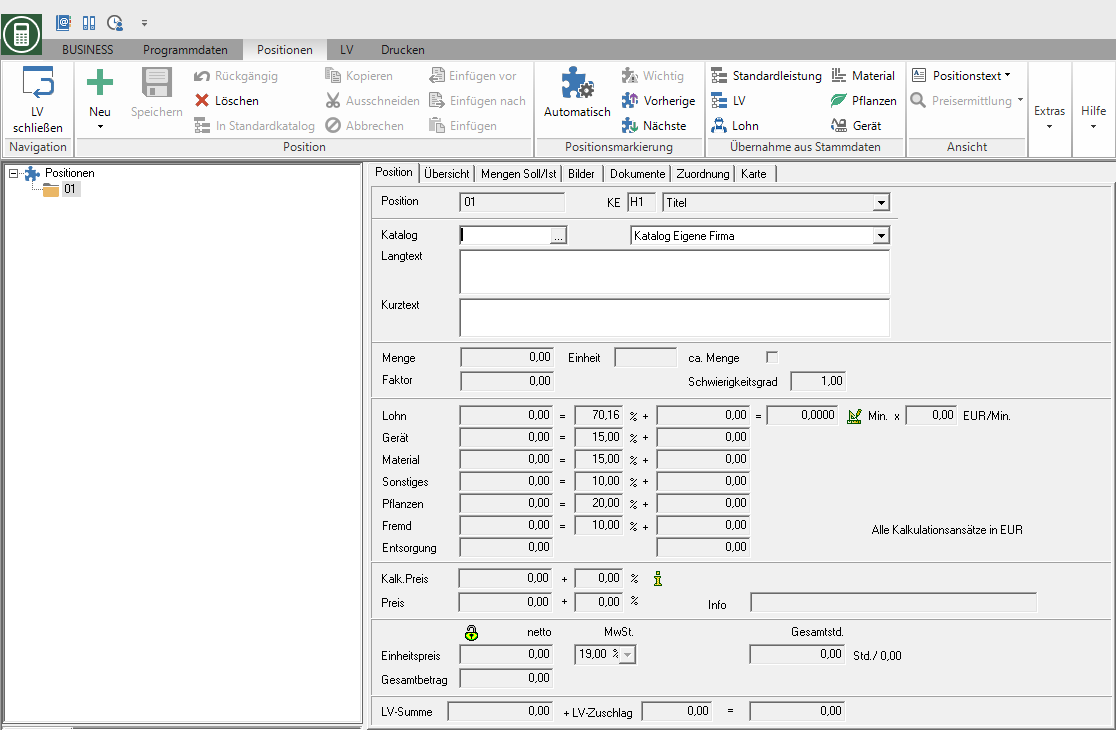
The new hierarchy is added in the position tree. On the right side of the screen put on the tab Position the properties of the hierarchy.
Position
The hierarchy number is assigned automatically, if in the basic data of the course on the tab numbering (please refer Course basic data) the option autom. numbering aktiv ![]() is set. The numbering takes place according to the specifications on the tab ordinal the (see Course basic data).
is set. The numbering takes place according to the specifications on the tab ordinal the (see Course basic data).
Is the autom. numbering switched off ![]() , enter the hierarchy number here manually.
, enter the hierarchy number here manually.
Catalog
By clicking ![]() you can use predefined designations from your standard catalogs.
you can use predefined designations from your standard catalogs.
Long text
Enter the name of the hierarchy here.
In info or text fields you are entitled to Editor with which you can change fonts and sizes. Furthermore, texts can be loaded from files and saved in BUSINESS created texts can be saved as files.
Confirm your settings by clicking on ![]() in the menu positions or alternatively use the key combination Ctrl + S.
in the menu positions or alternatively use the key combination Ctrl + S.
Append / insert a hierarchy
You can insert new hierarchies before hierarchies or append them to the last hierarchy.
The designation of the functions corresponds to the designation of the selected hierarchy level in the Course basic data.
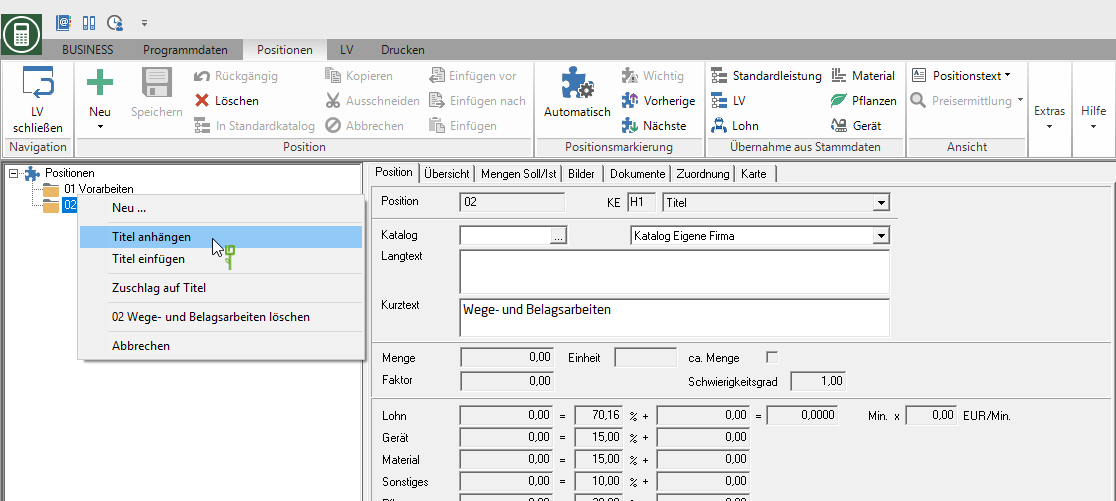
Append hierarchy
In the position tree, select any hierarchy in the hierarchy you want to add the new hierarchy to as the last hierarchy. Then open the menu positions the selection menu New. Or you can open the context menu with the right mouse button and select the entry Append hierarchy or alternatively use the key combination Ctrl + F2.
Insert hierarchy
In the position tree, mark the hierarchy in front of which you want to insert a new hierarchy. Then open the menu positions the selection menu New. Or you can open the context menu with the right mouse button and select the entry Insert hierarchy or alternatively use the key combination Ctrl + F3.
Deleting a hierarchy
To delete a hierarchy, select it in the position tree. Then press either Del or click on ![]() in the menu Project management. Alternatively, you can right-click to open the context menu and select the entry …Clear choose.
in the menu Project management. Alternatively, you can right-click to open the context menu and select the entry …Clear choose.
If there are positions below a hierarchy, a query is opened.

Confirm the query with [Yes], all positions below the hierarchy are deleted.
Are the tabs in item processing Preliminary calculation, Mass list or Documents is open ![]() in the menu positions disabled. This prevents accidental deletion of the position you are currently editing.
in the menu positions disabled. This prevents accidental deletion of the position you are currently editing.


