Table of Contents
Texturing objects
Command: DFTEX
Description
With this function, one or more surfaces can be assigned a texture.
Application
- After calling up the command, you will be asked to select the surface. You can also choose several surfaces here.
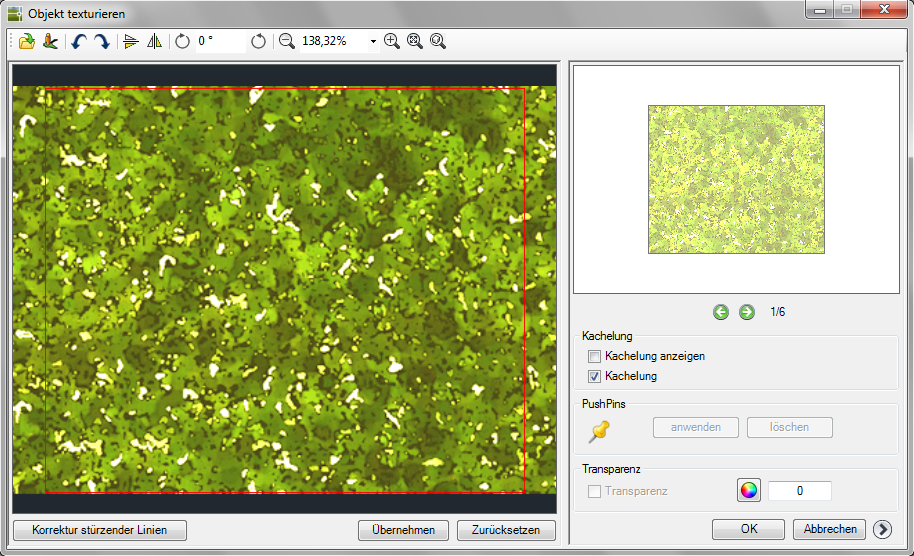
- The dialog for creating the texture then opens.
On the left side you will find the functions for creating the texture. The individual functions are explained below. You can also use the mouse to change the size and position of the inserted image.
The red frame shows you the size of the surface to be textured.
If you on [Take over] click, the result is displayed in the preview window on the right-hand side of the dialog. - If you have selected several surfaces, you can use the arrow keys to select the individual surfaces and give them a texture.
- With [OK] insert the textured surfaces into the drawing.
All textures created are only visible in certain styles (e.g. Realistic) or when rendering.
Features
| to open An image file that you want to use for texturing. | |
| Use a view Google Street View as a texture. | |
 | Go one step back or in. |
 | Mirror the picture horizontal or vertical. |
 | Flip the picture 90 ° right around, give the Rotation or rotate the image 90 ° left around. |
 | Zoom out, enter a value for the Zoom at or enlarge The picture. |
 | Zoom on borders of the picture. |
 | Fits the picture to the object |
| Correction of falling lines | In the case of building views, it can happen that the image is displayed slightly distorted due to the perspective. This function aligns the image using vertical lines.  |
| Apply | The edited image is included in the preview as a texture. |
| Reset to default | Removes the texture from the preview. |
 | Use the right and left arrow keys to select which surface should be textured. |
| Show tiling | With this function the tiling is displayed in the editing window. |
| Tiling | Choose whether to use the image as a single image or as an image tile. |
 | You can rectify the image using the PushPins. Application: Click on the icon. Mark the starting point on the picture by clicking the symbol You need at least three PushPins to rectify the image. With [apply] the image is rectified. With [Clear] the set PushPins are deleted. 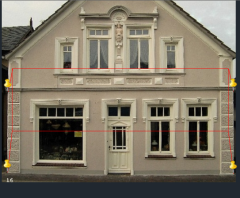  |
| Transparency | Switch the set transparency on or off. |
 | Choose one Color which should be switched transparently and enter the Transparency factor |
 | Click this button to open the libraries. Library elements suitable as textures can easily be dragged and dropped into the editing window. |
| OK | Applies the textures to the Objects (CAD) |
| Abort | Cancels the function. |
You can also drag and drop image files directly from Windows Explorer into the editing window.