Table of Contents
Working with the Crystal Designer
Description
The print variants of the form groups Printouts of business transactions, Reports and lists (Crystal) and Quantity documentation Crystal are created or edited with the Crystal Designer.
Structure of the designer
In the Crystal Designer, the forms are divided into individual areas. In the example you can see the first page of the form with the areas 1 - 1st address, 2 - 2nd address, 3 - form description and detailed information and 4 - subject.
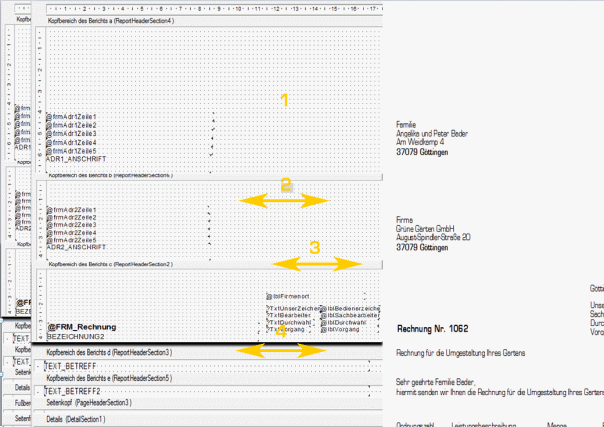
The other pages differ from the first page of the form. In the designer you have the option of adapting the various pages to your needs. To do this, you can select the corresponding tab in the upper area of the designer. The tabs are available for selection Page header page 1, Page header from page 2 and Side foot. On the tabs Watermark and background objects you can insert graphics that lie behind the text.

Customize areas
You can show or hide individual areas of the forms in order to get a better overview while editing.
Hide areas
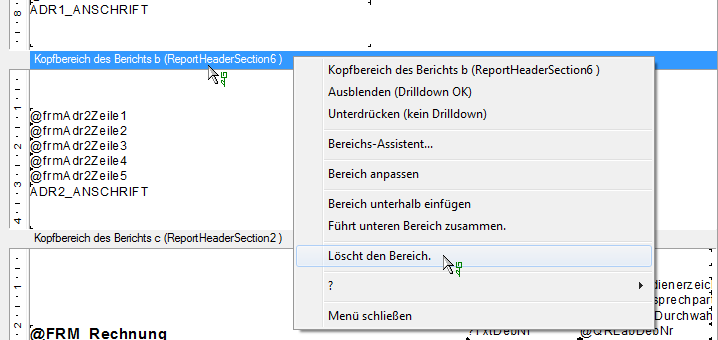
To hide an area, right-click the report header and select Suppress (no drill down).

To hide all areas, select Hide (Drilldown OK).

Show areas
Proceed in the same way to show areas and use the functions Don't suppress to show individual areas

... and ads to show all areas.

Delete areas
Change the size of the areas
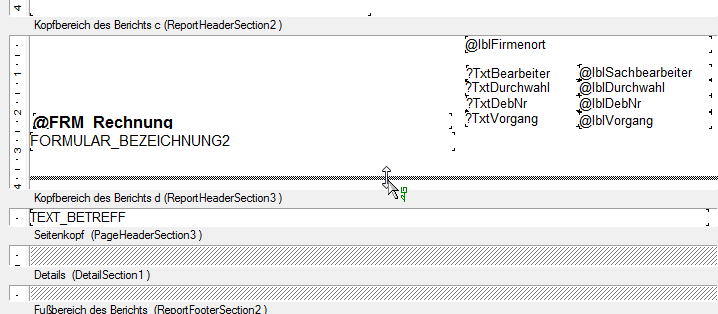
Position the mouse pointer on the lower edge of the visible area. A symbol appears (see illustration) to change the size of the area. Press the left mouse button and drag the area larger or smaller while the mouse button is pressed.
Page setup
Only use the margin settings and the page setup option if you want a new layout that extends beyond the previous print area.
To change the margin settings, click  in the toolbar.
| Option | Description |
|---|---|
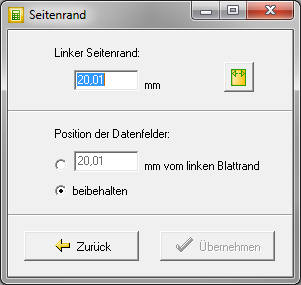
| Left margin | The left margin is preset to a distance of 20,01 mm. The data fields are positioned from the left margin. Changing the left margin shifts all data fields. The left margin should not be too small, so that, for example, punching and filing the invoice later does not make it illegible. The data fields retain their size even if the margin decreases. |
| Position of the data fields | Define the distance between the positions and the left margin of the page. Moving the data fields to the left margin increases the right margin. |
For example: To insert graphics across the entire width, e.g. a continuous colored strip at the top of the page, set the left margin to 0,00 mm. The position of the data fields is kept at a distance of 20,01 mm so that punching and filing of the printouts remains possible.
Restrictions apply to the free design of the width of the print forms. The content and formatting of the item and list output are specified and cannot be made narrower or wider. We recommend a business paper layout in which the entire width of the paper is available for printing in the text area.
Insert company logos and pictures
A picture is inserted by clicking on ![]() in the toolbar. The Windows file selection dialog opens, from which you can select the desired image from your computer.
in the toolbar. The Windows file selection dialog opens, from which you can select the desired image from your computer.
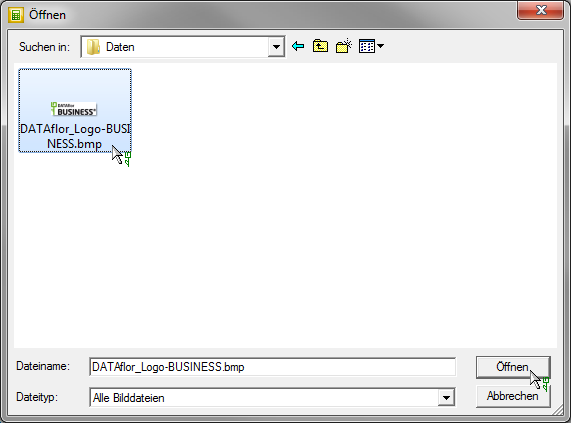
Confirm your selection by clicking on [To open]. Determine the position at which the picture is to be inserted and confirm this with a left mouse click. The image is displayed in the designer.
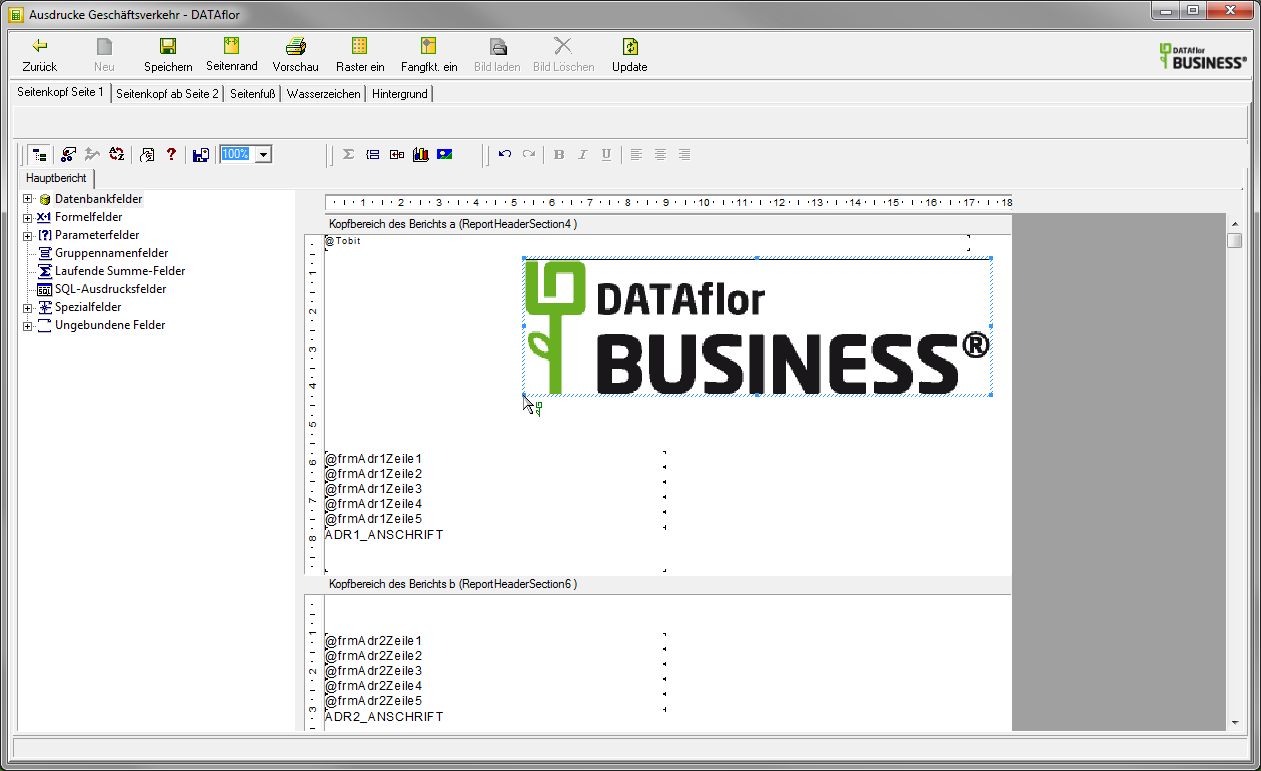
You can change the size of the picture using the nodes on the frame. Please note, however, that the resolution of the image can deteriorate as a result of the resizing.
Edit the size of the picture with an image editing program, for example Paint, and then insert the picture.
The display size depends on the image size. Inserting a large picture also shifts the size of the area.
Use text fields
You can enter any text in free text fields. This text is printed with this variant each time it is printed.
Insert text fields
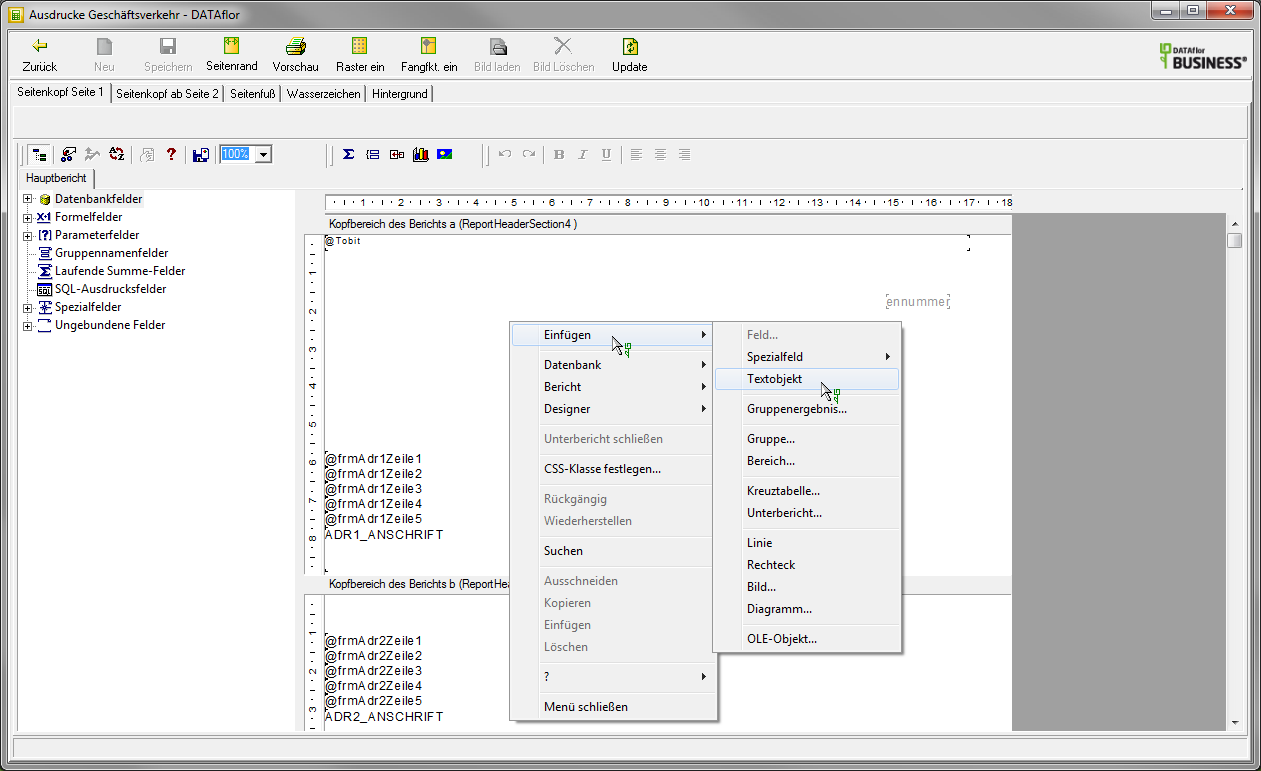
To insert free text fields, right-click the area in which you want to insert the text field. Then select the entries in the menu Insert and Text object .
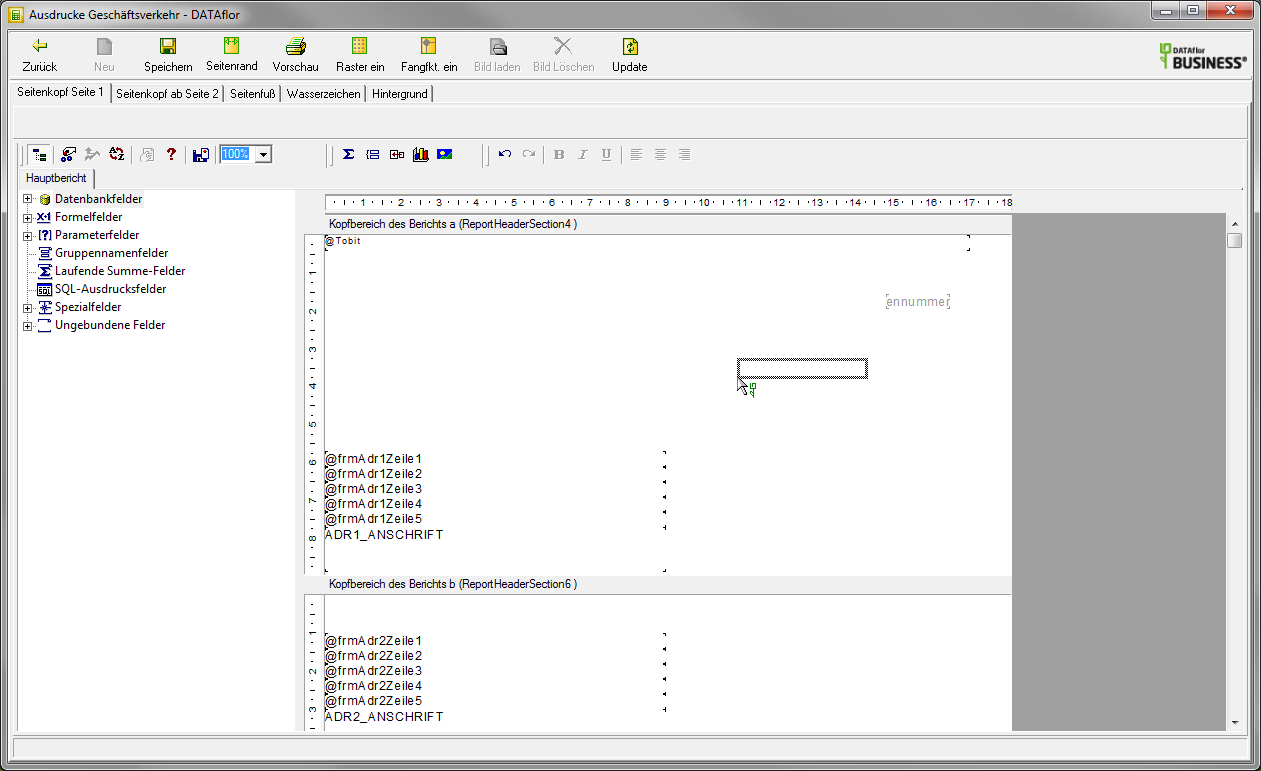
Position the text object and enter the text.
Format text fields
You can format manually created text fields according to your needs. To do this, select the text field or several text fields with CTRL. Then open the context menu with the right mouse button and select the entry Format text or Format multiple objects.
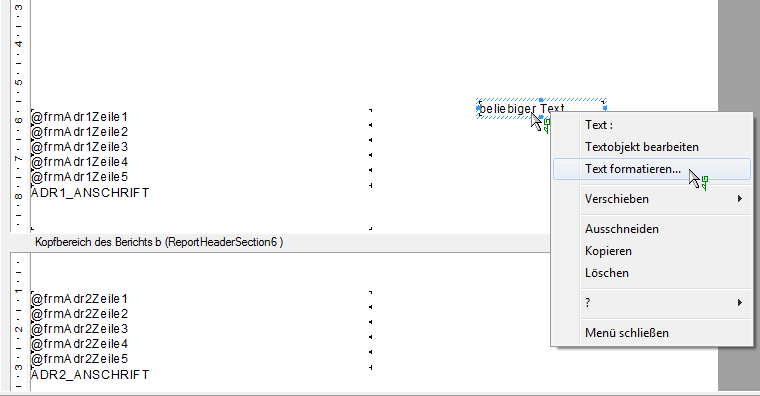
The Format editor will be opened. Open the tab Font.
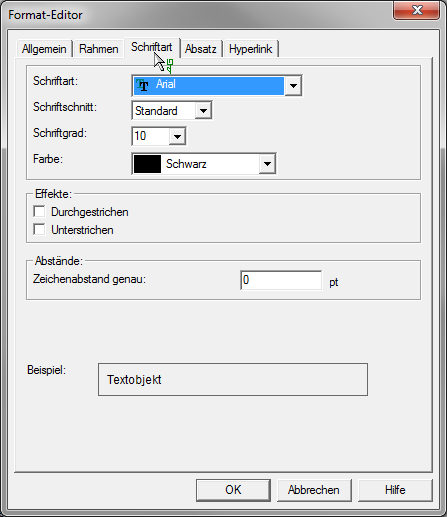
Make the desired settings. The preview gives you an overview of the form in which the text will be displayed on the form. Confirm your settings with [OK].
The new formatting is used for the selected text field. You may have to adjust the text field to the text size. To adjust the text field to the text size, click on the text field and drag it to the appropriate size at the nodes.
Use formula fields
Formula fields are text modules that are automatically filled with the stored data by the program when a document is printed out.
Insert formula fields
All available formula fields can be found in the directory tree on the left side of the window.
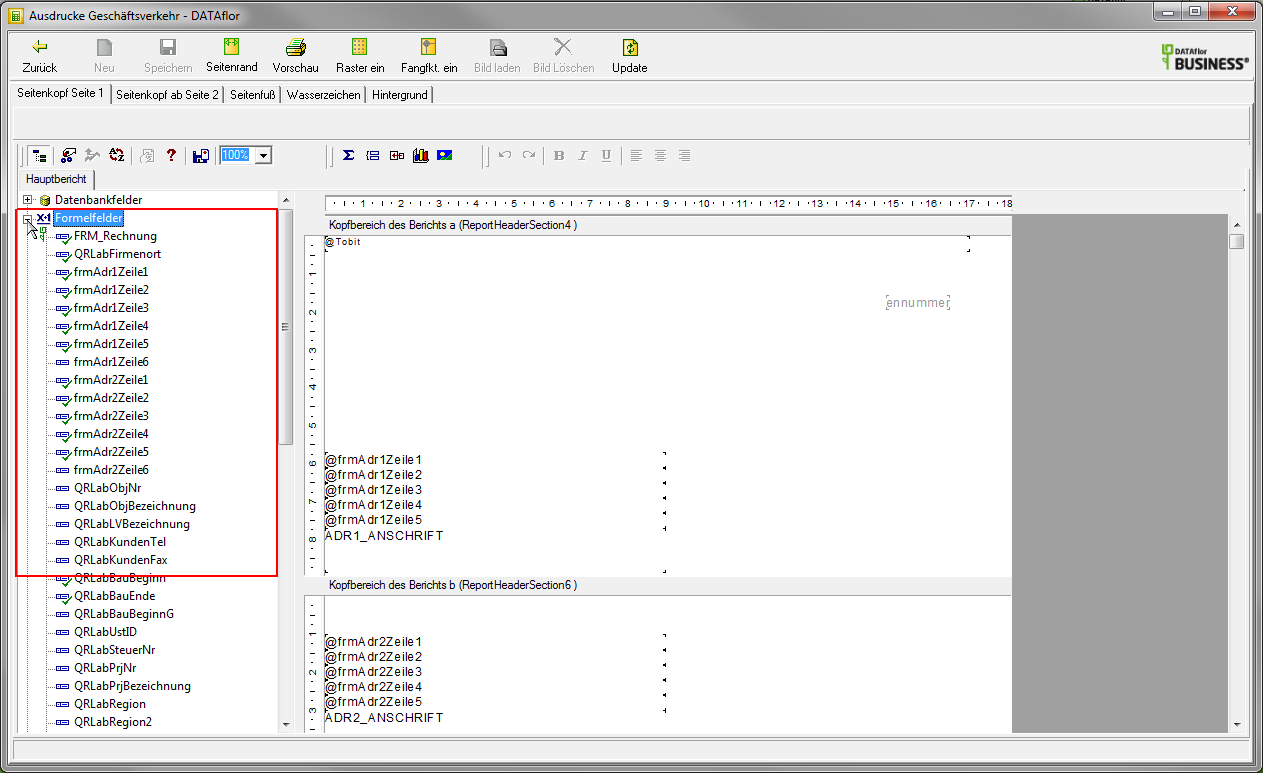
Select the desired formula field in the directory tree and drag it to the desired position in the form with the mouse button pressed. Release the mouse button when you have reached the desired position.
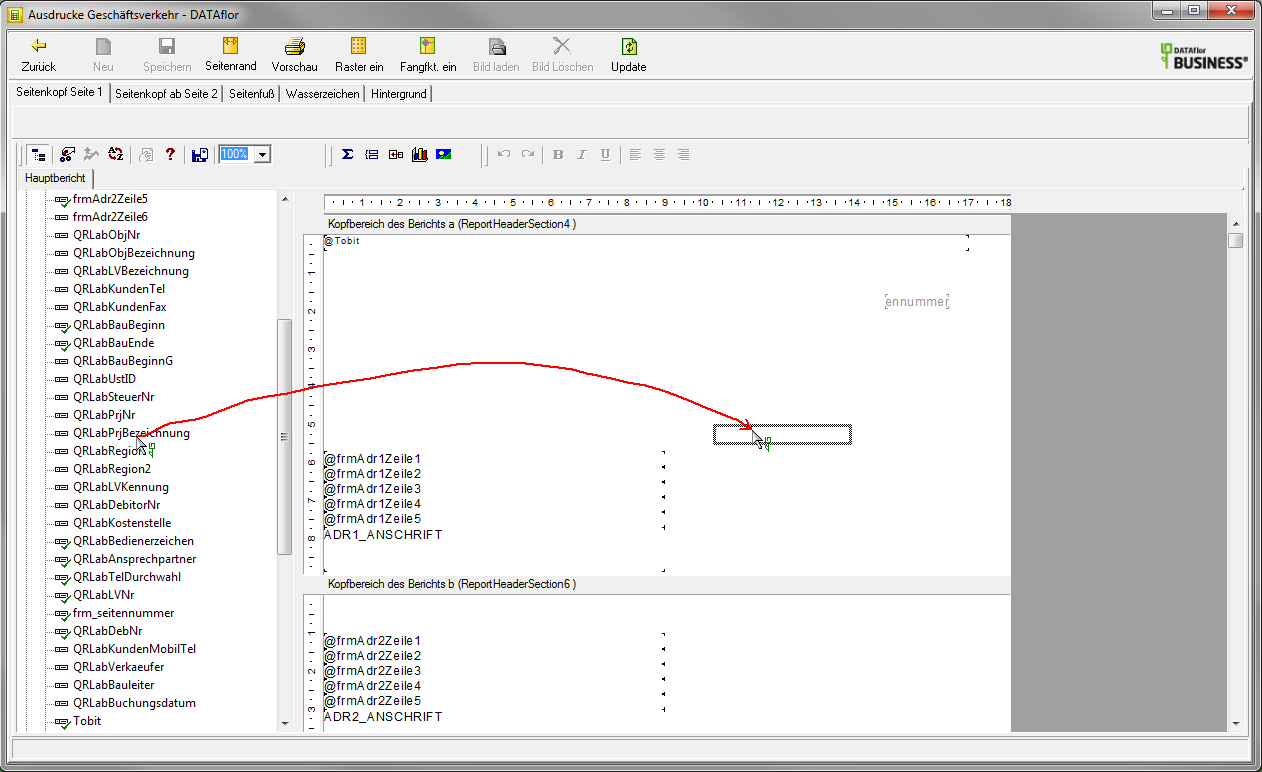
The formula fields in the list that have a green check mark  are already used in the form.
The field length must be set according to the size of the text. You can change the field size with the help of the nodes in the frame and pull it larger or smaller.
available formula fields
Attention: The formula fields Tobit and frm_seitennummer must not be removed as they are required for sending faxes or for determining the number of pages.

The following formula fields are available:
| Field name | Significance |
|---|---|
| FRM_invoicing | bill number |
| QRLab company location (old: lbl company location) | Company location from company address |
| frmAdr1Line1 | Salutation 1st address |
| frmAdr1Line2 | Name 1st address |
| frmAdr1Line3 | First name 1st address |
| frmAdr1Line4 | First address added to name |
| frmAdr1Line5 | Addition 1 1st address |
| frmAdr1Line6 | Addition 2 1st address |
| frmAdr2Line1 | Salutation 2st address |
| frmAdr2Line2 | Name 2st address |
| frmAdr2Line3 | First name 2st address |
| frmAdr2Line4 | First address added to name |
| frmAdr2Line5 | Addition 1 2st address |
| frmAdr2Line6 | Addition 2 2st address |
| QRLabObjNo | Object number |
| QRLabObj designation | Object description |
| QRLabLV designation | LV designation |
| QRLabCustomersTel | Telephone number of the client |
| QRLabCustomerFax | Fax number of the client |
| QRLabBauBegin | start of building |
| QRLabBauEnd | End of construction |
| QRLabBauBeginG | Planned start of construction |
| QRLabUstID | Sales tax identification number of the client |
| QRLab Tax No. | Tax number of the client |
| QRLabPrjNo | project number |
| QRLabPrj designation | project title |
| QRLab Region | Region 1st address |
| QRLabRegion2 | Region 2st address |
| QRLabLV identifier | LV identifier |
| QRLab customer no | Customer number |
| QRLab cost center | Construction site cost center |
| QRLab operator characters (old: lbl operator characters) | Operator symbol of the contact person |
| QRLab contact person (old: lbl clerk) | name of contact person |
| QRLabTel extension (old: lbl extension) | Extension of the contact person |
| QRLabLVNo | LV number |
| frm_page number | required by the program to determine the number of pages |
| QRLabDebNr (old: lblDebNr) | Customer number |
| QRLabCustomerMobileTel | Mobile phone number of the client |
| QRLab seller | Name of the seller of the LV |
| QRLab site manager | Name of the site manager of the LV |
| QRLab posting date | Posting date |
| tobit | required by the program to provide for fax transmission |
| TobitFont | Font for sending faxes |
| GLB_PageNumber | Page number of the current page |
| frmAdr1Street | Street 1st address |
| frmAdr1Location | Place 1st address |
| frmAdr1Postcode | Postal code 1st address |
| frmAdr1Country | Country 1st address |
| lbl_performance period | Text field for "performance period" |
| FRM_Performance period | Service period of the construction site (from start of construction to end of construction) |
| LBL_FROM | Text field for "from" to specify the service period |
| LBL_BIS | Text field for "to" for specifying the service period |
| QRLabCustomerEmail | E-mail address of the client |
| QRLab document date | Document date |
| frmPagesNofM | Page reference "Page ... of ..." |
| LBL_PAGE | Text field for "Page" for page information |
| QRLabMobil extension | Mobile number of the contact person |
| QRLabEmailContact person | E-mail address of the contact person |
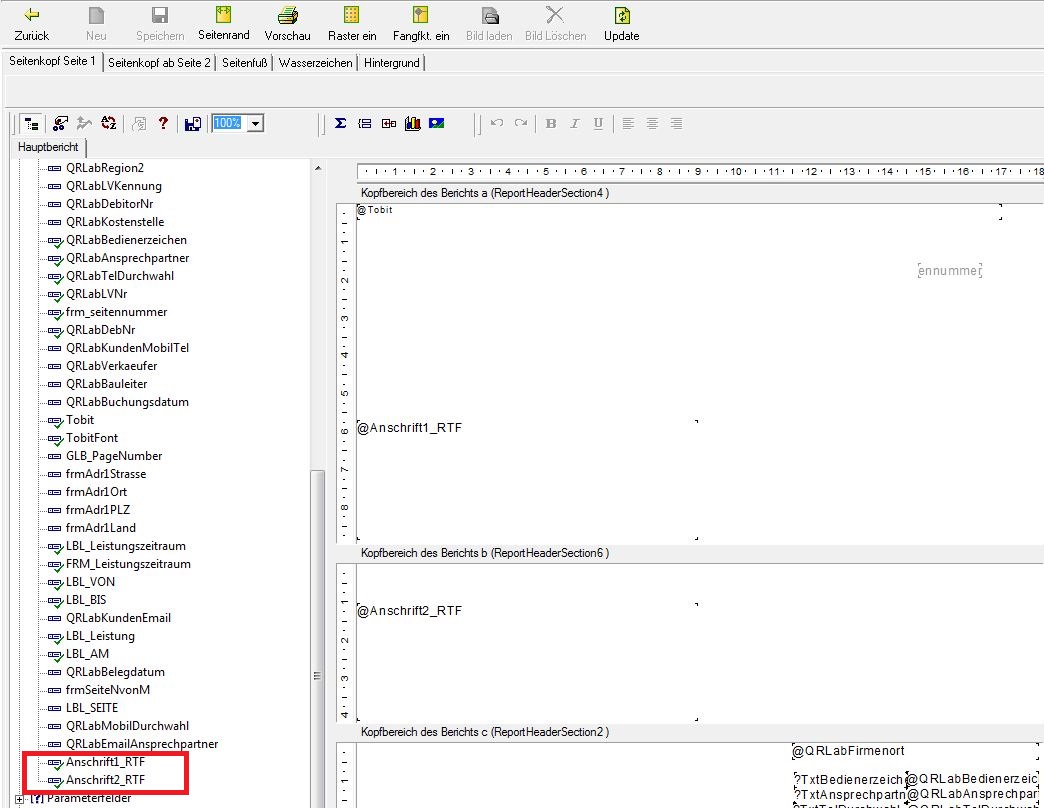
| Address1_RTF | 1. Address according to the preview in the address manager |
| Address2_RTF | 2. Address according to the preview in the address manager |
Format formula fields
For the formula fields, the font and size used in the program parameters are used by default in the printout Default character set and Default font size are set. You can define different formatting for individual formula fields.
First mark the formula field or with Ctrl multiple formula fields. Then open the context menu with the right mouse button and select the entry Format field or Format multiple objects.
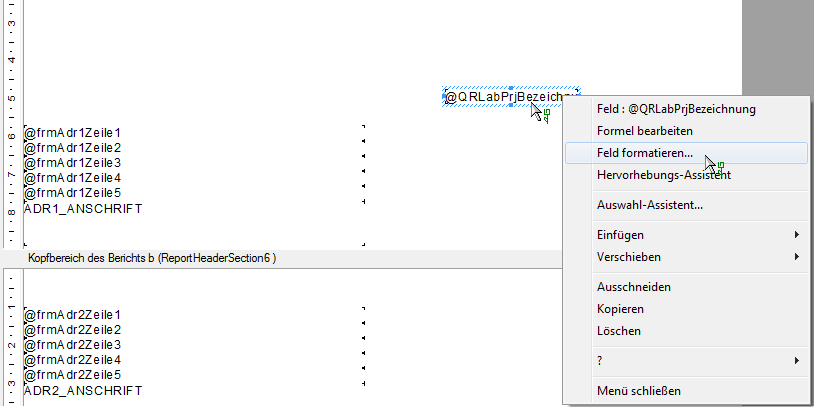
The format editor opens. Open the tab Font. click on  that is behind the field Font located.

The formula editor opens. Remove the text "{? Font}" with Del and confirm with [Save and close].
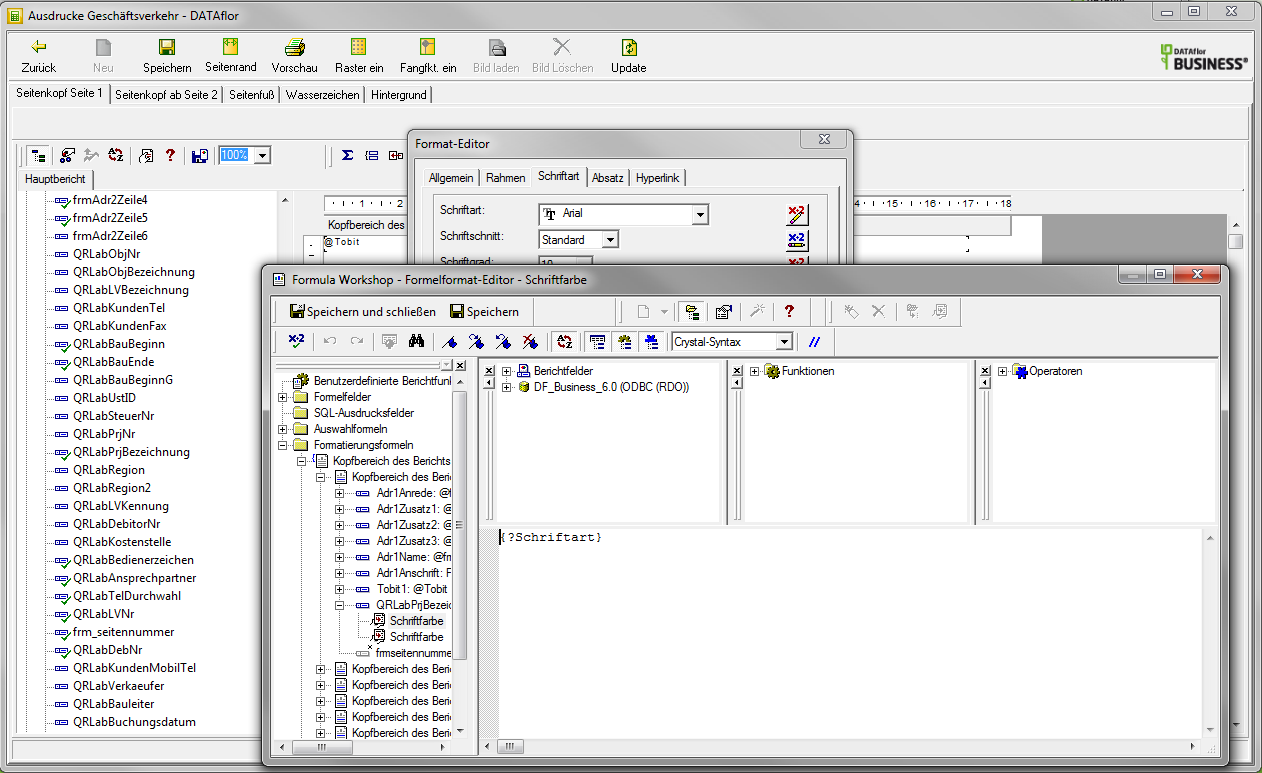
Then set the desired formatting of the text in the format editor and confirm with [OK].
Update formula fields
In the form settings of the current program version, adjustments and improvements are made on an ongoing basis. An example: the address field was previously divided into six individual formula fields, today it is combined in a common formula field. And it used to be filled from the bottom up, today from the top down.
If like in this example with a BUSINESS-Update in the Crystal Designer provided new formula fields or the functionality of existing formula fields has been changed, these innovations are not automatically available in existing print versions. The update must be carried out manually:
Step 1:
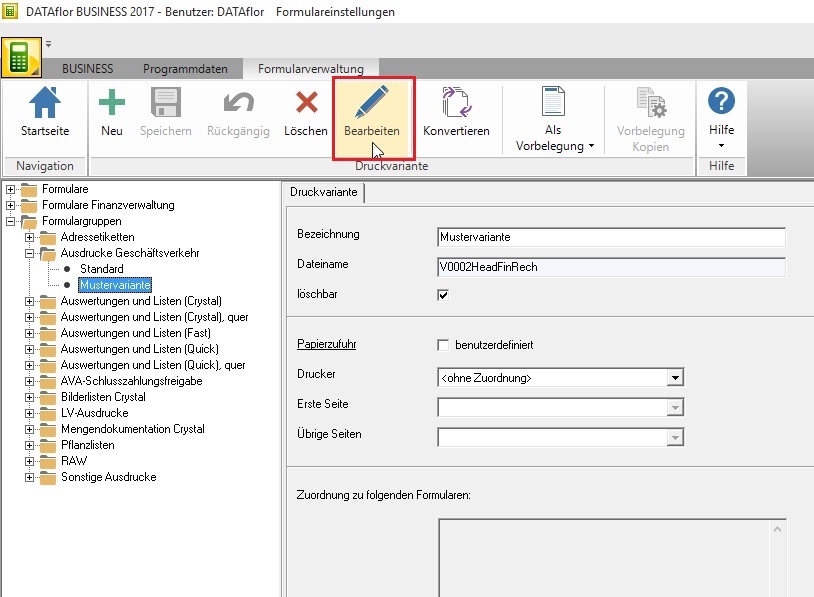
Open the desired print variant using the button [To edit] or with Double.
Step 2:
Now click the button in the editor [Update]to update the print variant.

Step 3:
A dialog then appears, which starts with [OK] must be confirmed.

Step 4:
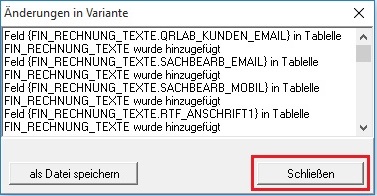
You can now see which formula fields have been added. These changes can be saved as a file. The following dialog only has to be done with the button [Shut down] be terminated. The print variant is then up to date and the corresponding formula fields are available.
Step 5:
Note: make a note of the previous position of the address range using the rulers on the edge of the screen or a printout of the screen.
Now the existing formula fields @ frmAdr1Zeile 1-5 as well as ADR1_ADDRESS to be deleted. Mark the formula fields with the left mouse button and press DelDelete key.
Step 6:
Left in the tab Main report find a junction Formula fields. This can be done via the More be opened.
Scroll down until you see the new formula field Address1_RTF appears in the list. Then drag the Drag and Drop the formula field Address1_RTF in the Report header a and bring it to the position and size of the previous address range.
Repeat this procedure with the formula fields in Report header bif you also want to change the address field for a second address. Attention! Use the existing formula field here Address2_RTF.
Use graphic elements
In addition to formatting individual fields, you can also format entire areas of the form.
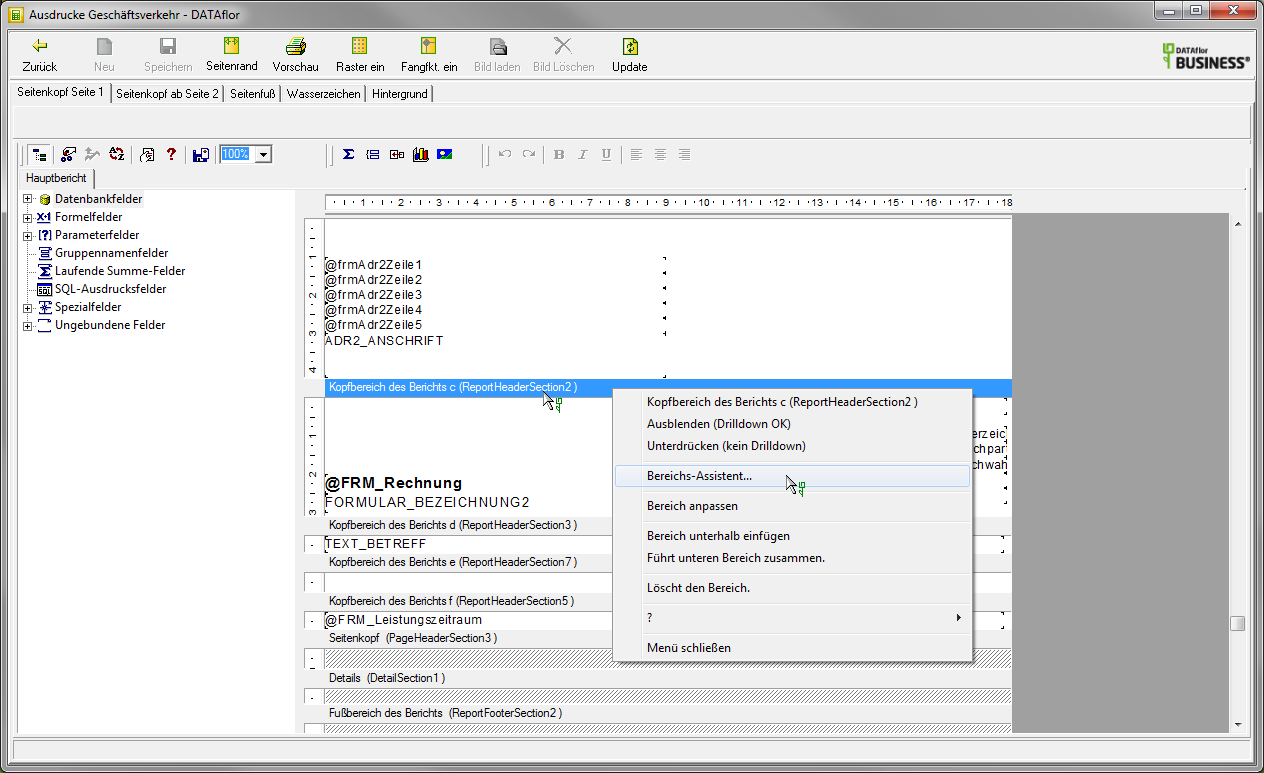
To do this, mark the desired area, open the context menu with the right mouse button and select the entry Area Assistant.
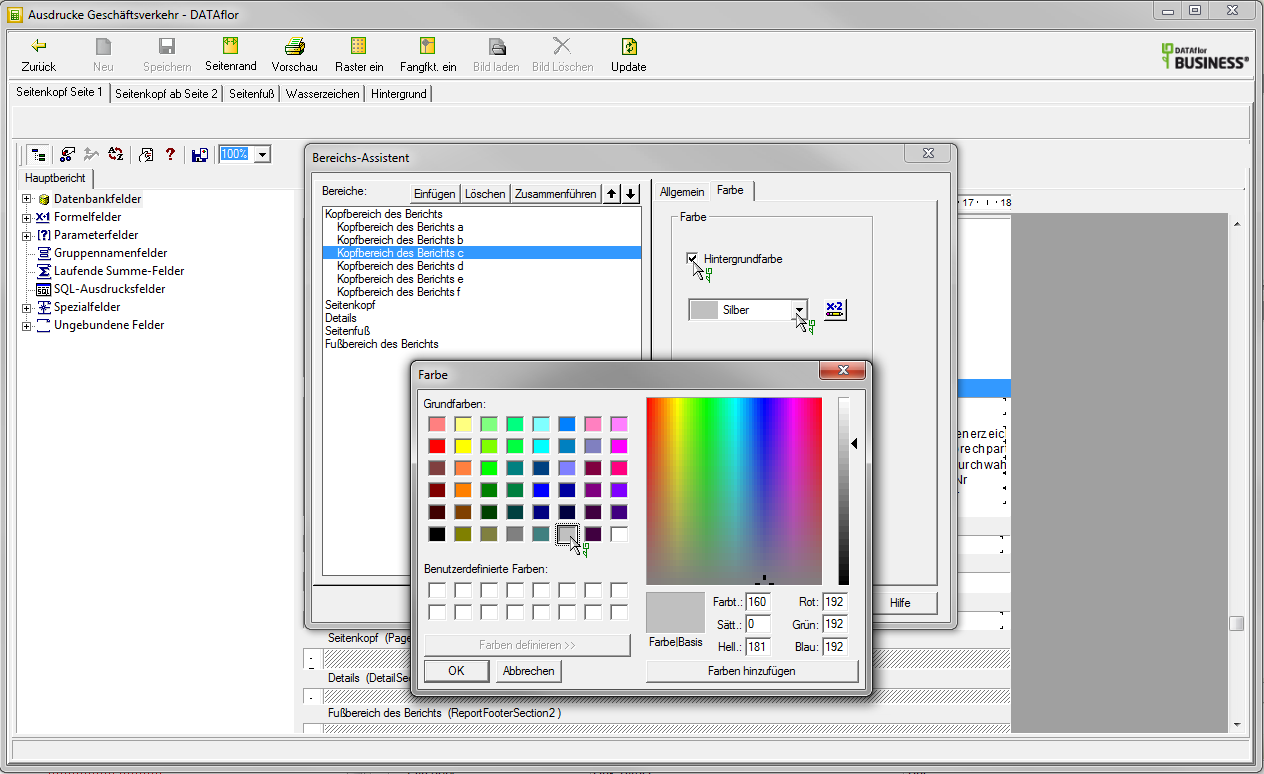
For example: Change the background color
In the section wizard, select the tab Color and activate the check box Background color. You can now choose a background color. You also have the option of using the command Other and entering the RGB values to set your own company color.
Only the area of the page that was previously selected when setting up the page (Margin Settings) is filled. In addition, the formatting only relates to the selected area (e.g. header of report b).
For example: Inserting shapes
You can add bars and other lines to the form. To do this, right-click in the area in which you want to insert the graphic elements. Select the entry in the context menu Insert and the command Line or rectangle .
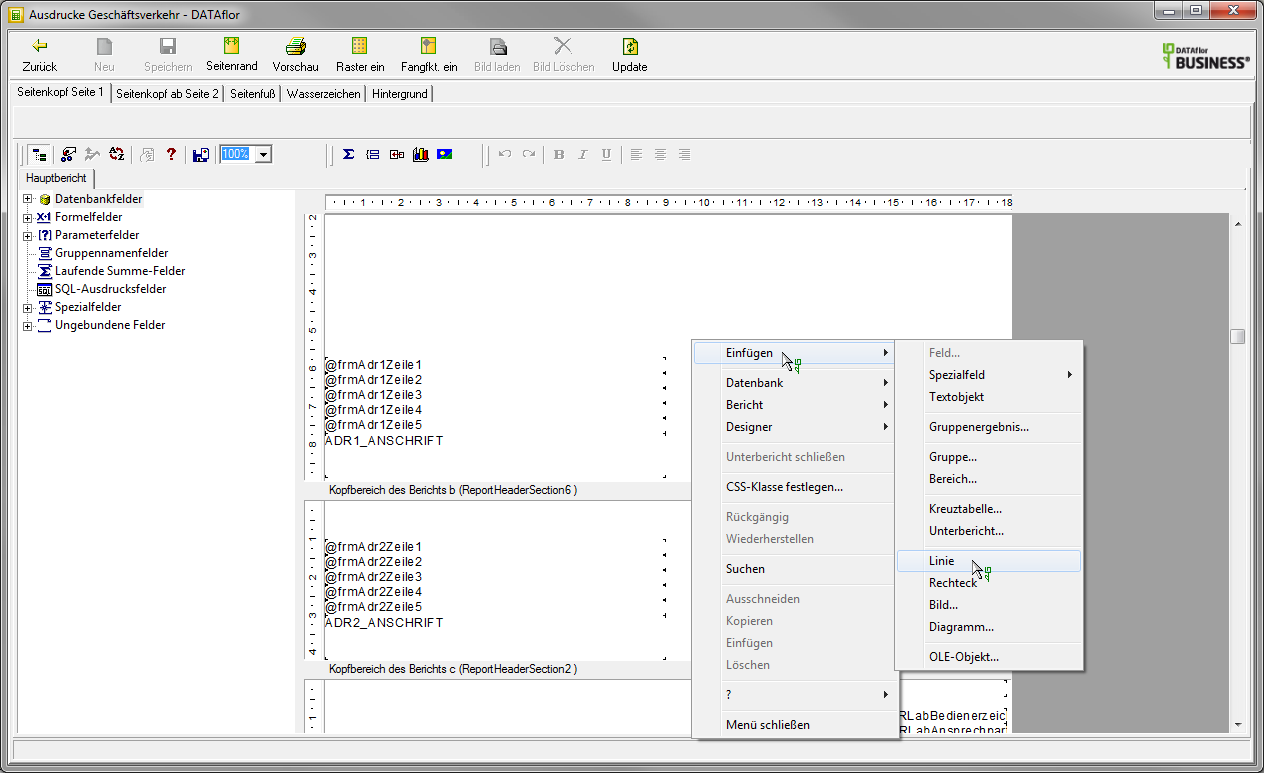
The mouse pointer changes into a drawing tool with which you can format the object in terms of size, shape and location. You can get further formatting options by right-clicking on the object. Select the entry in the context menu Line or Format rectangle ... .
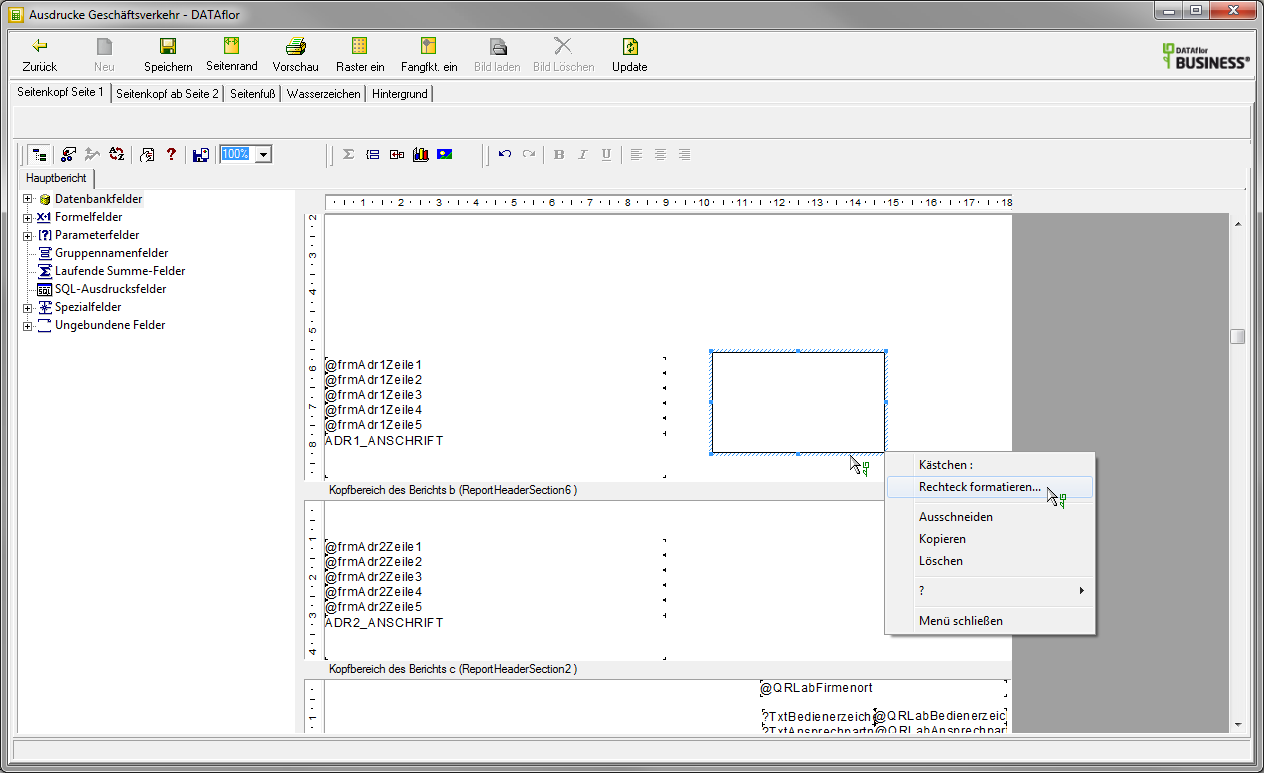
In the format editor you can define the line type, thickness and color. You can also set the fill color of the object.
Copy elements
Graphic elements, text fields and formula fields can be copied within a form. To do this, mark the element that is to be copied. Then open the context menu with the right mouse button and select the entry Copy or use the keyboard shortcut Ctrl + C.
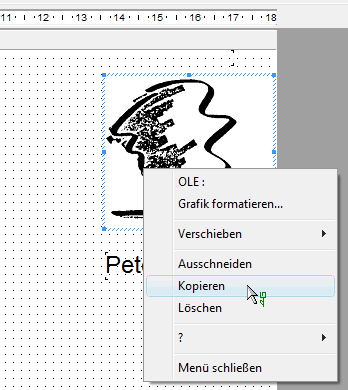
Then open the context menu again with the right mouse button and select the entry Insert or press Ctrl + V.
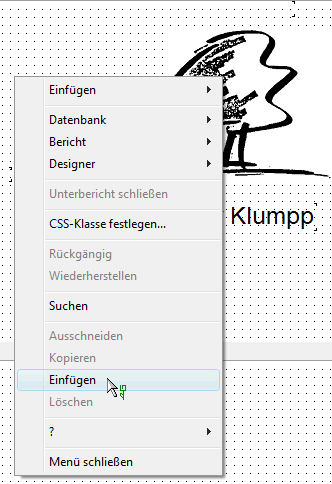
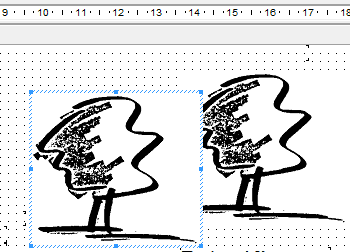
A frame the size of the copied element is displayed. Place the element by moving the mouse and pressing the left mouse button.
Position elements
Two auxiliary tools are available for positioning newly inserted or copied elements: the grid and the snap function.
Switch grid on / off
If you turn on the grid, a series of evenly spaced points will be displayed, to which you can align formula fields, text fields, images etc.
click on ![]() in the toolbar to activate the grid.
in the toolbar to activate the grid.
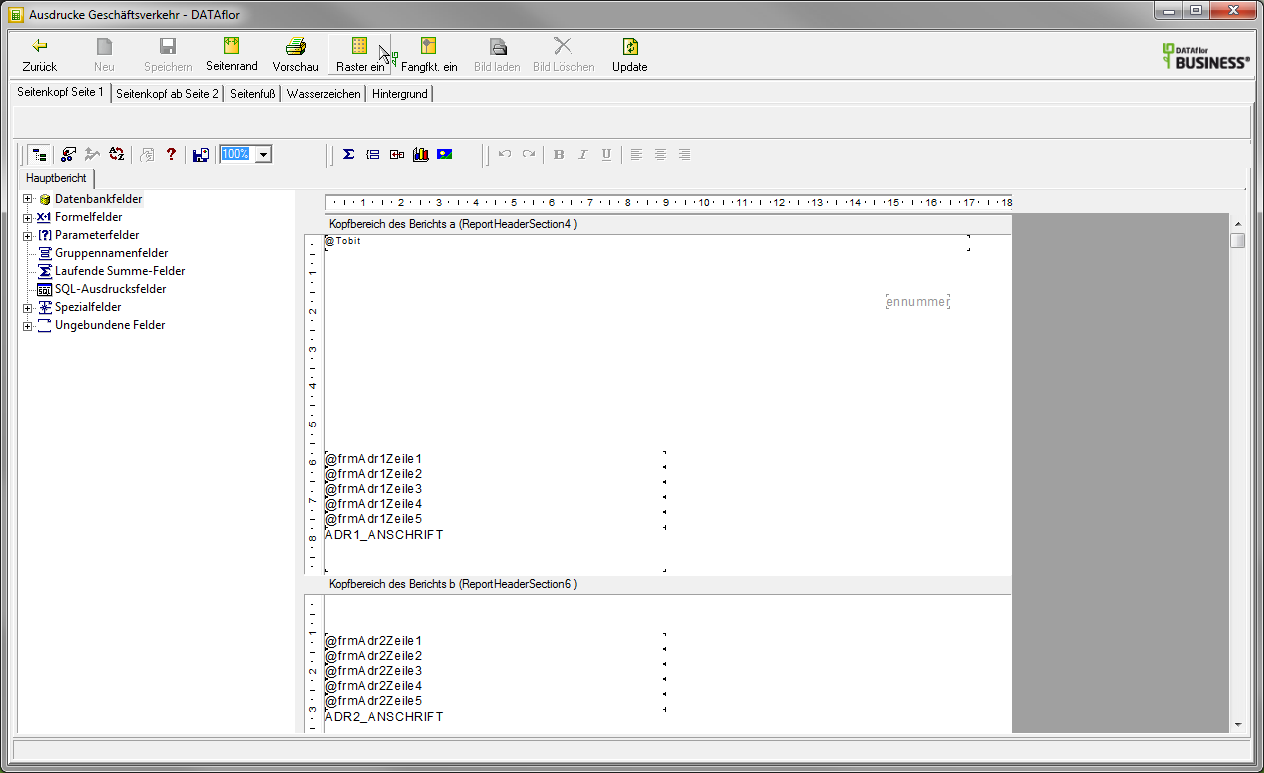
The grid of points is displayed.
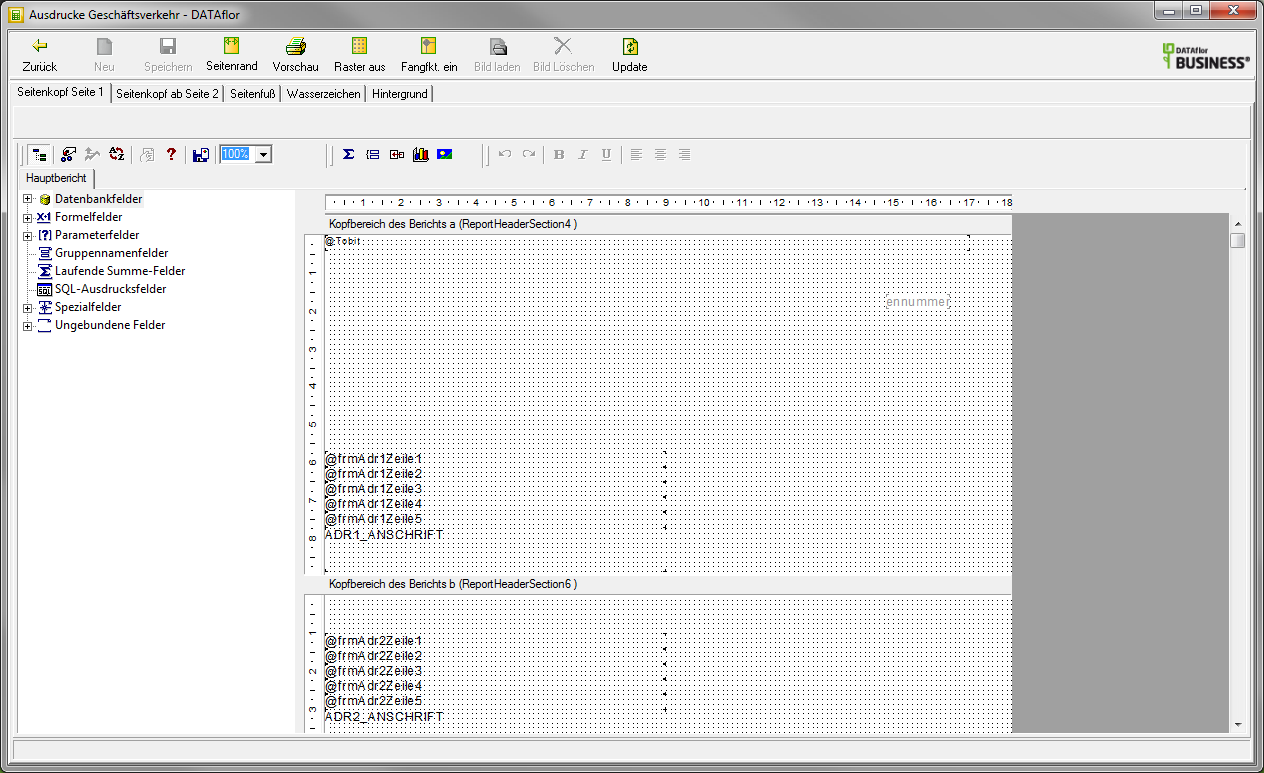
After clicking ![]() the grid is no longer displayed in the toolbar.
the grid is no longer displayed in the toolbar.
Switch the snap function on / off
If the snap function is switched on, the fields are shifted in even increments.
click on ![]() or
or ![]() to switch the snap function on or off.
to switch the snap function on or off.
Insert background image
Store the form group in a print variant Printouts of business stationery or Quantity documentation Crystal Your business stationery as a background image to create printouts, faxes and e-mails with the same layout. Graphics over the entire width and length of the page are possible.
Scan your A4 size business stationery and save the image as a JPG file. Images with the properties 150 dpi and 1754 x 1240 px guarantee an optimal display.
Then open the tab in the print variant background objects and click on ![]() in the toolbar.
in the toolbar.
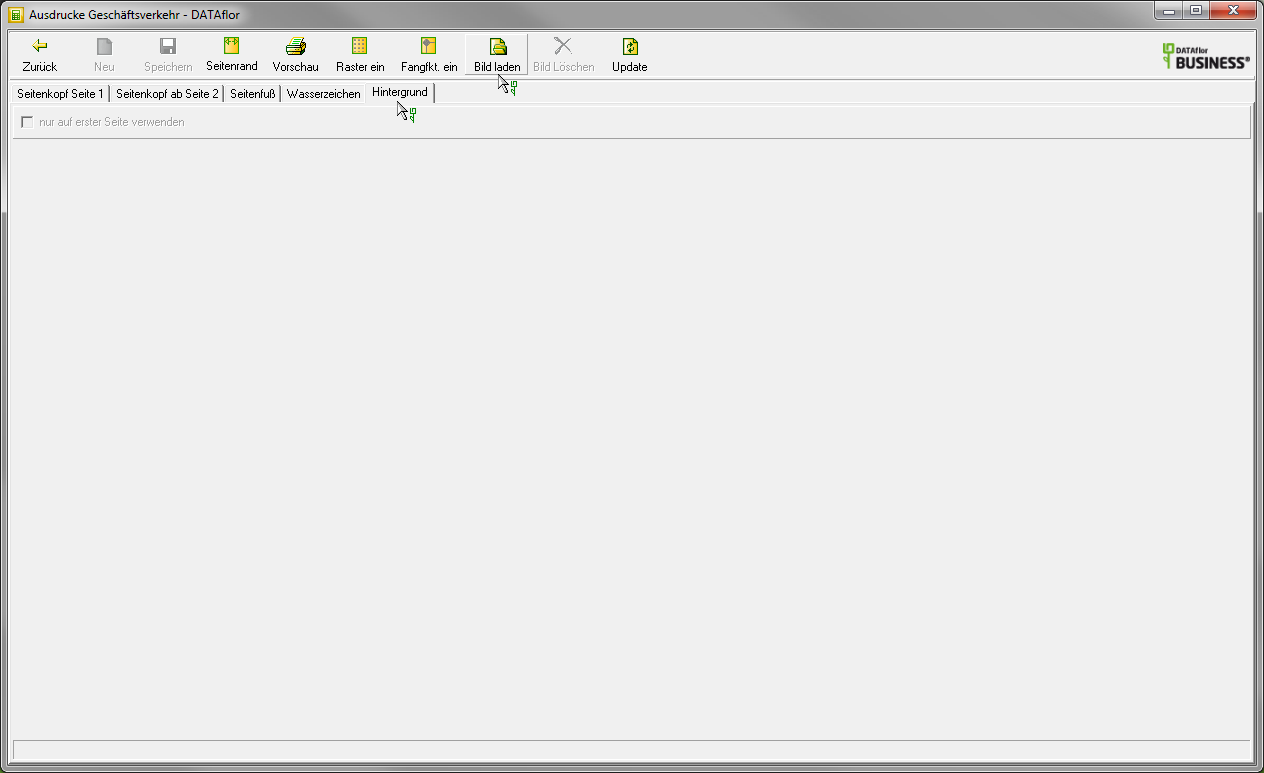
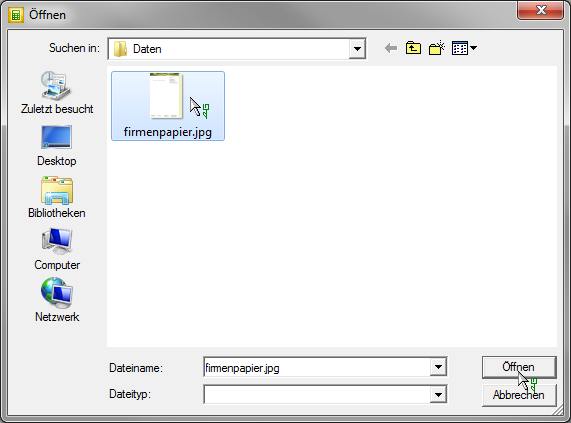
The Windows file selection dialog opens. Select the JPG file of the scanned business stationery and confirm with [To open].
Save the setting by clicking on ![]() in the toolbar.
in the toolbar.
Activate the option use on first page only, only the first page of the document is output with the business paper as the background. For the following pages you can use the tab Background from page 2 store a different background image.
Insert watermark
In addition to the background image, you can also use the print variants of the form group Printouts of business transactions and Quantity documentation Crystal deposit a watermark. The watermark is printed behind the text, in front of the background image and does not appear behind the footer.
Save the watermark in your photo editing software with a transparent background, because a white background would obscure your background image.
Open the tab Watermark and click on ![]() .
.
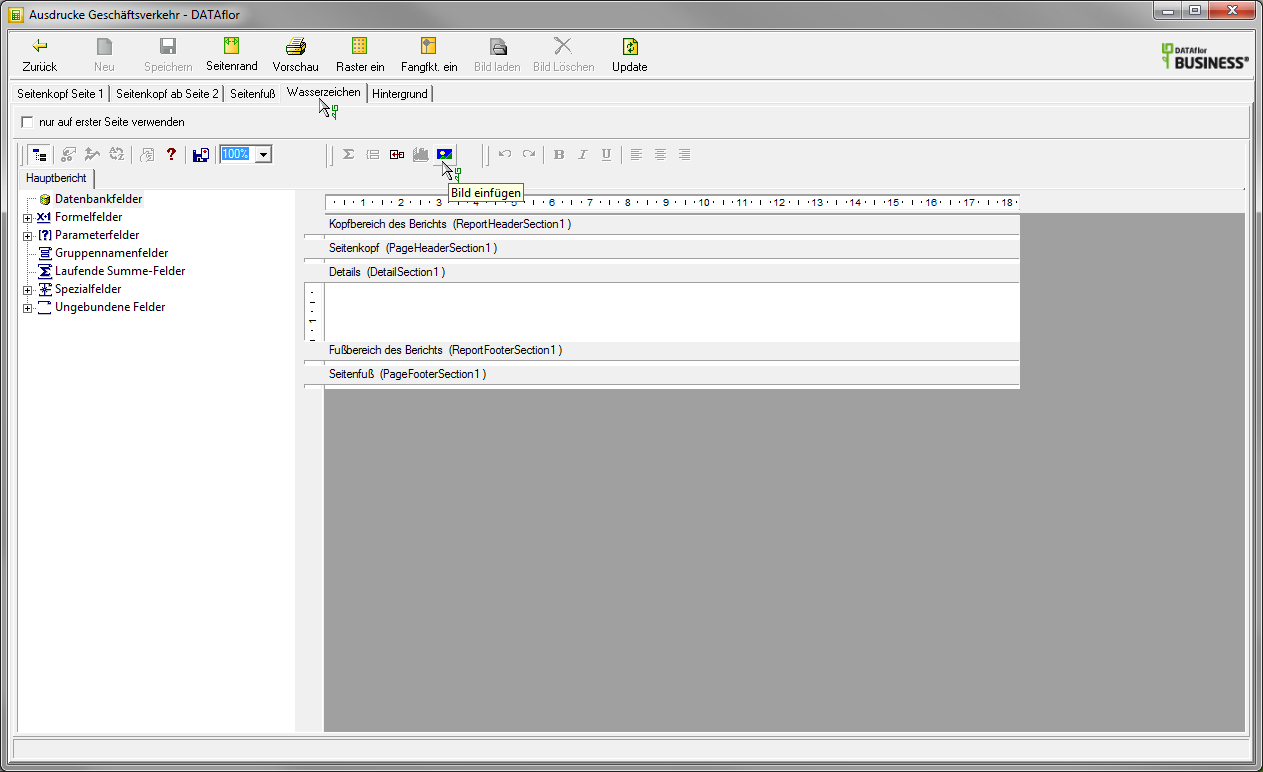
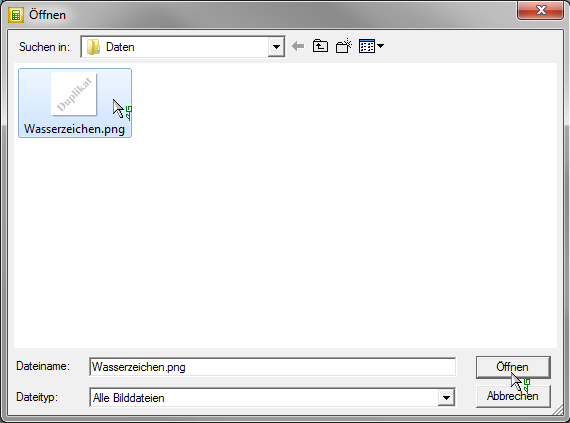
The Windows file selection dialog opens. Select the image file with the watermark and confirm with [To open].
A frame appears in the size of the picture.
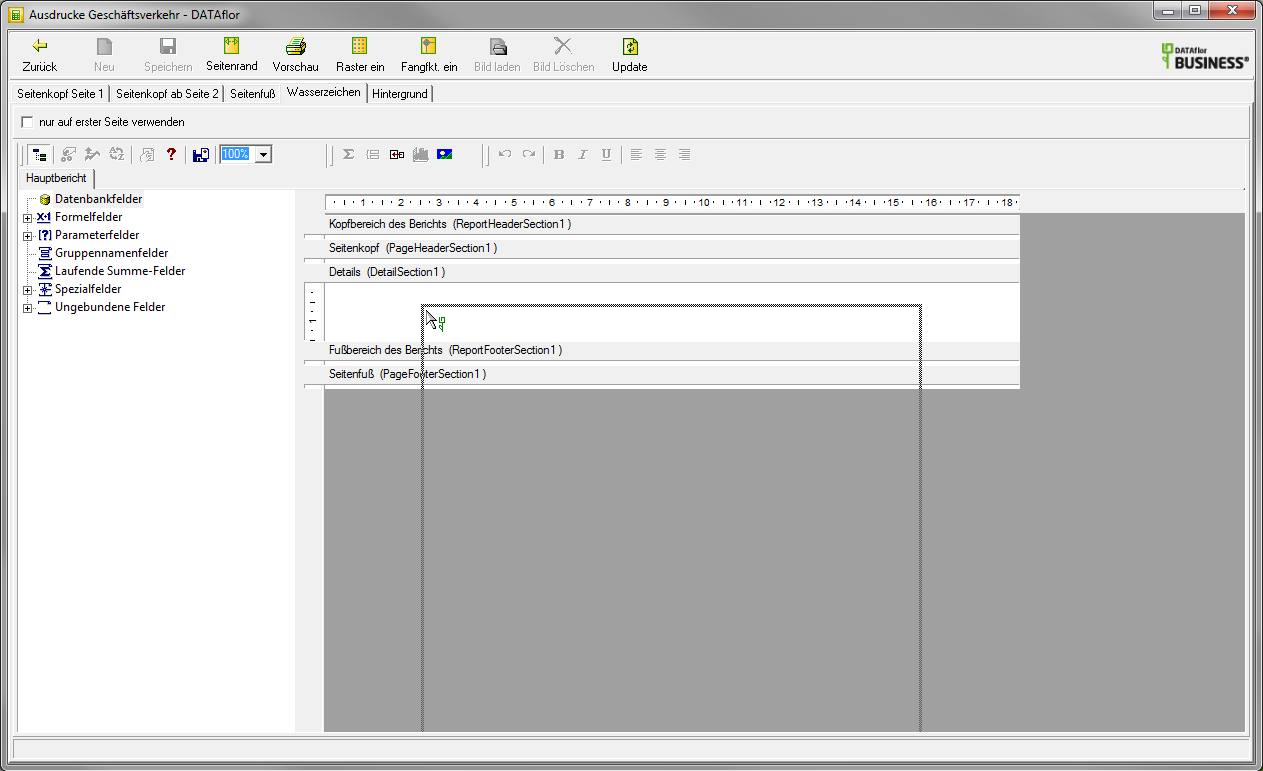
Use the mouse to position this frame at the desired location and click with the left mouse button. The graphic or picture is now displayed.
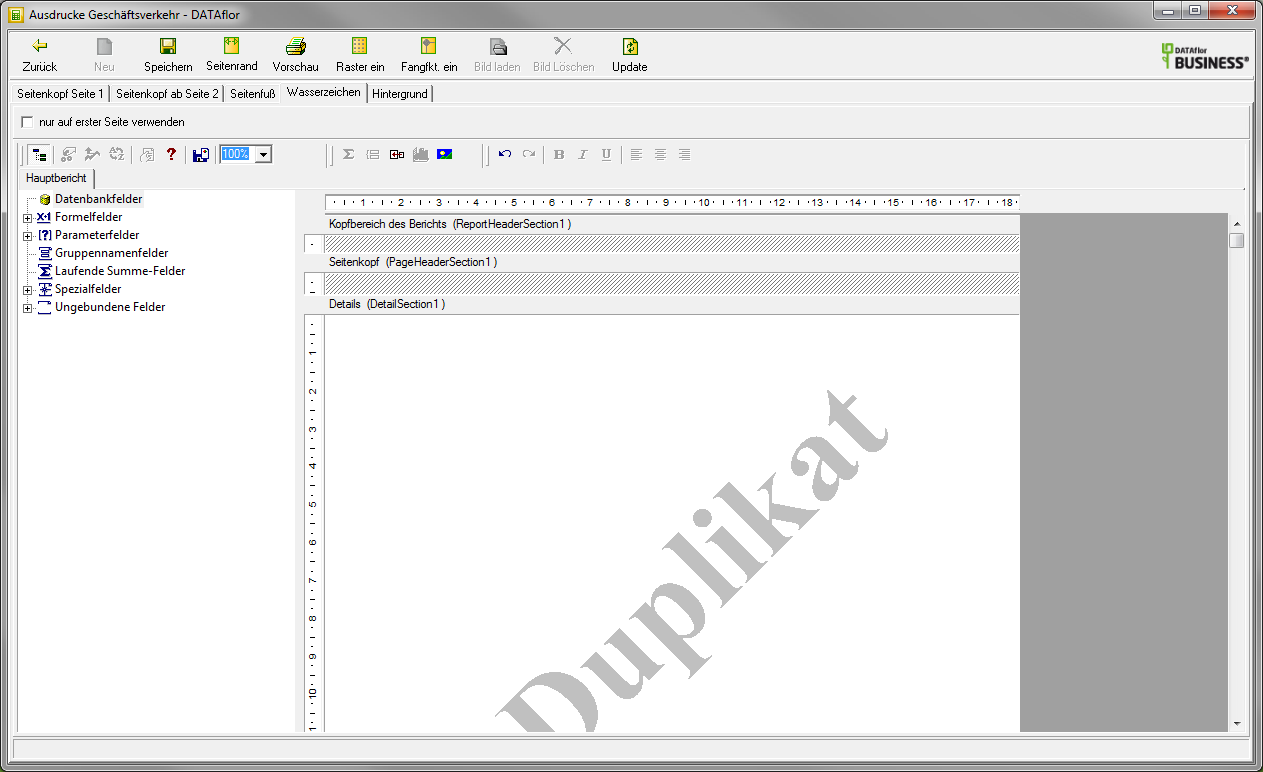
You can change the size of the picture using the nodes on the frame. Please note, however, that the resolution of the image can deteriorate due to the change in size.
Edit the size of the picture with an image editing program, for example Paint, and then insert the picture.
The display size depends on the image size. Inserting a large picture also shifts the size of the area. Therefore, make sure that there is enough space left for the footer along the side.

If there is not enough space at the bottom of the page for the footer, the watermark will not be displayed in the preview.
Activate the option use on first page only , only the first page of the document with the watermark is output.
Check settings
Check your settings by clicking ![]() click in the toolbar.
click in the toolbar.
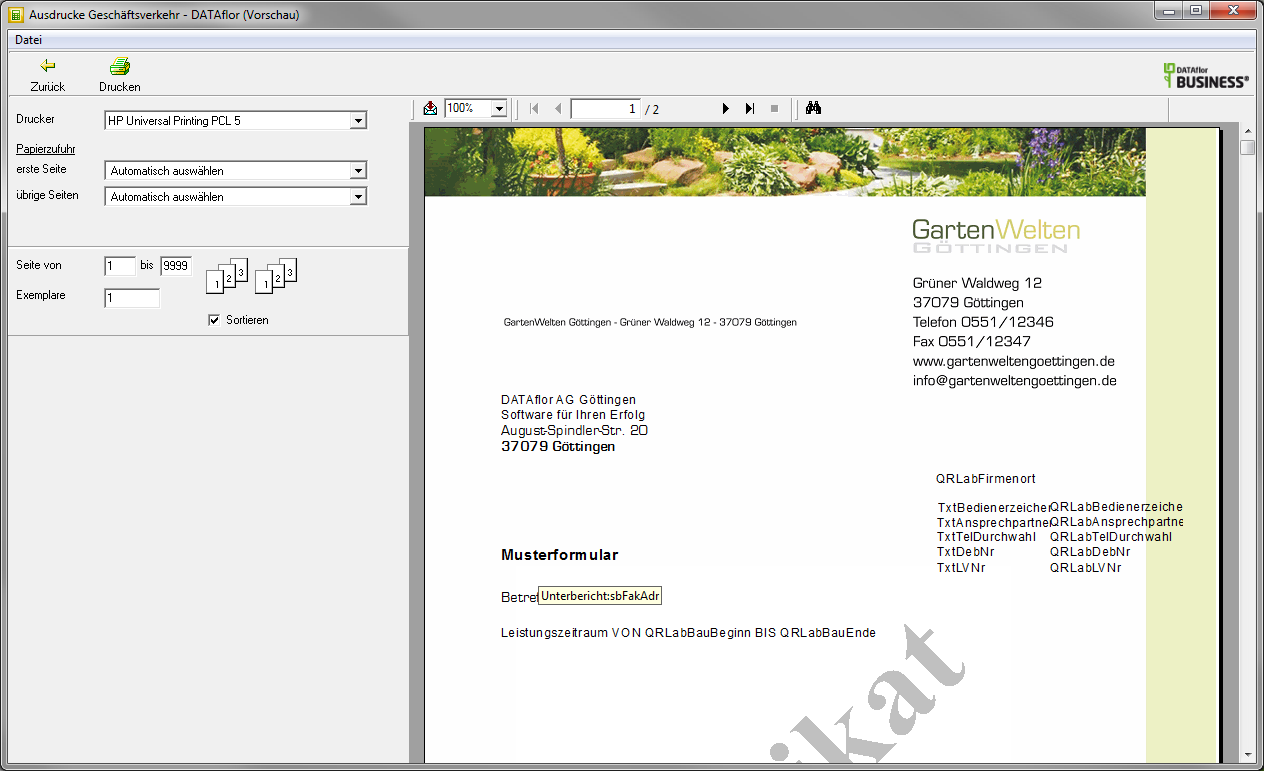
By clicking ![]() in the toolbar you get back to the designer.
in the toolbar you get back to the designer.
Setup reports with wide margins
You can in BUSINESS-Program set up and store your individually designed company stationery. However, the printable areas of business stationery are not standardized, and the creative freedom of company-specific layouts occasionally comes up against technical limits. An example: BUSINESS cannot take into account a right margin of more than 2 cm, because otherwise the position lines would not have enough space. Printing in the margin is then unavoidable. To prevent such problems, there are special Report files is available for storage, management and analysis.
This is accompanied by restrictions:
- Restrictions in the hole area are to be expected (around a right margin of and 4 cm, the left margin in the form variant must be reduced, which reduces the hole area).
- Restrictions on line breaks are to be expected.
- Certain forms can only be printed on blank paper because the report files do not affect all printouts.
Step 1: Which edge variant do you need for your business paper?
To determine the width of the right margin of your business paper, measure the distance from the right end of the text to the right margin with a ruler.
Step 2: Which edge variant do you need?
Now that you know how wide the right margin is, read the section for your suitable margin variant:
- Side margin = 2 cm:
In order to achieve a right margin of 2 cm, the left margin has to be reduced to 16 mm, thus the left margin is reduced to 13 mm.
- Side margin = 3-4 cm:
In order to achieve a wide margin of 3 cm or 4 cm, specially prepared report files must be added:
- OFFER.001
- LETTER.001
- FinBook.001
- FinKto.001
- FinMahn.001
- FinRech.001
- Side margin = 5 cm:
In order to get a 5 cm right margin, the 4 cm report files must be used and then in the print version the left margin itself must be reduced to 17 mm in the print version.
The report files for the 3 and 4 cm edge variant of works BUSINESS Version, you can download it here:
BUSINESS 2020
BUSINESS 2019
BUSINESS 2018
Step 3: Adding the report files
When you have downloaded the files, they must be in the installation directory of DATAflor BUSINESS be deposited. Please make sure that a current data backup is available.
Standard installation directory
- Local: C: \ ProgramData \DATAflor\BusinessData \ Reports
- Network: \\ servername \ shared folder \BusinessData \ Reports
If the data backup is available, then create a folder USER im BusinessData / reports at. Please note that the original files in the report directory must not be overwritten. Already have a folder USER with wide margin files, all you have to do is download the new files and save the existing files in the USER Overwrite folder.
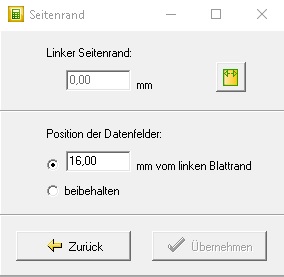
If you want to set the left margin in the form variant, click the button at the top of the editor [Margin], A new window is opening up. Here you can set the left margin and with the button [Take over] save.
Step 4: Set program parameters and form variants
After adding the report files, further settings must be made in the program parameters. The Program parameters can be found in BUSINESS under the rider Program data> program parameters.
Parameter: 110.10 Subject input width - standard settings must be changed:
- List item 3 cm edge variant on 16 cm
- List item 4 and 5 cm edge variant on 15 cm
Parameter: 110.20 Input width for header and footer texts - standard settings must be changed:
- 3 cm edge variant on 16 cm
- 4 and 5 cm border variant on 15 cm
Parameter: 110.30 Position text input width - standard settings must be changed:
- 3 cm edge variant on 13,3 cm
- 4 and 5 cm border variant on 12,3 cm
In addition, further settings must be made in the form variant itself under Program data> Form groups> Print out business stationery moved and adjusted:
In the form variant, the formula field Subject be drawn smaller, otherwise the subject will be printed in the margin area.
- 3 cm edge variant on 16 cm
- 4 and 5 cm border variant on 14,5 cm
So that Formula fields do not protrude into the right margin, these must also be moved in the form variant:
- Contact Person
- Company location / date
- Customer number
- LV number
- Operator sign
- Phone number
- page number
- Etc
The DATAflor Take over service for you. Write to us at service @dataflor.de
Wide margin DATAflor BUSINESS Upgrade
If you are a Upgrade auf die current version make sure that you download and exchange the latest files for the wide margin as well.
Standard installation directory
- Local: C: \ ProgramData \DATAflor\BusinessData \ Reports \ User
- Network: \\ servername \ shared folder \BusinessData \ Reports \ User

