Table of Contents
Working with the Fast Designer
Description
All print and form variants of the form groups with the ending (Nearly) are created or edited with the Fast Designer.
In einer Pressure variant On the one hand, an image file can be stored as letterhead, for example for sending documents by e-mail. On the other hand, the print variant contains the data fields for the header and footer of the form. The print variant thus forms the framework for the form variant.
In Form variants with Fast it is possible to customize the content of the form. When printing, the selected form variant is then inserted into the selected print variant.
The following picture shows in color how the print and form variants come together in the printout.

So it is important to know whether the area to be adjusted is on the print or form variant.
In the form group Print out business transactions (Fast) the variants are divided as follows:
During the Pressure variant are located:
- Background image / stationery
- Address fields
- Info block
- Form name
- Subject
- Performance period
- Page footer with page number
During the Form variant are located:
- Header text
- Position table
- compilation
- Appreciation, discount, security, information texts
- labour costs
- Footer text
- transfer
The Fast Designer is illustrated using the example of the print variant of the form group Print out business transactions (Fast) described.
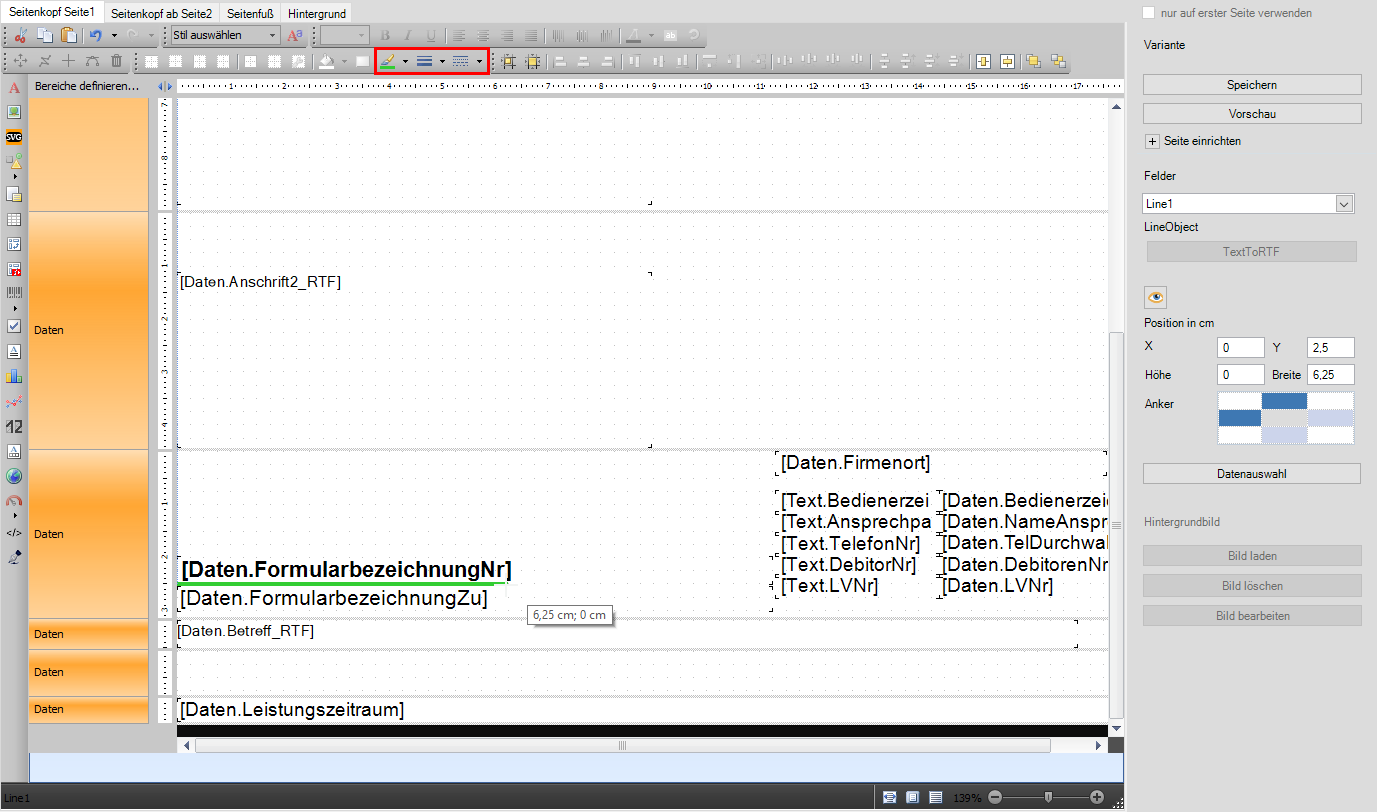
Structure of the designer
The Fast Designer offers various menu bars for editing the variant. At the top you will find the various areas that make up the variant in several tabs. To edit an area, you have to switch to the respective tab.
Underneath are the menu bars, which contain the options for adapting the selected data field, e.g. text editing or frame types.
The menu bar on the left contains various data objects that can be inserted into the variant, e.g. text or images.
On the right side you will find the menu for general page settings and positioning of data fields.
In the middle of the window you can see the variant with the data strips and the data fields contained therein.

Deposit stationery
It is best to store your company letterhead as a background image in the print version. To do this, click the tab background image. Then click in the right ribbon at the bottom Load a picture.

The file selection dialog opens where you select and confirm the desired letterhead.
Make sure that the image file is in the correct format (usually Din A4) and has a sufficient resolution. If the image format does not match, this can lead to errors in the print variant.
If you have selected a suitable image, it will be displayed in the Fast Designer. If you want to store different letterhead for the first page than for the following pages, activate  In the top right menu ribbon, click the function use on first page only. As soon as the function is activated, a new tab is created Background from page 2.

On this tab you can now load another background image which is to be used from the second page.
Finally click on Saveto save your entries.
Page setup
To set up the page, click in the right menu area Page setup. The page settings open. The paper size, the paper format and the page margins can be specified here.

About the defined Anker the data fields automatically adapt to the margins. With very wide margins, however, overlays can occur. Please refer to the section Print versions with wide margins.
You can only make changes to the paper format or margins in the print version and not in the form version!
Customize data fields
A data field lies on a data tape. There can be several data fields on one tape. A data field is identified by the markings at the corner points. By marking a data field, various menu options become active and can be applied to this data field.
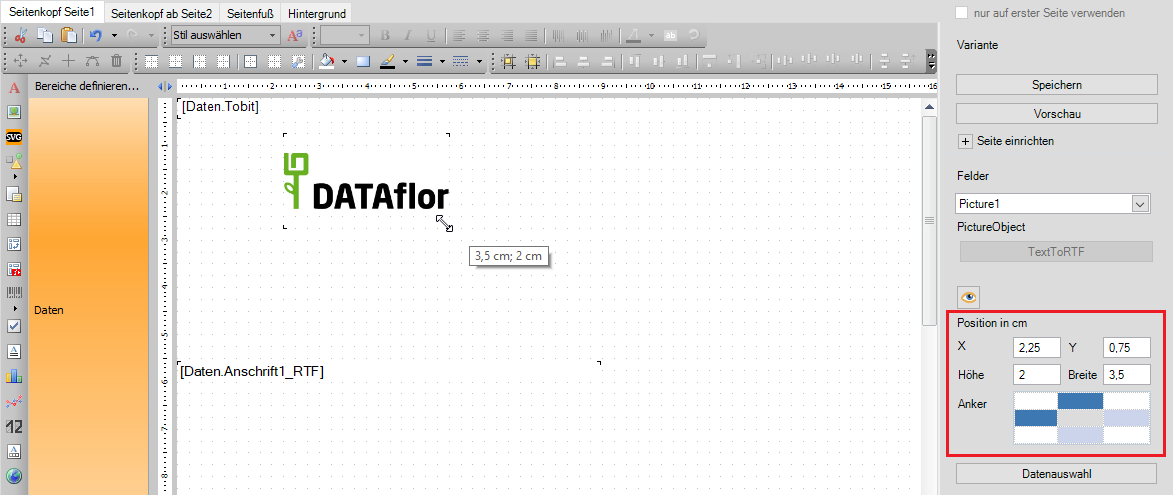
You can drag a data field with the mouse to the desired size and position. Or you can enter the corresponding values for the data field in the right menu bar. The X and Y values indicate the distance from the left and upper edge of the tape, respectively.
In the case of converted print variants in particular, check the X and Y values of the data fields that should be aligned flush with one another and adjust them if necessary!

If you do not want a data field to appear on the printout, you can hide this data field from the printout.

Always use the function of fading out instead of deleting the data field. Deleting data fields can lead to error messages in the print menu and thus make the created variant unusable.
For fields that can be controlled via the form settings, the corresponding form setting remains active, even if the field is invisible.
Anker
Below the values for position and size you will also find the settings for anchoring the data field. The anchors indicate to which margin the spacing is fixed if the margins or the page format change via the print settings. The position of the data field adapts dynamically to the page. The anchors can be set by clicking on the corresponding page.

In order to be able to use the advantage of Fast that the content of the form adapts dynamically to the margins, always make sure that the data fields are anchored on the correct page. If the data field is anchored on the left side, the distance to the left side of the page is fixed. If, on the other hand, it is anchored on the right, the distance to the right side edge is fixed.
In the following, using the example of the page number, you can see how differently set anchors affect a print with a wider right margin.

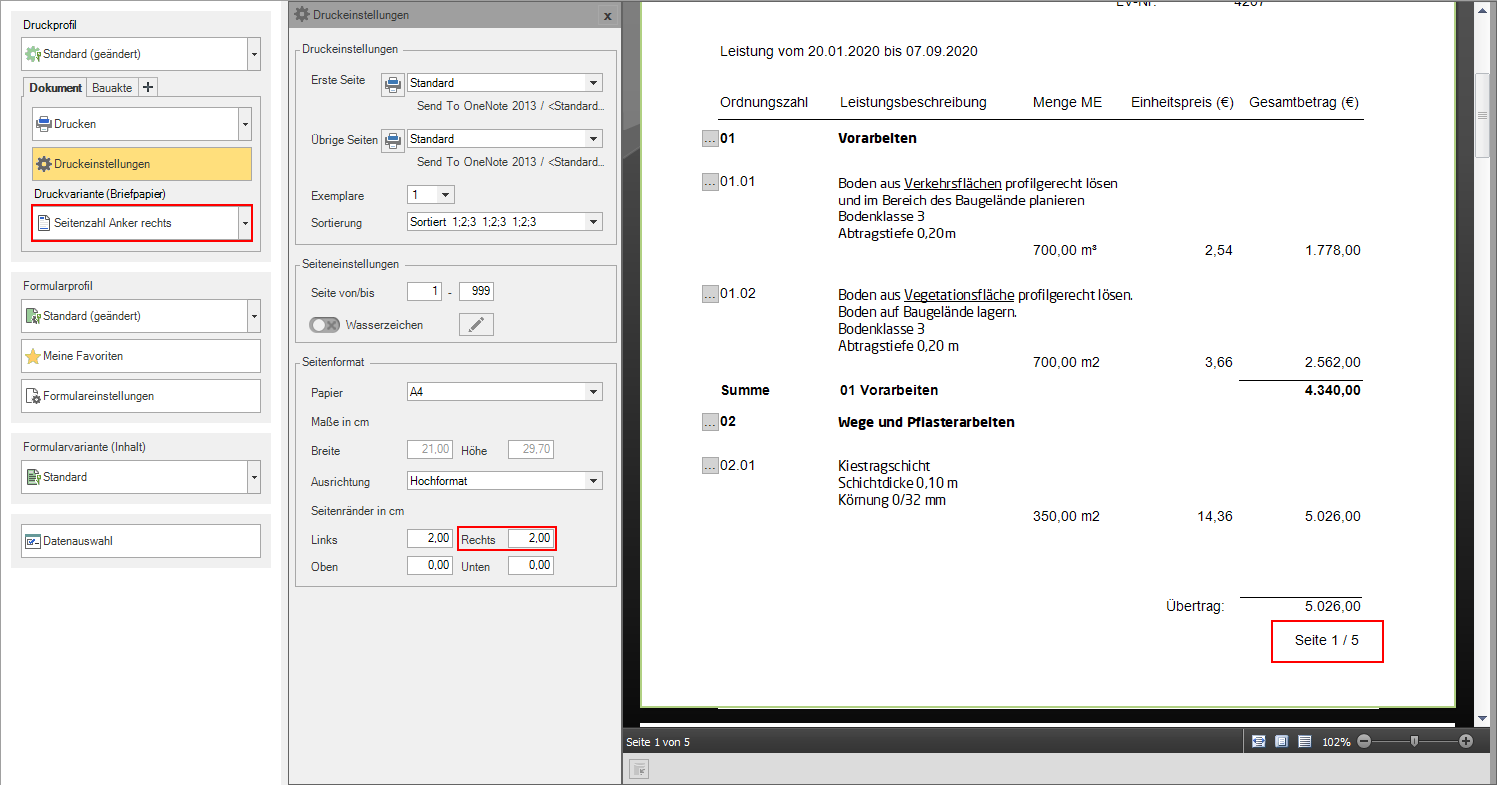
Insert company logos and pictures
Click on the second entry in the left menu bar to insert an image.

Then click with the mouse on the position where the picture should be inserted. Double-click the inserted data field to open the dialog for inserting the picture.
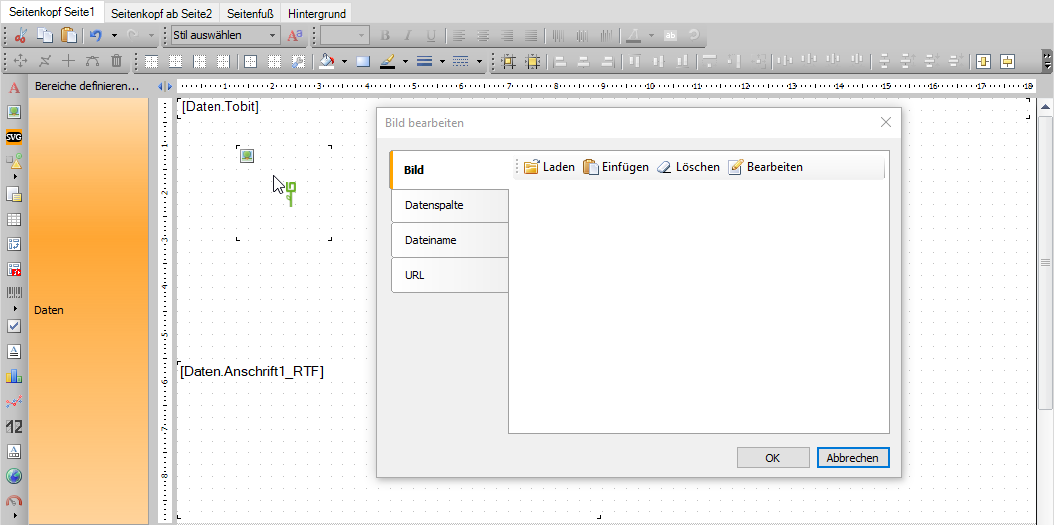
With a click on Shop the file selection dialog opens. Select the desired picture and confirm with OK. You can adjust the size and position by dragging with the mouse or using the values in the right menu bar.
Please note that the resolution of the image may deteriorate when you change the size.
Edit the size of the picture with an image editing program, for example Paint, and then insert the picture.
Use text fields
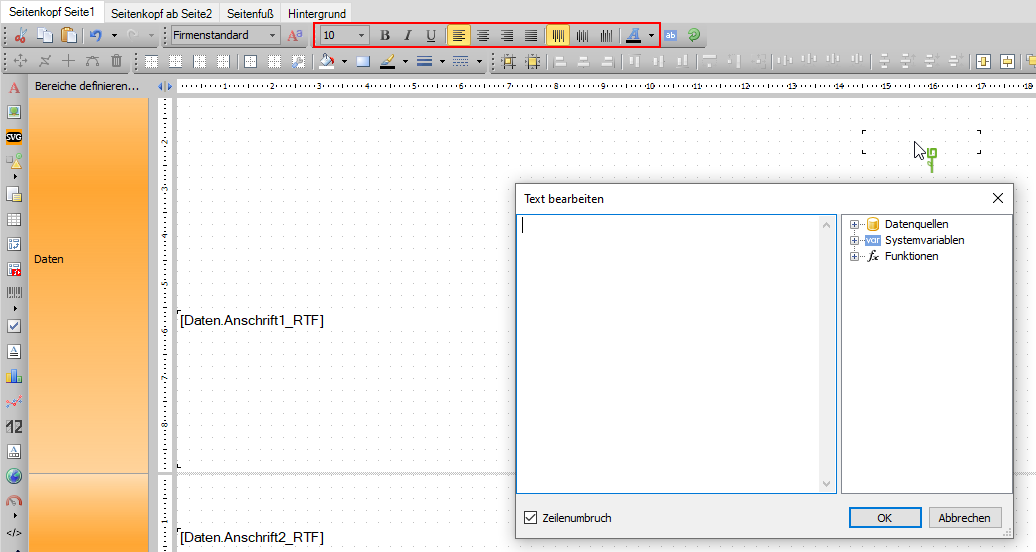
To insert a field with a fixed text in the variant, click on the top entry in the left menu ribbon.
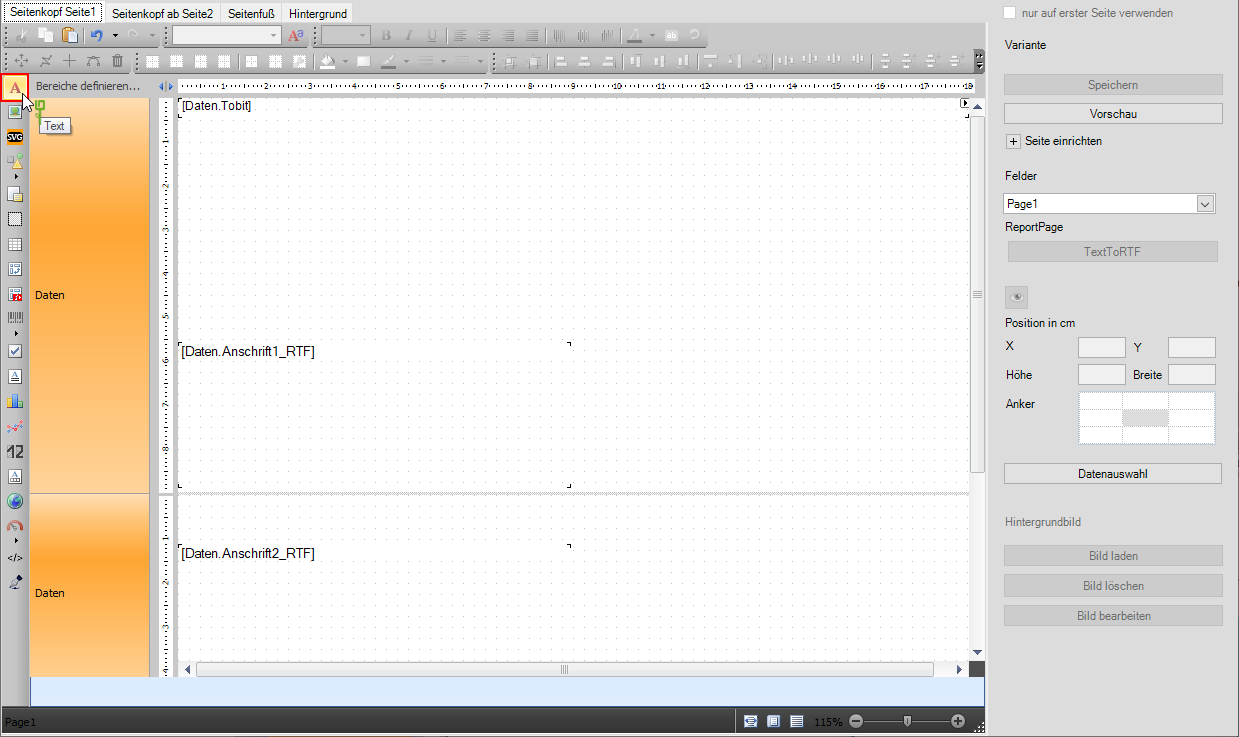
You can then use the mouse to position the text field on a tape. Double-click the field to open the dialog window for editing the text. In the upper menu bar you will find the options for text editing, such as font size and color.
Attention: If you want to add several text fields of your own, errors can occur if they all have the same name. You can control this by opening the context menu with the right mouse button.
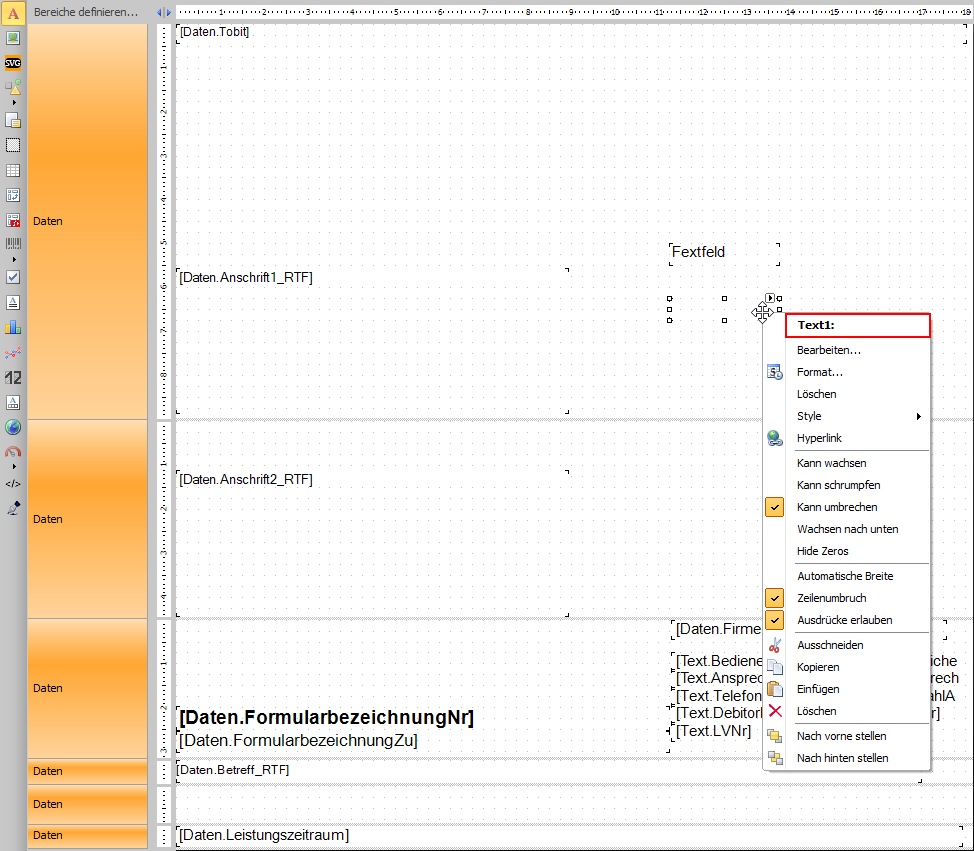
To prevent multiple text fields e.g. the name text1 you have the following options:
- Make sure that no other text field is selected before adding another.
- Alternatively, if you have just added a new text field with the same name as the previous one, you can first select another element again. Then open the context menu of the text field again and check whether the name has been automatically adjusted.
- If that doesn't help either, delete the text field, make sure that no text field is selected and add a new text field.
Use formula fields
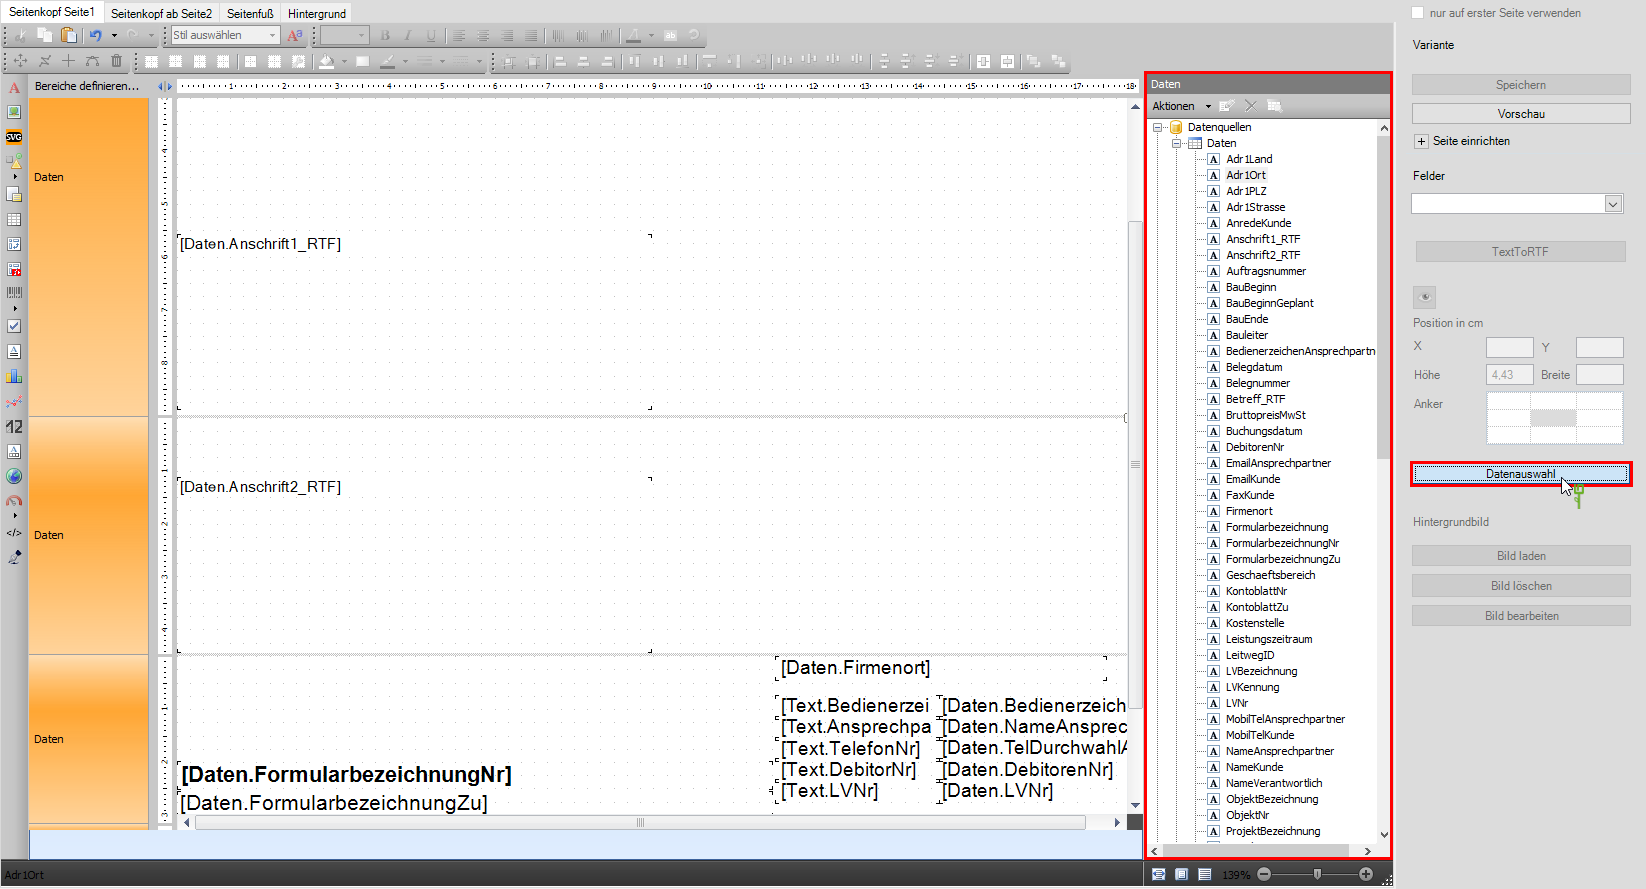
A database entry is printed on the report with a formula field, if the entry is available. To add a formula field, click in the right menu bar Data selection. This opens a selection list, where you can find under the heading Data sources in the folders data and text find all available formula fields.
Example: the formula field Text contact person becomes the word Contact Person on the printout. The formula field Data.Contact person will display the name of the contact person. A list of all formula fields as well as a short description of the values with which the formula fields are filled can be found on the Wiki page available formula fields in the Fast Designer.
Click on the desired formula field and drag it with the mouse to the corresponding position on the report.
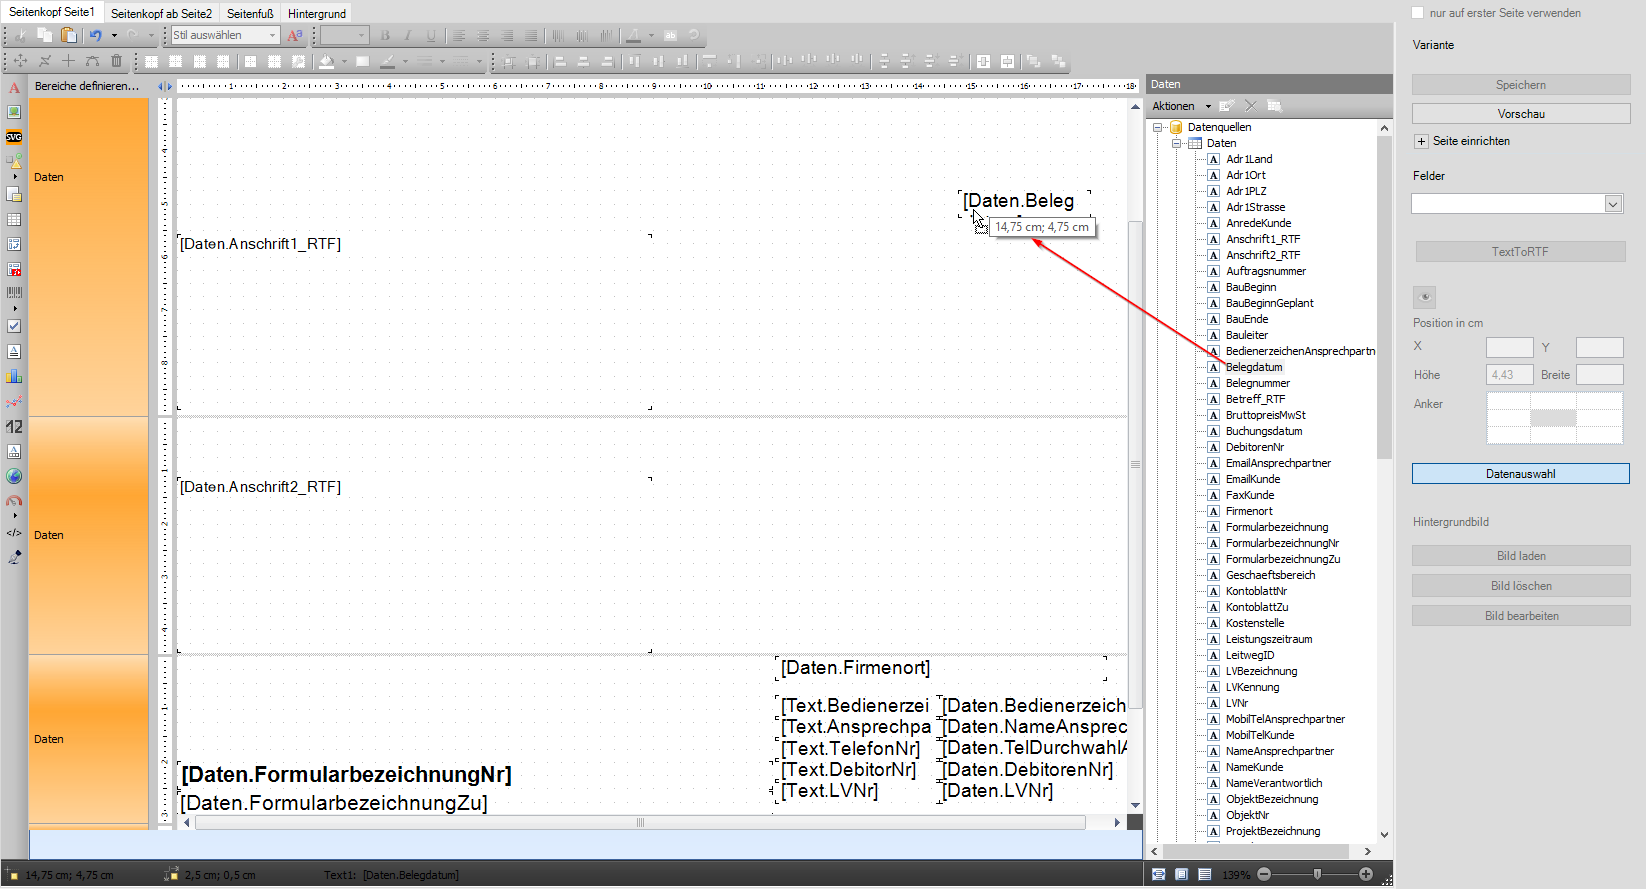
You can then enter the values for position, size and anchor in the menu bar on the right.
Do not select the size of the formula field too small, otherwise parts of the entry could be cut off in the printout. Since the length of some database entries can vary, you can use different printouts to test which size is necessary for the inserted formula field.
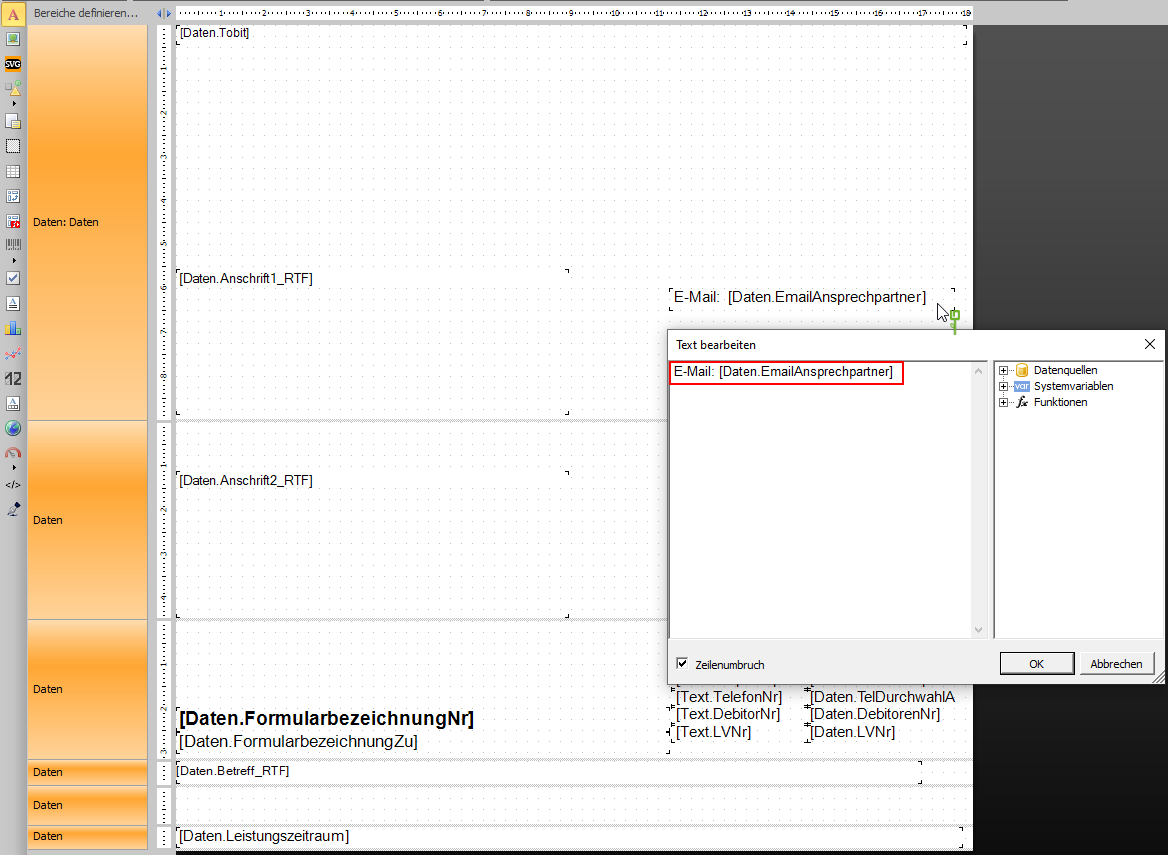
If you want to add a formula field in combination with a text, first position the corresponding formula field on the report. Double-click to open the formula field for editing and add the desired text.
Adjust font
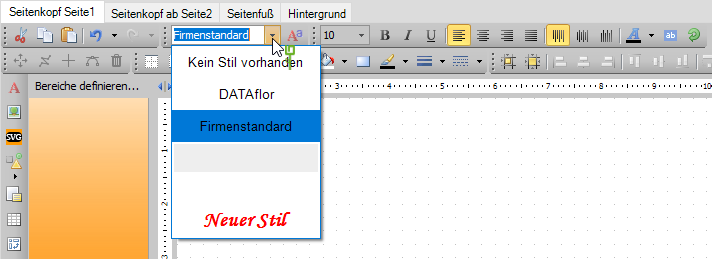
The company standard is initially defined as the font for each text, which refers to the information in the program parameters 110.40 to 110.70.
To use a different font for a text, a new style must first be created. To do this, click on ![]() .
.

The style editor opens. Click there Add and name the new style.
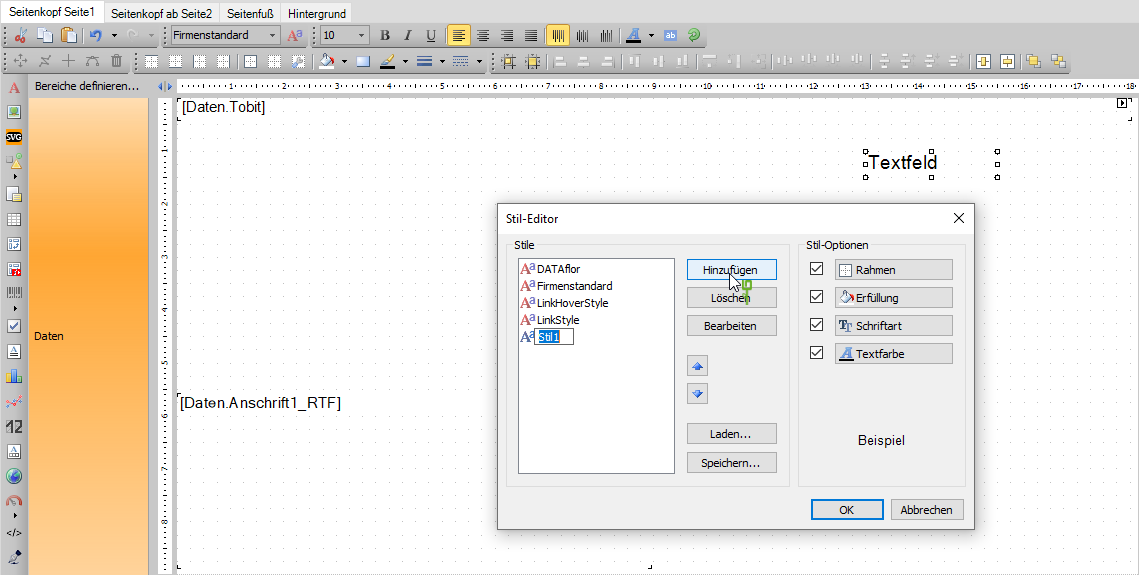
Then edit your new style using the style options on the right. Here you can set the frame, fill, font and text color. Confirm your details with OK. You can then select the new style from the menu and apply it to text boxes.
Use graphic elements
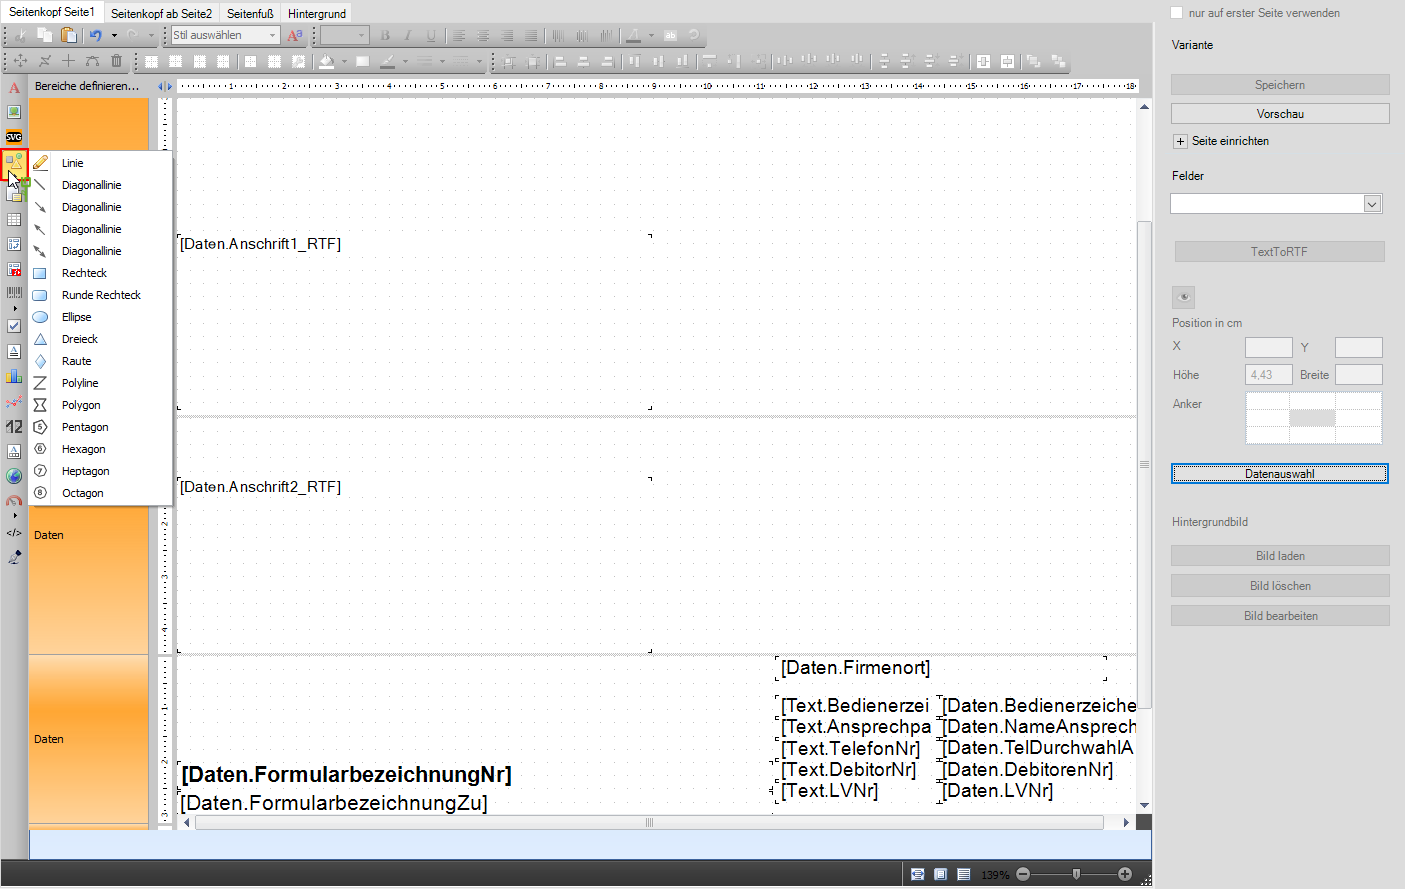
In Fast there are various graphic forms available that you can use in your printouts. To insert a graphic, click on the fourth entry in the left menu ribbon. A selection of all graphic elements opens, which you can select with a mouse click.
For linear elements, click with the mouse on the starting point and drag the line to the desired end point. The position and length can be edited later.
Once you have selected a shape, click where you want to position the shape and then adjust the size and position using the corner points or the values in the right menu bar.
In the top menu bar you will find options to adjust the color, line thickness and line style of the elements.
Customize pages
You can adjust the page header, page footer and background in the Fast Designer and, if you wish, design the first page differently from the other pages for all three areas. Simply switch to the relevant area or page using the tabs at the top of the window.
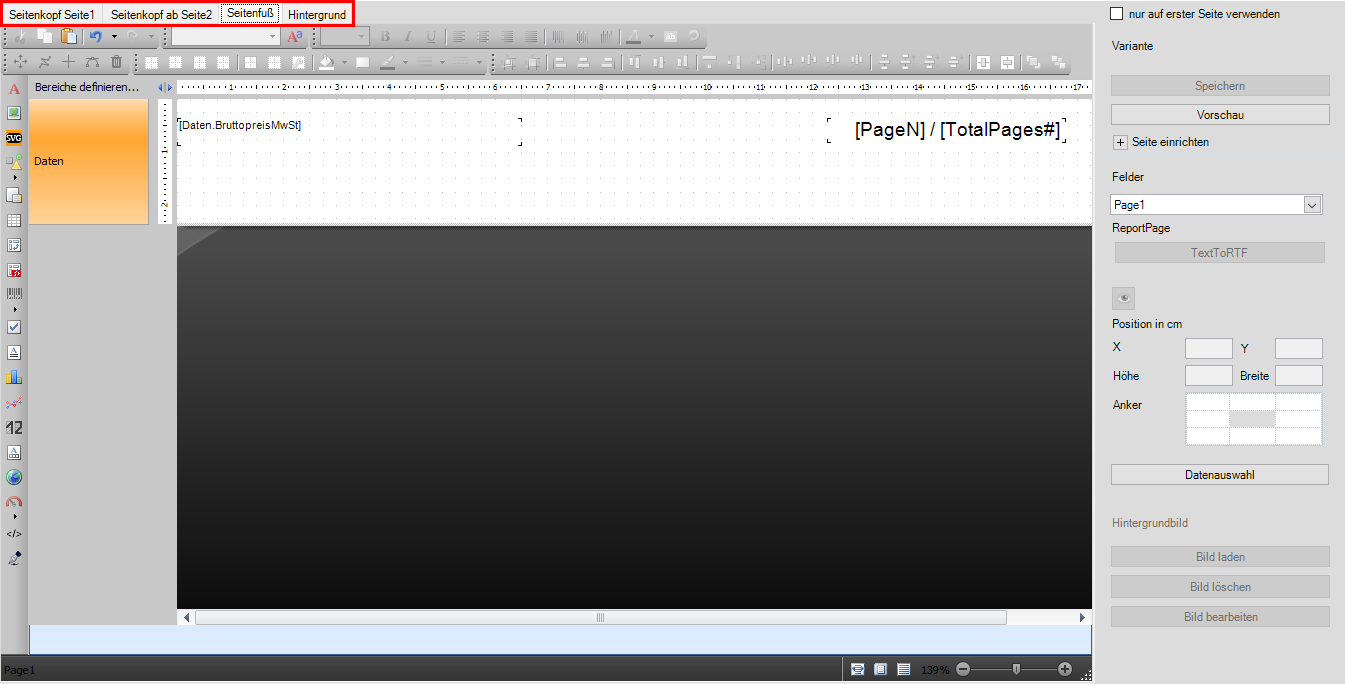
In the standard, a different representation is defined for the page header from the second page onwards. To design the first page differently from the rest of the page for the footer or background, activate the option on the corresponding tab use on first page only.

As soon as the option is activated, a new tab for the design from the second page is automatically created. This initially contains a copy of the first page. Adjust the display here to your requirements by adding or editing images, text or formula fields as described above.
Print versions with wide margins
About the set Anker of the data fields, the position of the data fields on the page is always automatically adjusted to the margins. For example, if you enlarge the right margin, all fields that are anchored to the right are automatically shifted to the left.
However, if the page margin is very wide, this leads to some fields being overlaid, which are anchored to the left margin. This mainly affects the fields in the Form variant. Therefore, in this case, the sizes, spacing and positions of the fields must be individually adjusted so that all fields fit into less space.
An alternative form variant is available for the use of letter paper with a wide margin, which has been optimized for a right margin of up to 4cm. The Margin even you have to be in your own Pressure variant and use or pre-allocate the corresponding print variant in combination with the adapted form variant for printing.
At the end of this page you will find the zip files for download.
Download and unzip the file. Then open the form group in the form manager Print out business transactions (Fast) and mark the entry in the LV printouts folder Form variants. Click in the menu Import.
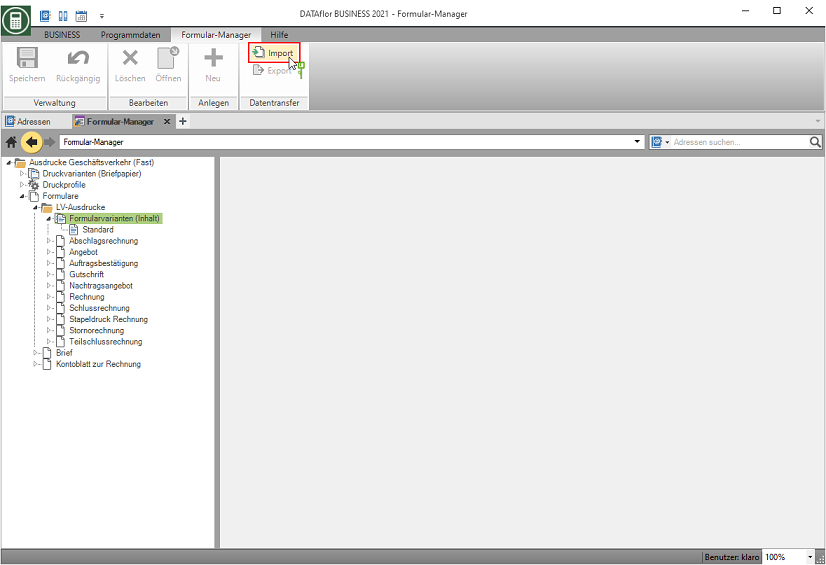
Select the downloaded file with the extension .DfV. The imported form variant is now available in the form manager and can be renamed if desired. Then assign the Forms the new form variant and the print variant with the wide margin.
Account sheet
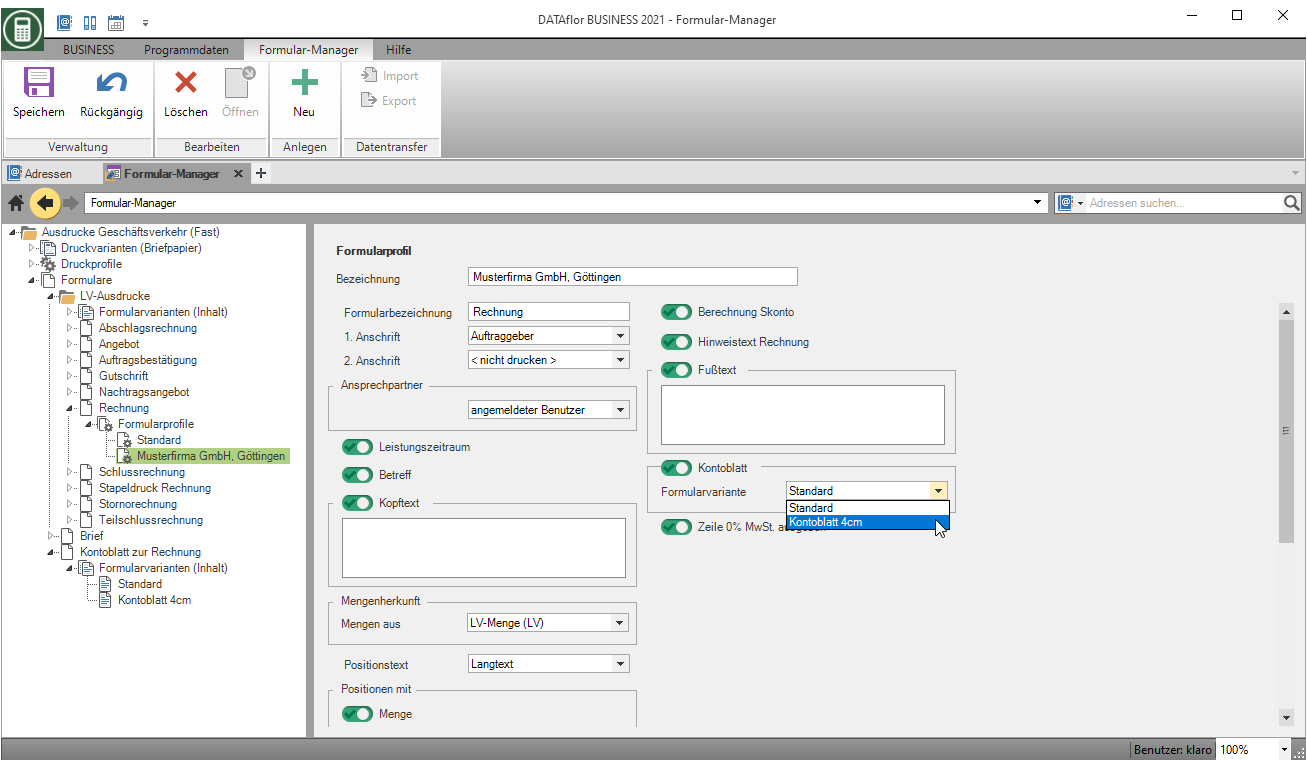
If you also want to use the account sheet with a wide margin, do the same here. Highlight under the Account sheet for the invoice the entry Form variants. Click in the menu Import.
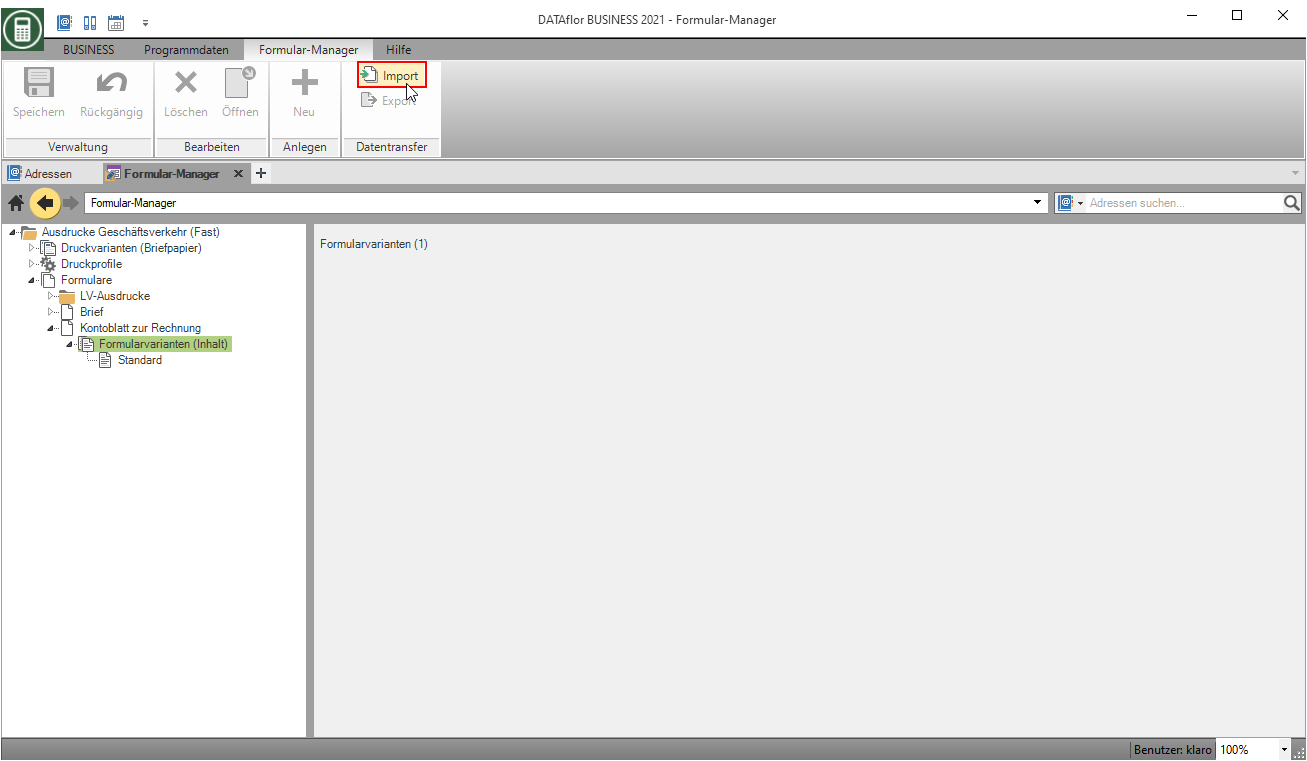 Select the downloaded file with the extension .DfV. The imported form variant is now available in the form manager and can be renamed if desired. You can then pre-fill the desired form variant of the account sheet in the form profiles of the various invoice types.
Booking sheet
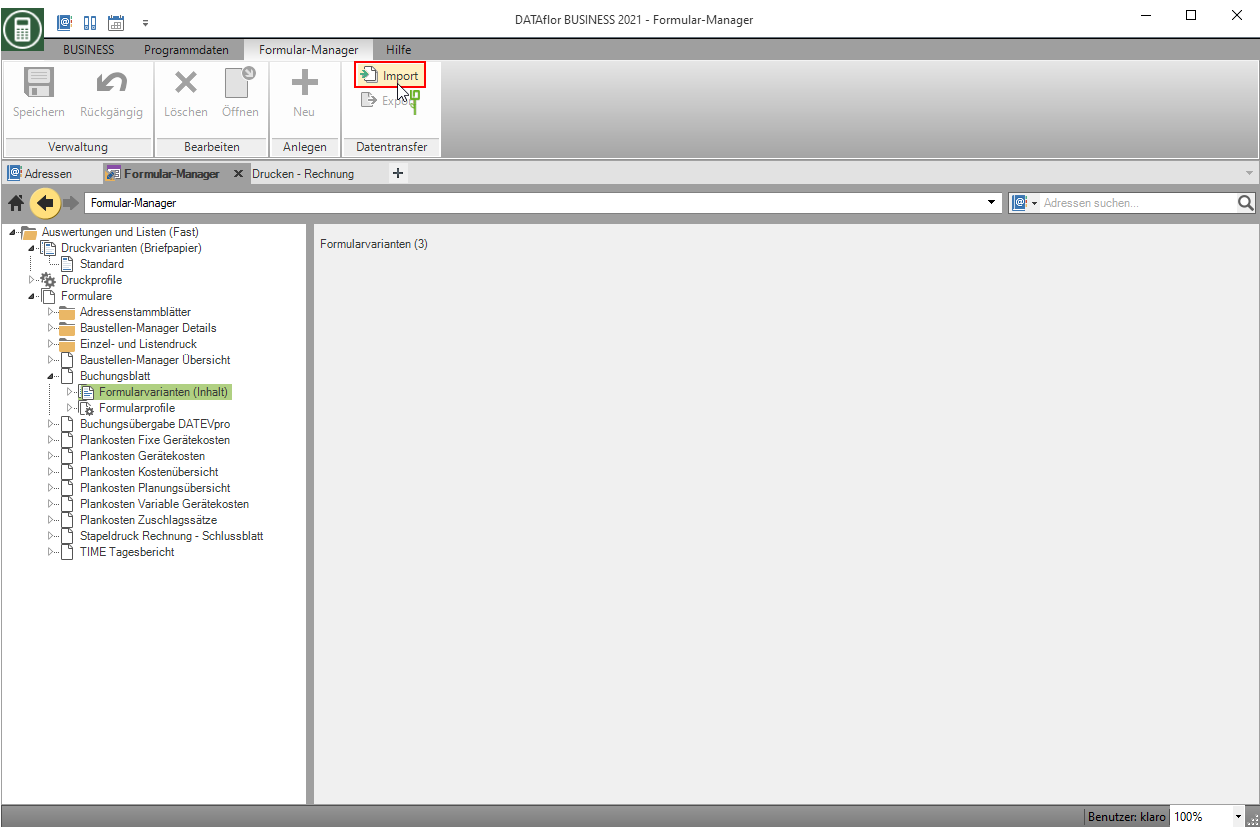
If you use a right margin of over 3,5 cm for the booking sheet, you should also import a form variant optimized for a 4 cm margin. You can find them at the end of this page. You can find the booking sheet in the form manager in the group Evaluations and lists (almost). Select the entry under the booking sheet Form variants and click in the menu Import.
printout_geschaeftsverkehr_fast_formvarianten_breiter_rand_3cm_2022.zip
printout_geschaeftsverkehr_fast_formvarianten_breiter_rand_4cm_2022.zip