Table of Contents
Transfer of wage data
Description
Before the data is transferred to your payroll software, the data to be transferred is displayed in a table overview.
- The data can be selected on a monthly basis and separately according to mandate / business area.
- In addition, for some wage software solutions it is also possible to select according to an individual period.
- In addition, an archive of the expenditure that has already taken place is kept.
Data selection
All data records that can be transferred to external payroll programs are displayed in the overview. These are all the wage hour postings for wage types recorded in the recalculation, for which the option in the wage type administration Handover of wage interface is set.
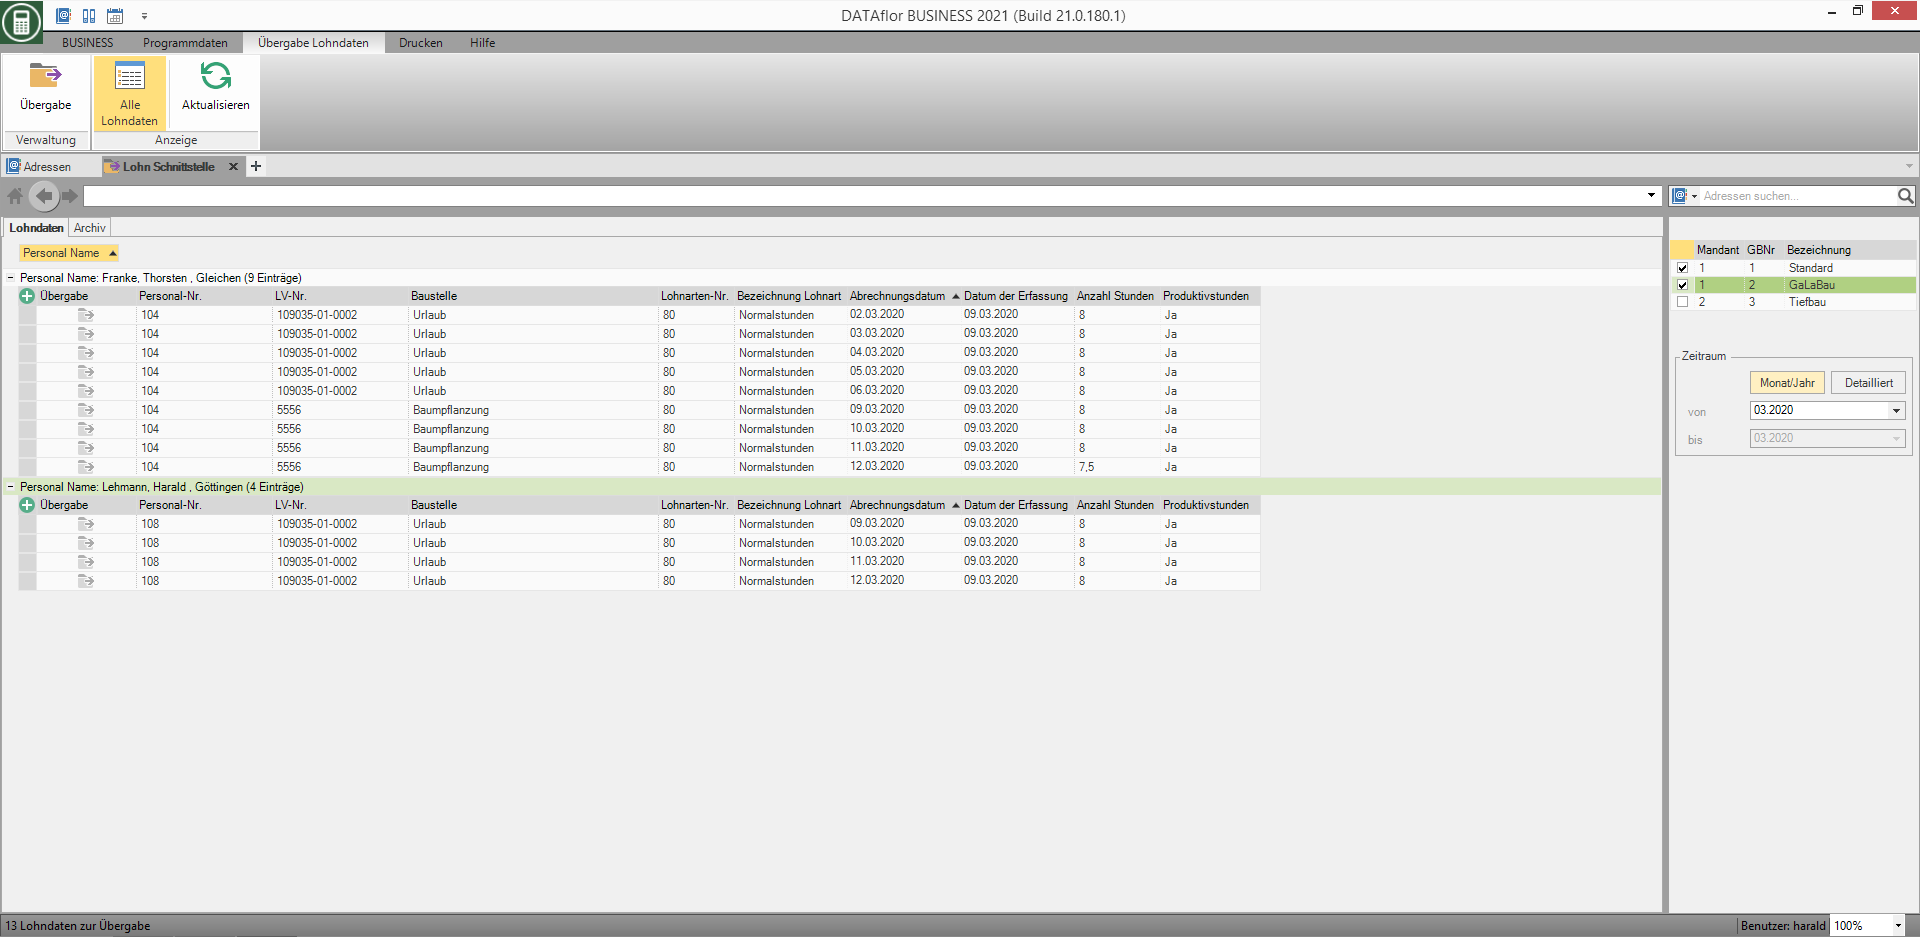
The table contains functions such as grouping, sorting, column selection, column order, etc. for the individual configuration of the Table layouts is available for storage, management and analysis.
Click on  in the menu Transfer of wage data will all data shown in the overview issued and in the column handing over checked
  are. The following functions are available for selecting the data that is displayed and therefore to be exported.
Period selection
On the right side of the screen you can choose the month you want. In addition, the counter is available for some wage interfaces (Addison, GDI, DATEV LODAS and SAGE HR Suite) Detailed available, which allows the handover for any period of time. Enter the first and the last date of the desired period.
Only those data records are displayed in the table and transferred to the export file whose date for which the wage hours were recorded is in the selected period. This date is shown in the column Billing date displayed.
For example: The transfer takes place for all data recorded for the month of March.
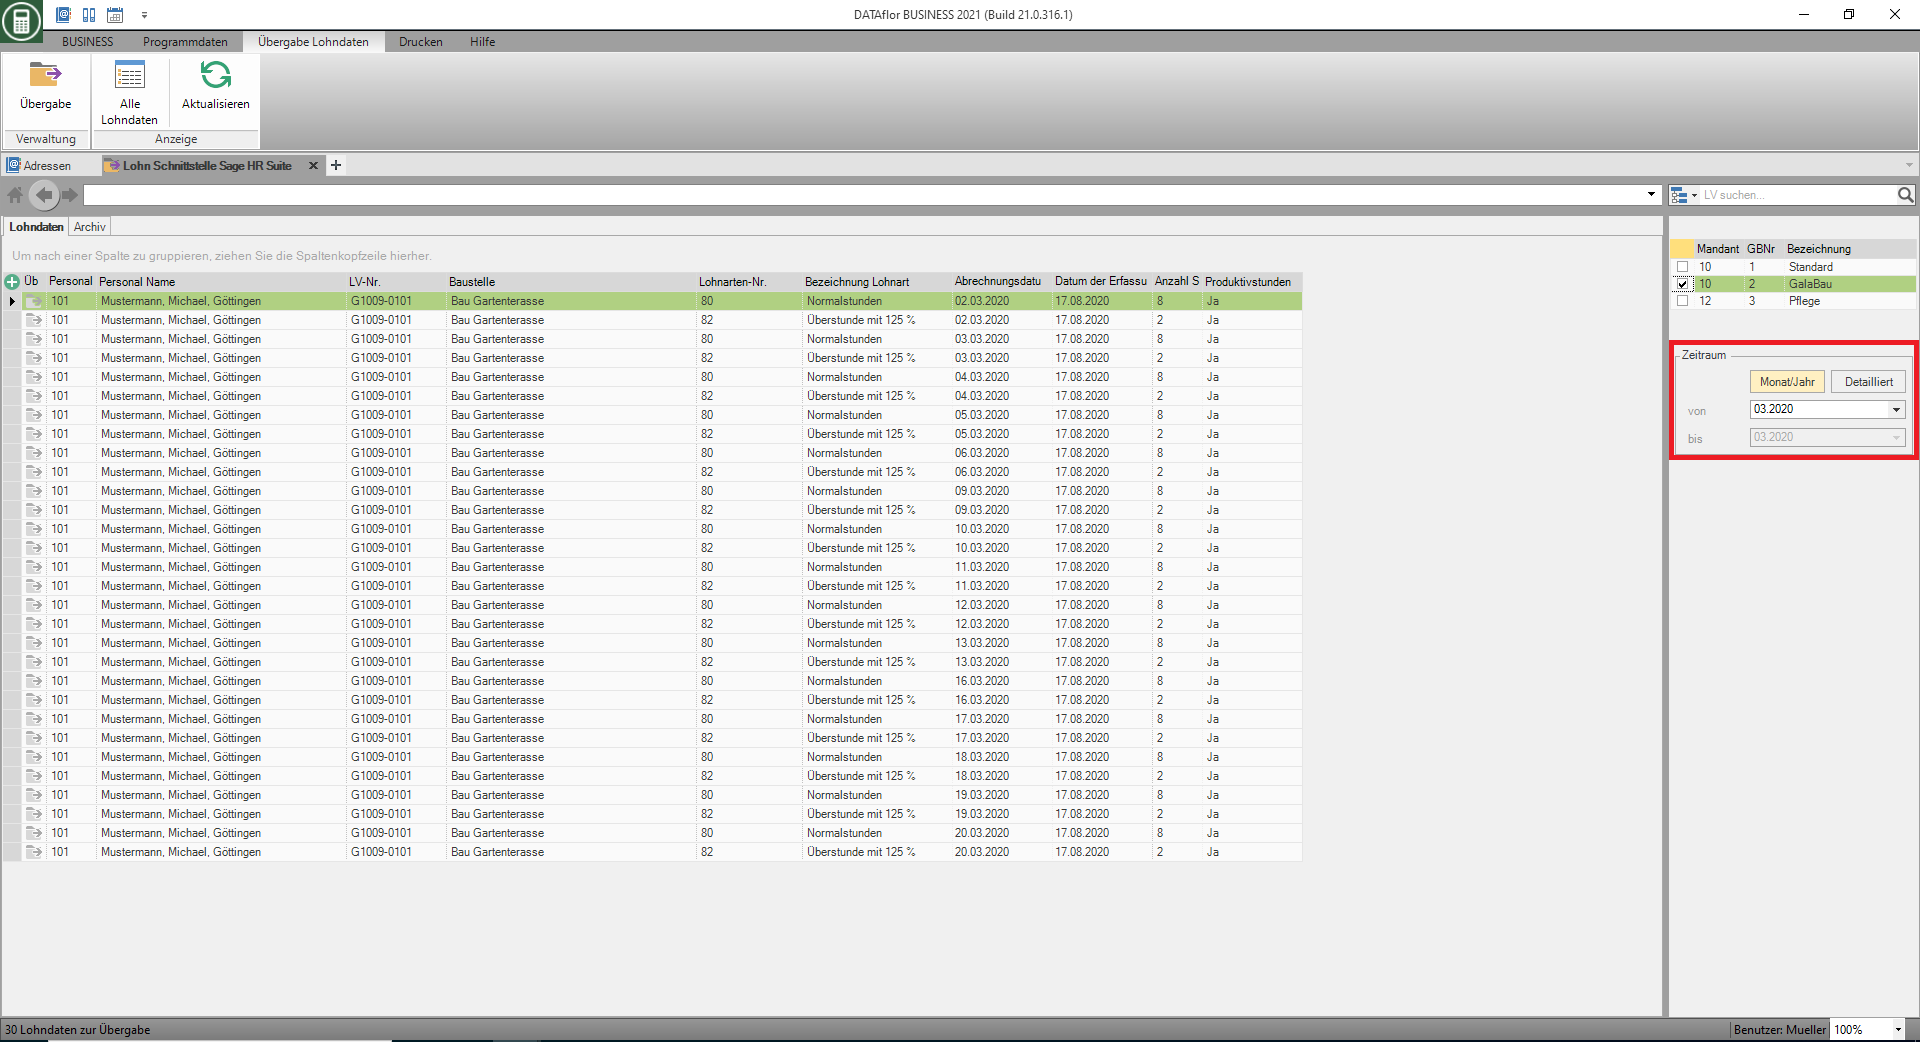
For example: The transfer only takes place for data that was recorded for the first week in March (from 02.03. To 08.03.).

Client / business area selection
If you work with one or more clients in your payroll program, first assign them to DATAflor BUSINESS Your business area or several business areas.
To do this, open the menu Program data the selection Company and select the program area Company data.

Select the business area and open the tab on the right-hand side of the screen Wage parameters.
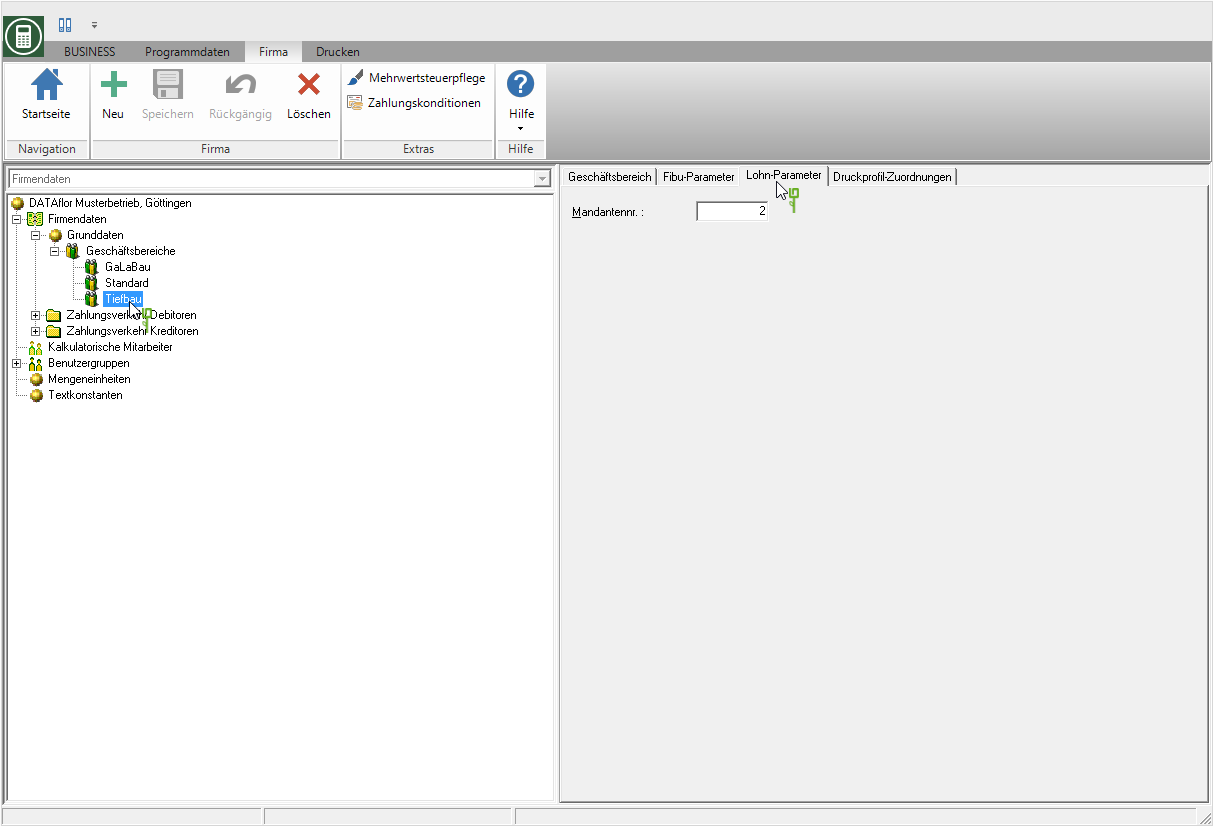
- A business area can only be assigned to one client.
- Several business areas can be assigned to a client.
In the next step, you assign your employees to a business area.
To do this, open the tab in the addresses of the employees Employees the plus menu interface and activate the selection business.
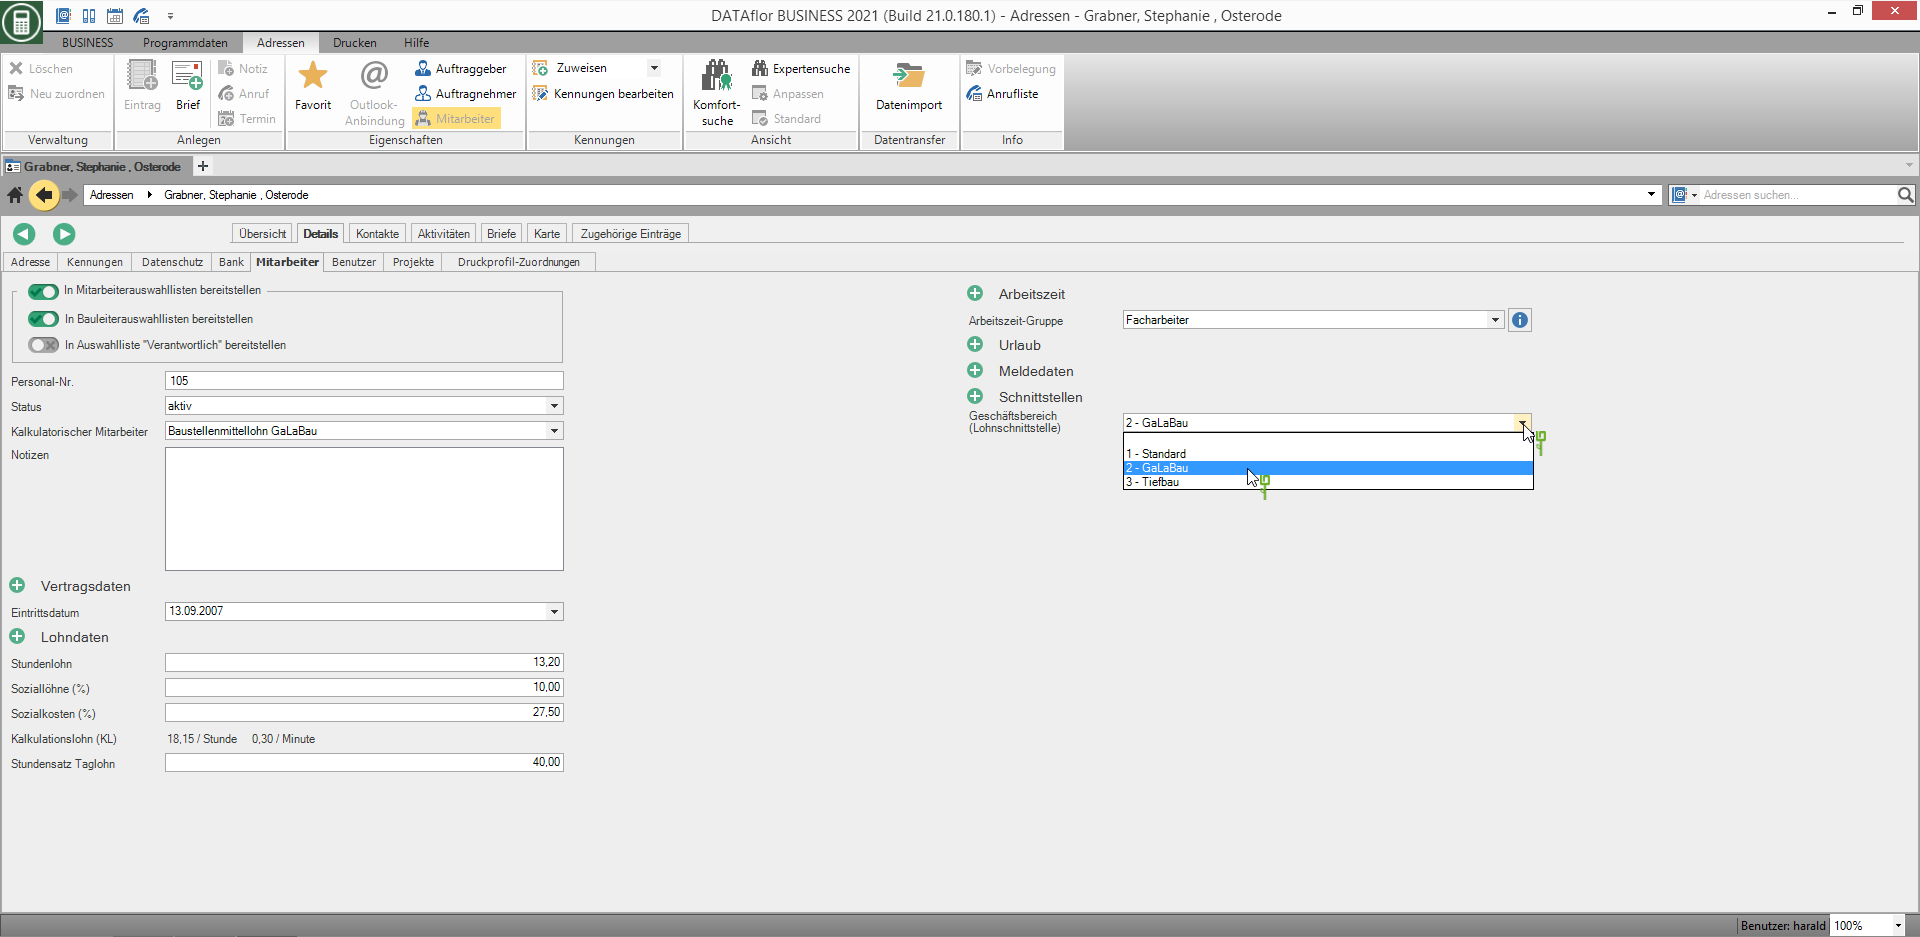
The export of wage data is possible for one client at a time. For each client, you can also output the data records separately for each business area.
For the wage interfaces GT building wages, Lexware wages & salaries and SAGE wage XL is also the handover several or all clients at the same time possible. This is justified by the special requirements of this payroll software.
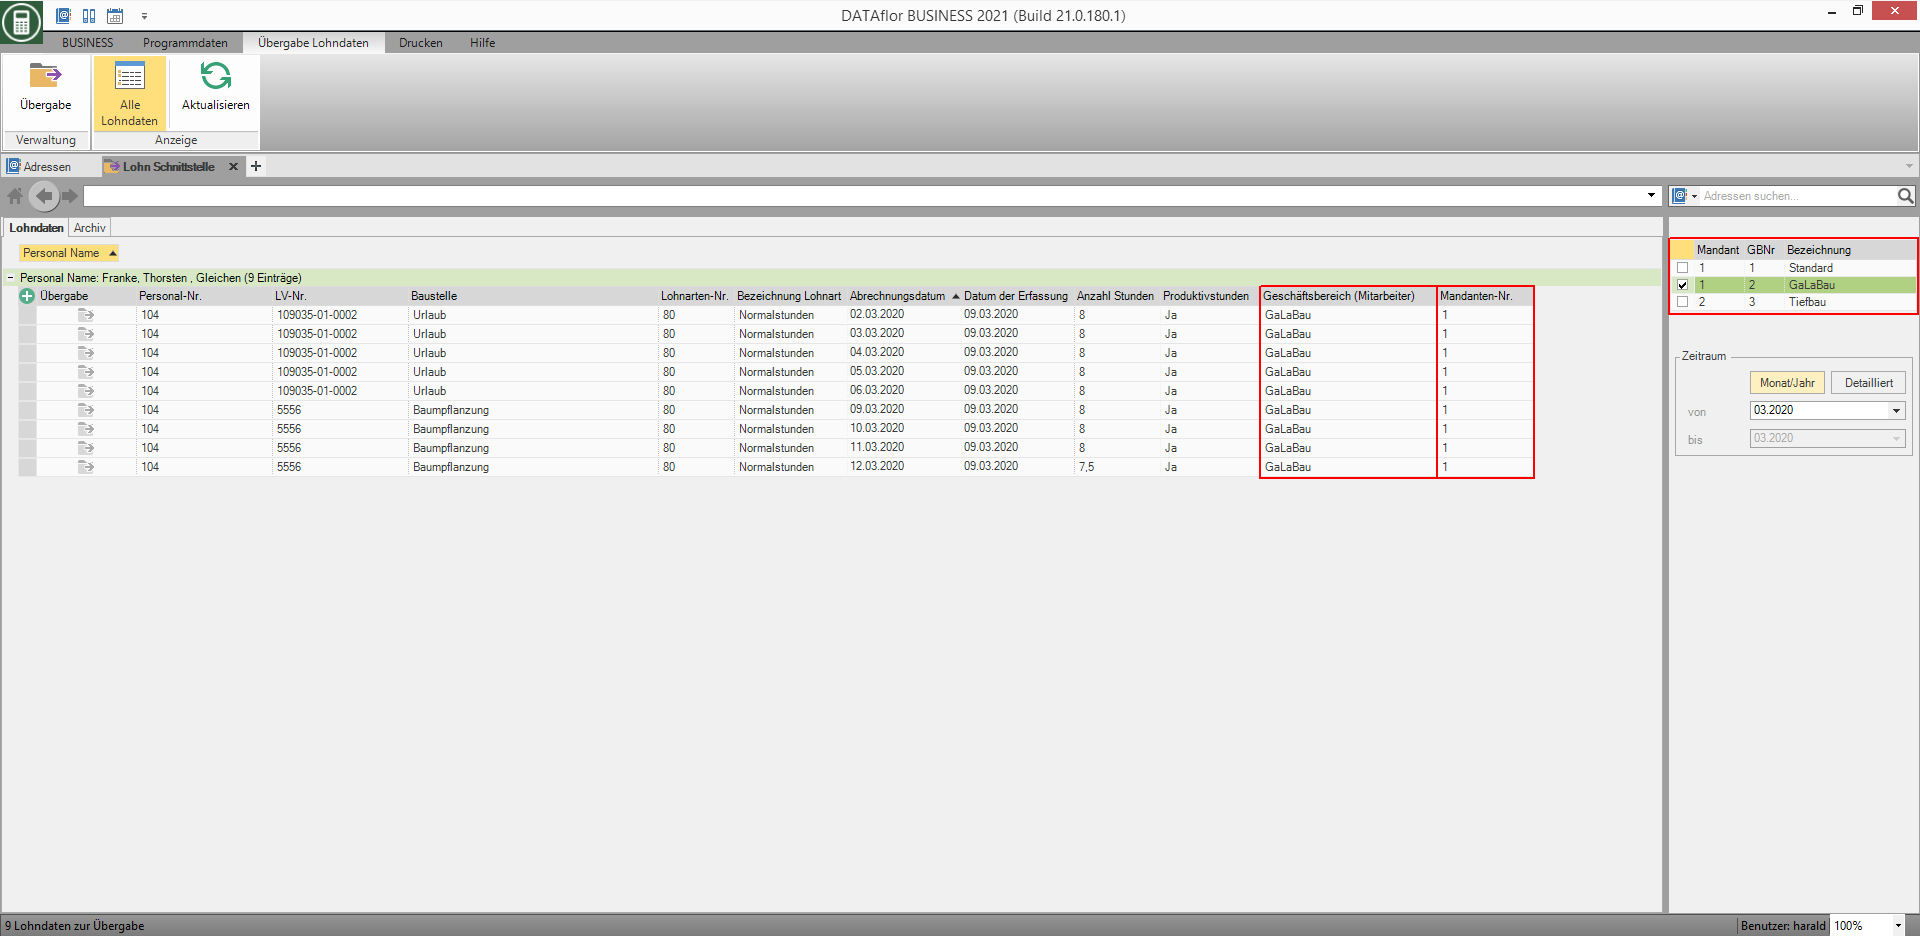
To do this, select the client and the business area (s) for which the data is to be output in the overview on the right-hand side of the screen. In the columns Business area (employees) and Client no. The business area assigned to the employee and the number of the client assigned to this business area are displayed for each data record.
For example: The handover takes place for all employees of the business area GaLaBau of the client 1.
Exclude data that has already been transferred
For each data record, it is saved whether it has already been transferred. Thus, depending on the specification of your wage program used, it is possible to restrict the selection of the data records to be transferred so that only data that has not yet been transferred is output.
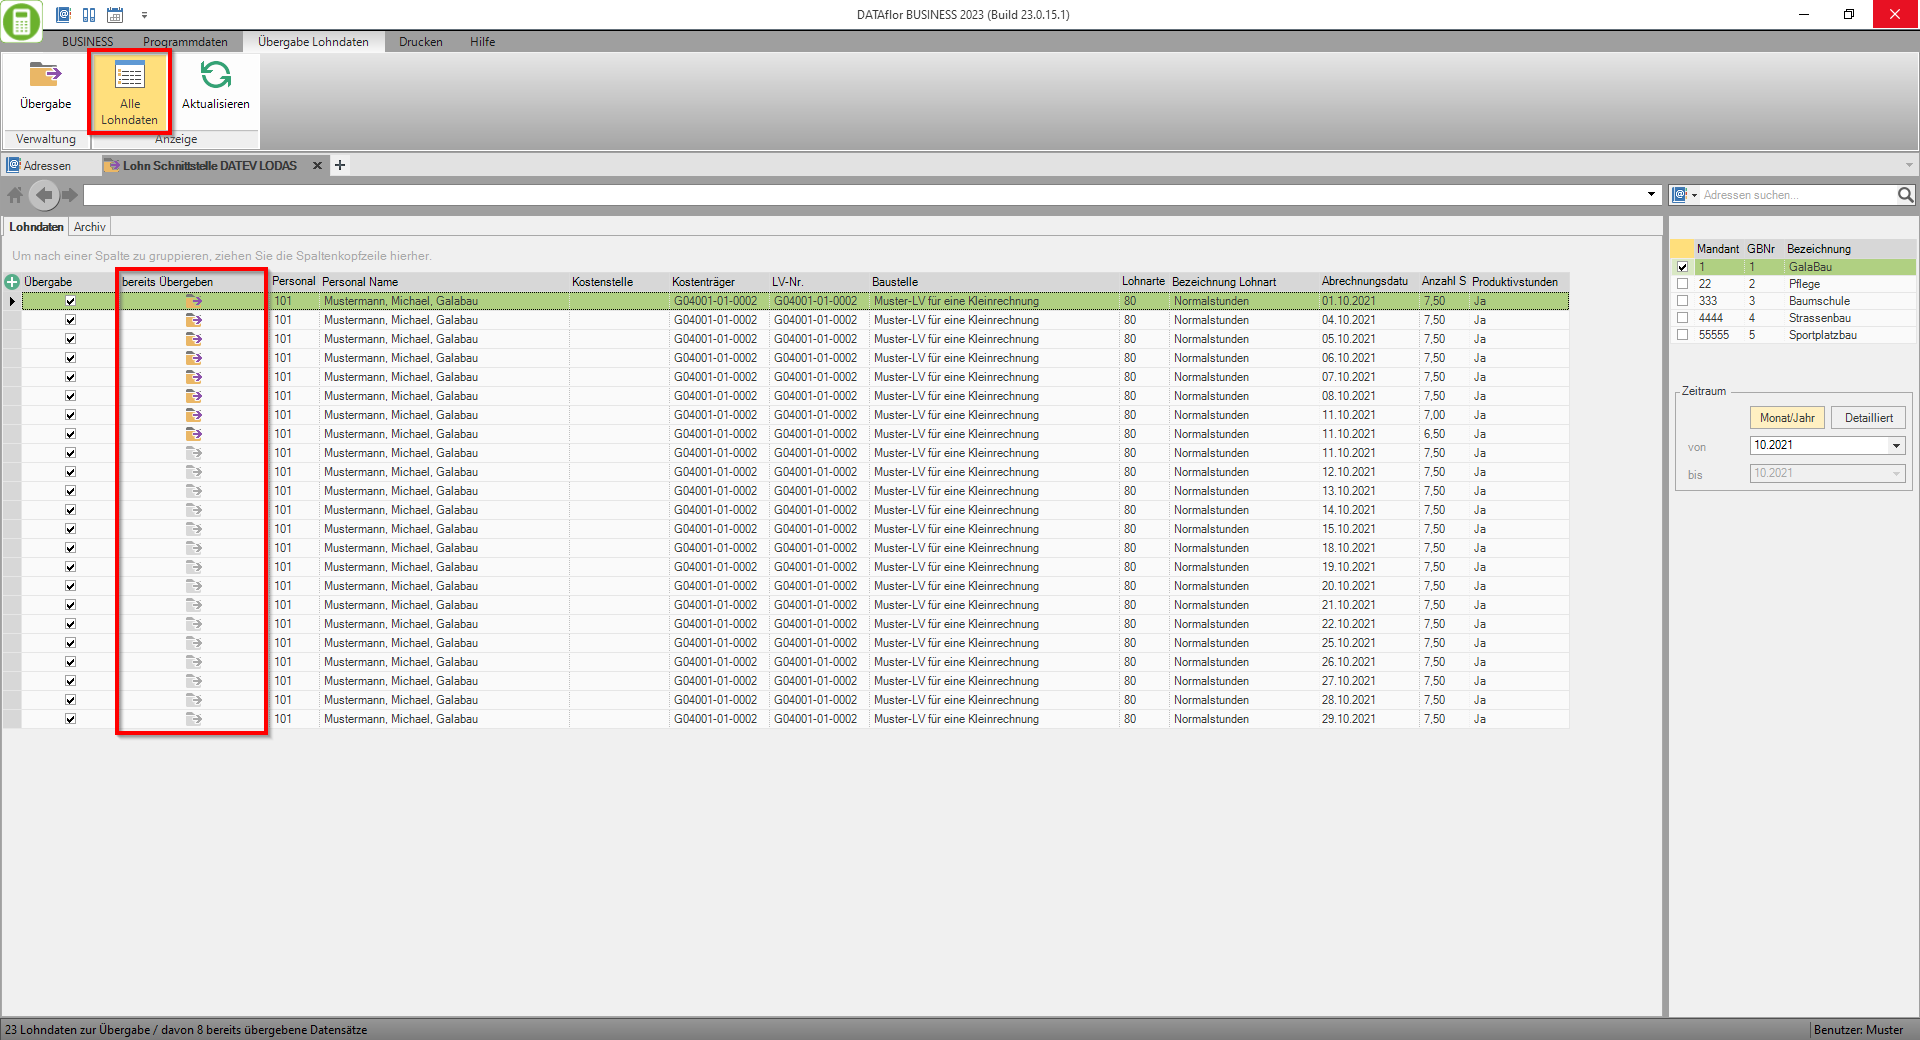
Is in the menu Transfer of wage data the button All wage data active, all data records of the period and client / business area selection are displayed in the overview, regardless of whether they have already been transferred or not. In the column already passed the data records that have already been output are indicated by the symbol ![]() marked. Records with the symbol
marked. Records with the symbol ![]() are data records that have not yet been transferred.
are data records that have not yet been transferred.
For example: Data records that have already been output are taken into account for output.
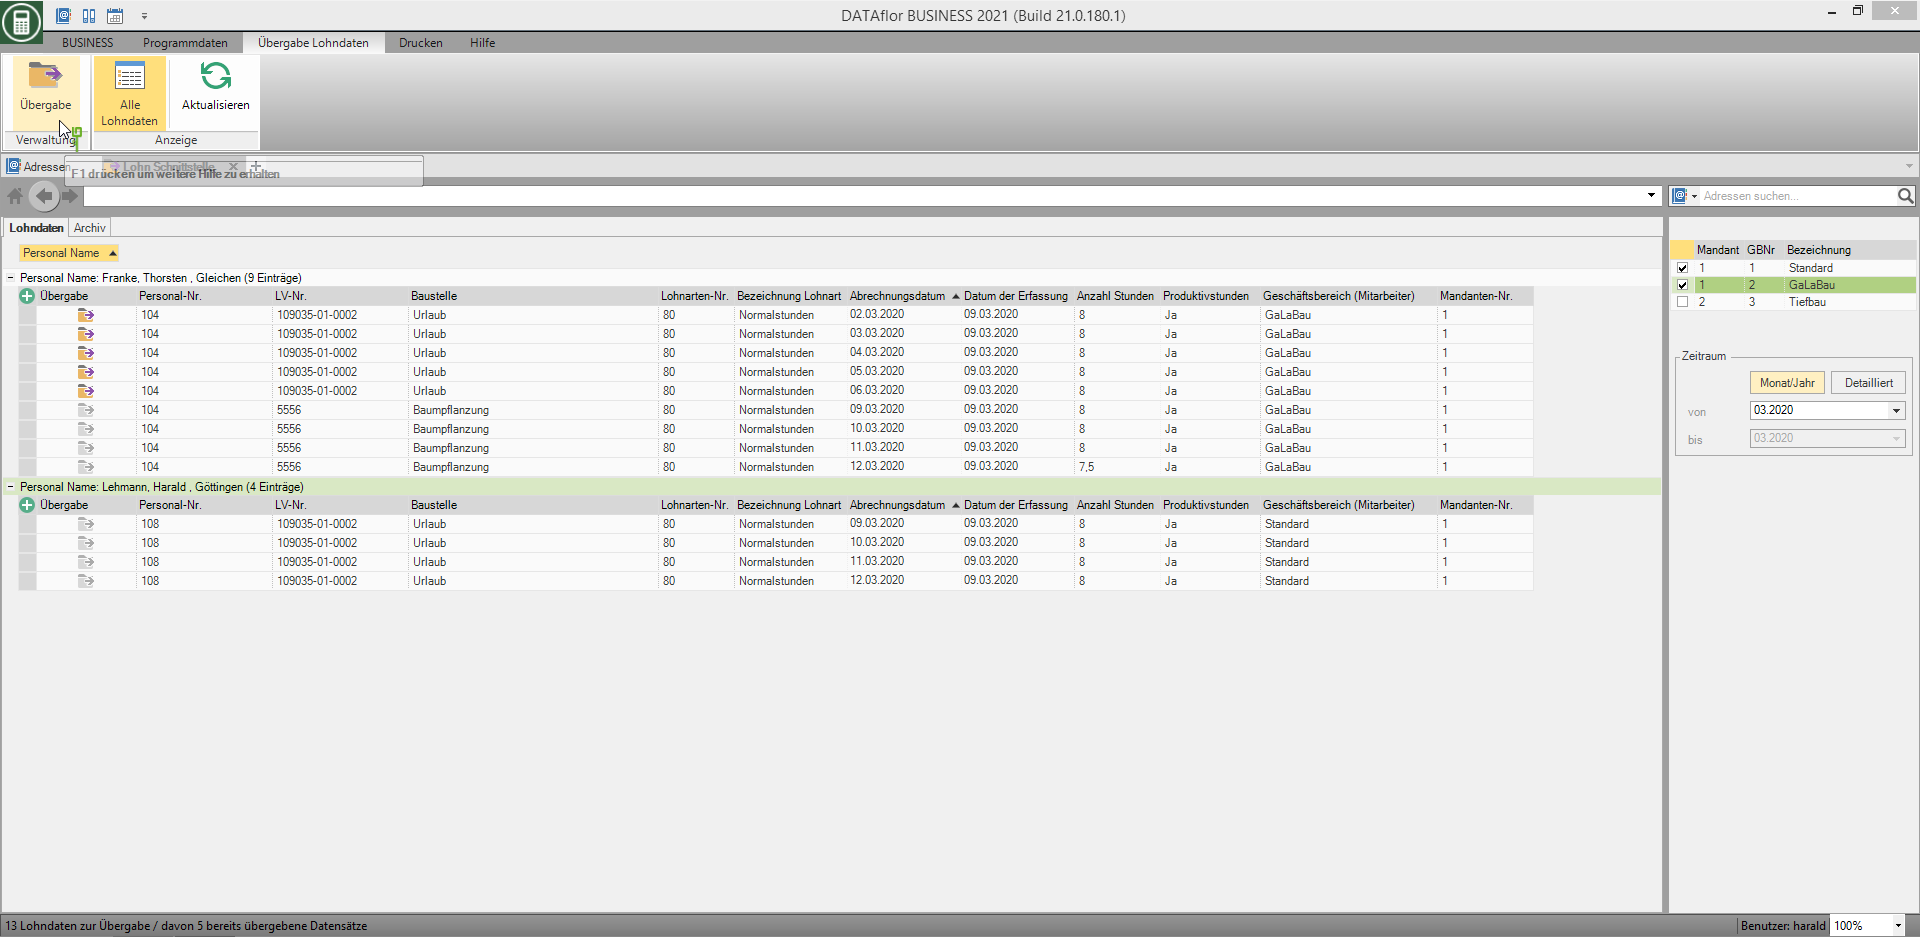
Deactivate in the menu Transfer of wage data the button All wage data, only data records that have not yet been output are displayed in the overview.

Exclude individual dates
If you do not want individual data records to be transferred to your payroll software with this transfer, you have 2 options.
1.) Remove the unwanted data records from the overview before transferring them.
To do this, mark the data record or use Ctrl or Shift several records and press the key Del.
The data is only removed from the overview. The data record is still available in the final costing.
When the overview is updated and the next time the wage transfer is opened, the removed data records are displayed again.
2.) Use the column handing over to select the data to be transferred.
All data in the overview table that are ticked  , are taken into account for the handover. All unchecked records
  , become not taken into account.
For a Multiple choice the functions are available to you Select and Deselect available in the context menu. To do this, use Ctrl or Shift several data sets and then click the right mouse button. In the context menu that now appears, you will find the desired function for multiple selection / deselection.

Update
The button Update in the menu updates entries in the transfer list. When the button is clicked, the latest data is immediately searched for and new entries made from another workstation are also displayed.
handing over
Click on  in the menu Transfer of wage data all data records displayed in the overview at this point in time are exported.
In the directory in the transfer parameters in the field Wage output path is specified, a file is created.
- With every further data output, the file stored in the output folder is overwritten. If necessary, save the output file manually in a separate directory after each export. To do this, you can switch to the directory directly in Windows Explorer after transfer.
- For DATEV LODAS (calendar), GDI wages and SBS Pay Plus: The name of the file must not be changed, because this name is required by the payroll systems for the import process.
Show output directory
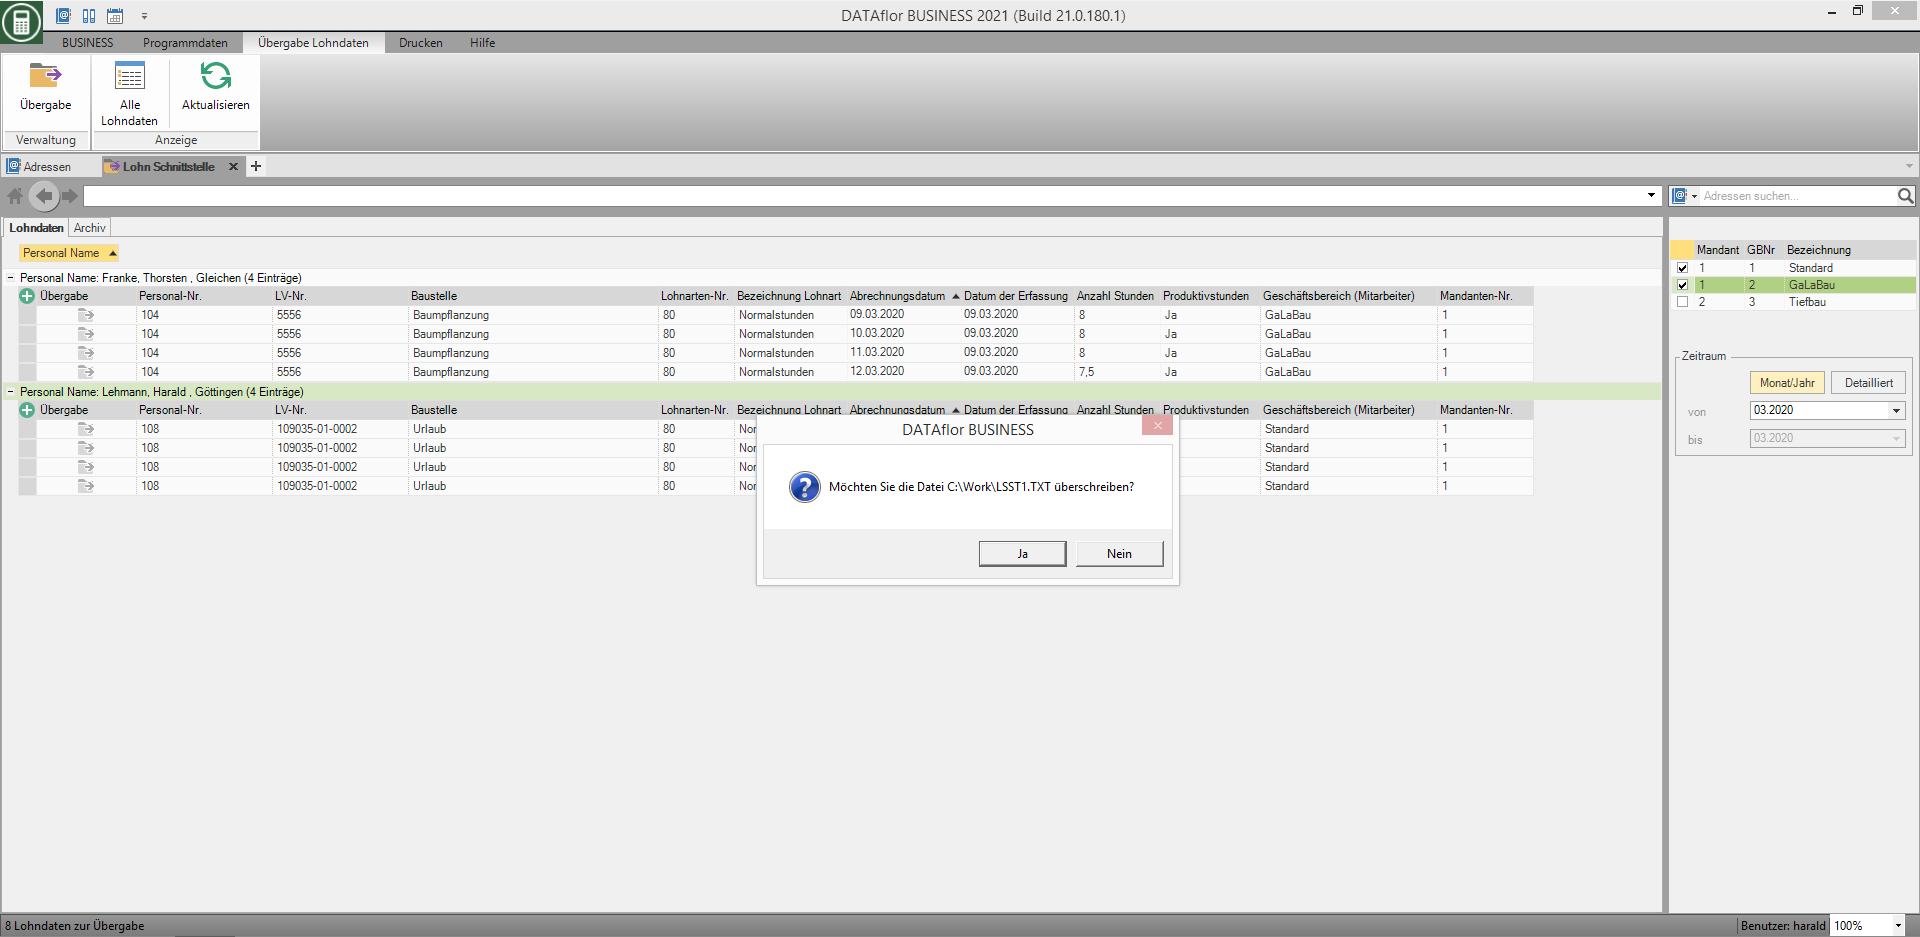
During the transfer, you may be asked to overwrite the existing transfer file. Confirm the query with [No] the data output is aborted. click on [Yes] the new transfer file is written and you can then switch directly to the output directory.
Correct already submitted data
If you would like to correct a data record that has already been transferred to your payroll program, we recommend the following procedure:
- First delete the data record in question in your payroll program and in the post-calculation of DATAflor BUSINESS.
- Enter the data record with the new information in the costing of DATAflor BUSINESS again.
- Since this new data record has not yet been issued, it is automatically included in the next transfer if the period and client / business area are selected accordingly.
In this way you ensure that there are no discrepancies between the hourly reports in your payroll program and DATAflor BUSINESS gives.
Archive
The overview records when the data output was carried out. To do this, open the tab Archive. All the data transfers you have made so far are listed with the creation date and transfer period.

Restore archive file
By double-clicking on a transfer, the associated transfer file is written to the output folder that you have specified in the transfer parameters.
You can then, for example, open the file for viewing or send it again to the clerk in your payroll department.
Restoring a previous release will overwrite the previous release file in your output folder. Make sure to back up this file beforehand if necessary.
Delete archive file
If you want to remove output files from the archive, select the file or use Ctrl or Shift multiple files and press the button Del or alternatively open the context menu with the right mouse button and select the entry Delete.
Protocol printing
Open the menu Print and click the button Protocol printing.
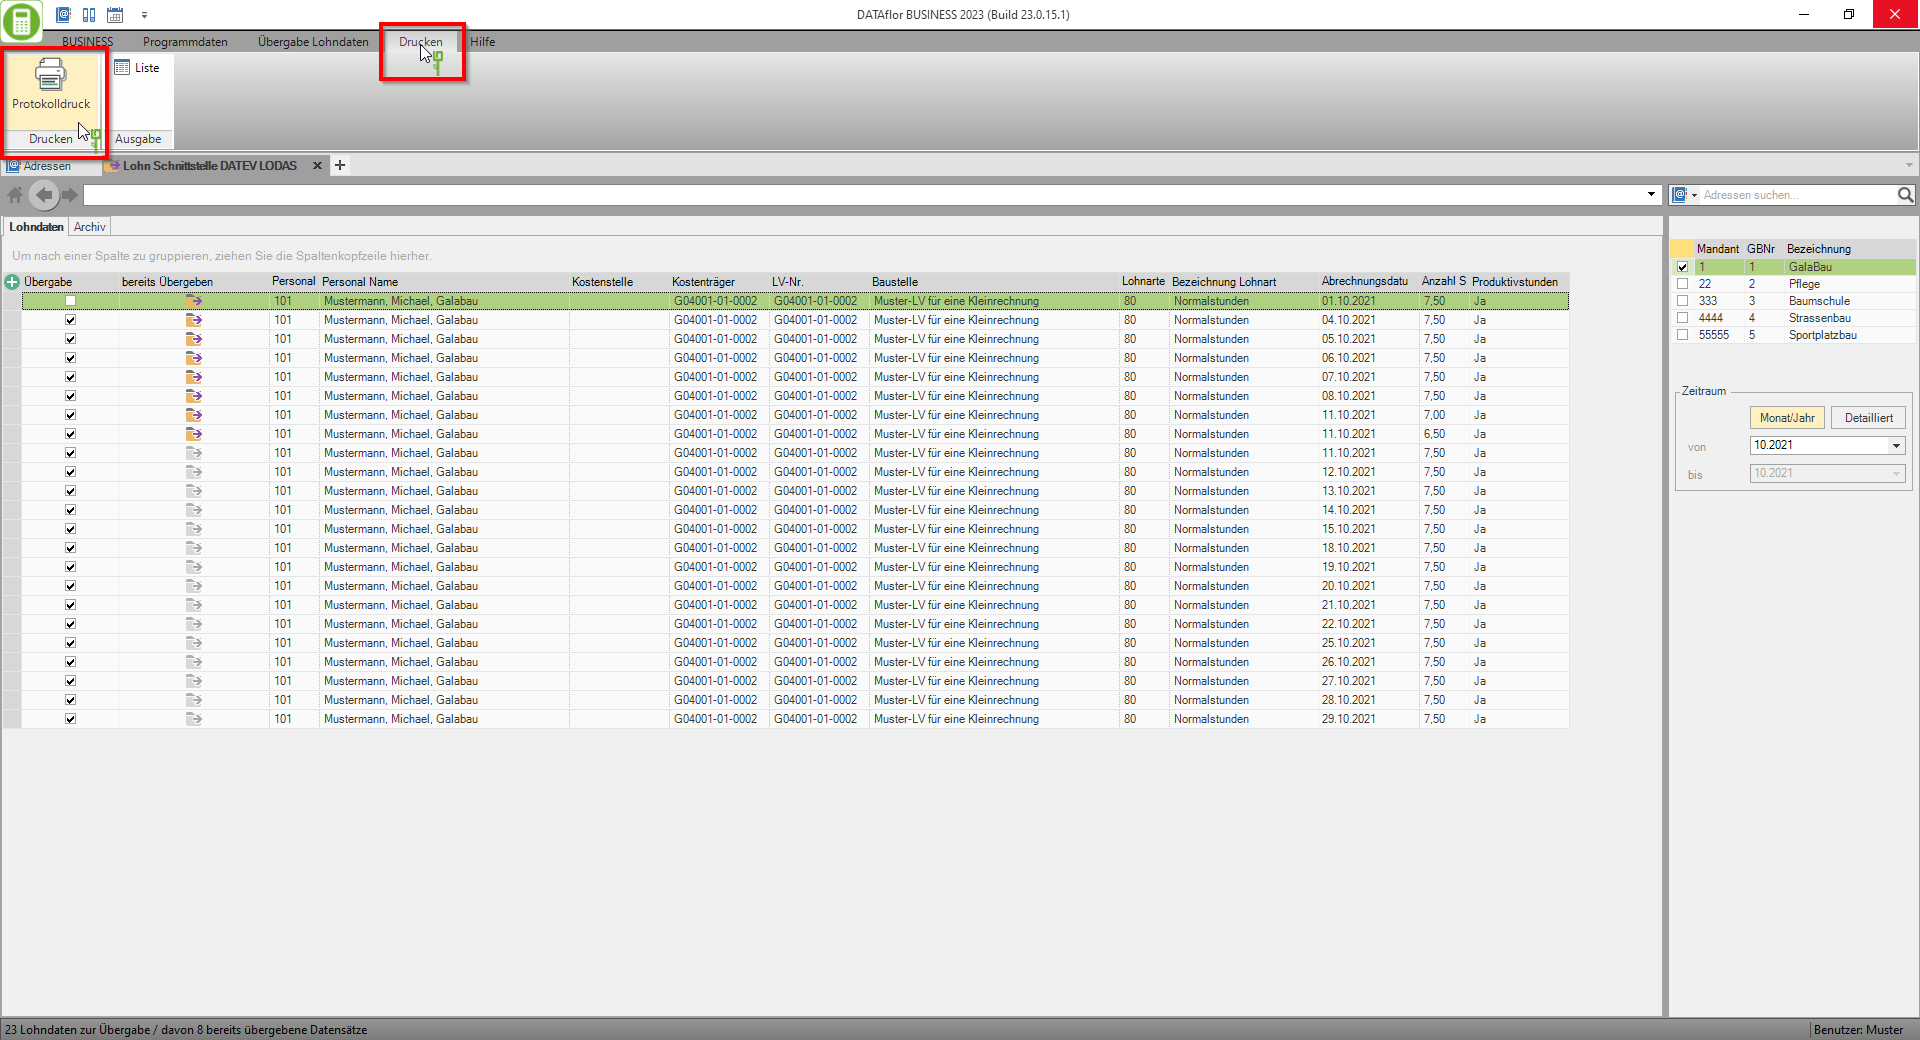
The print menu for log printing opens. Use the familiar functions from print management here.

Setting options for log printing
In the form manager, see Evaluation and lists (FAST) the setting options for Protocol printing of the transfer of wage data.
Create your own print and form variants here in order to adapt the contents of your handover protocol. For the form variant in the FAST-Designer all columns of the transfer window (personnel no .; personnel name; ...) are also available as ready-made data and text fields and can be used on the printout. You can also Summation Create for hours of individual wage types or hourly rates and amounts.

You can find detailed instructions on how to use the FAST Designer at: FAST designer.
With the settings for the form, you can also use the Default Define your automatic log printing.

