Table of Contents
Planting variants
Add plants
Adding plants to a drawing is possible using different working methods.
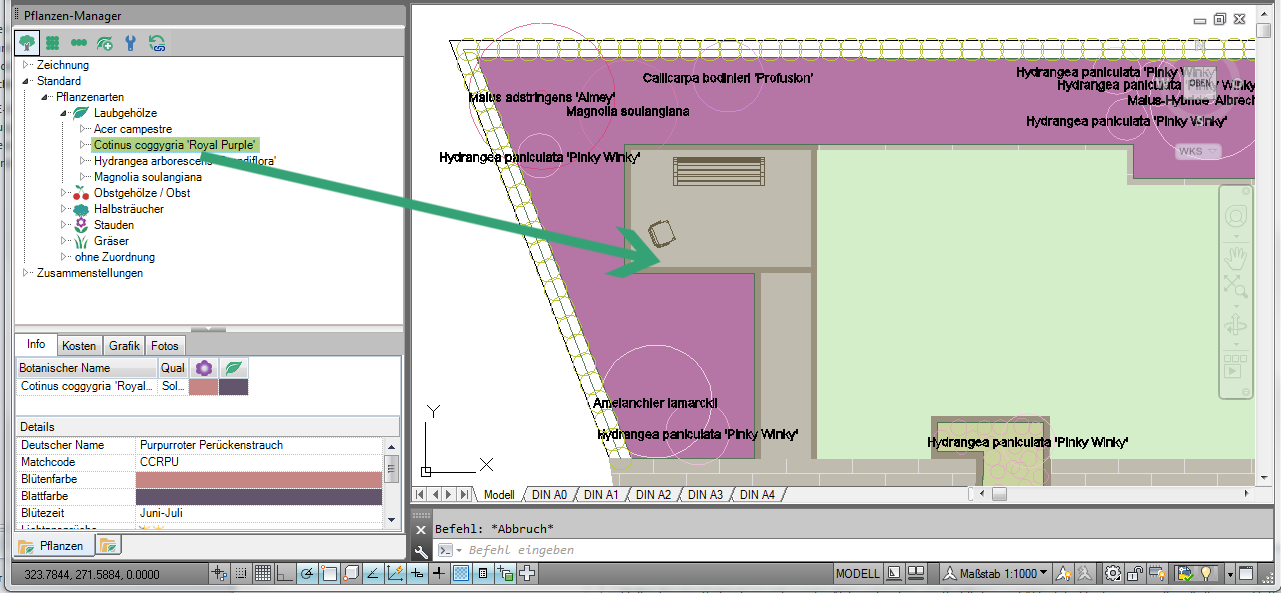
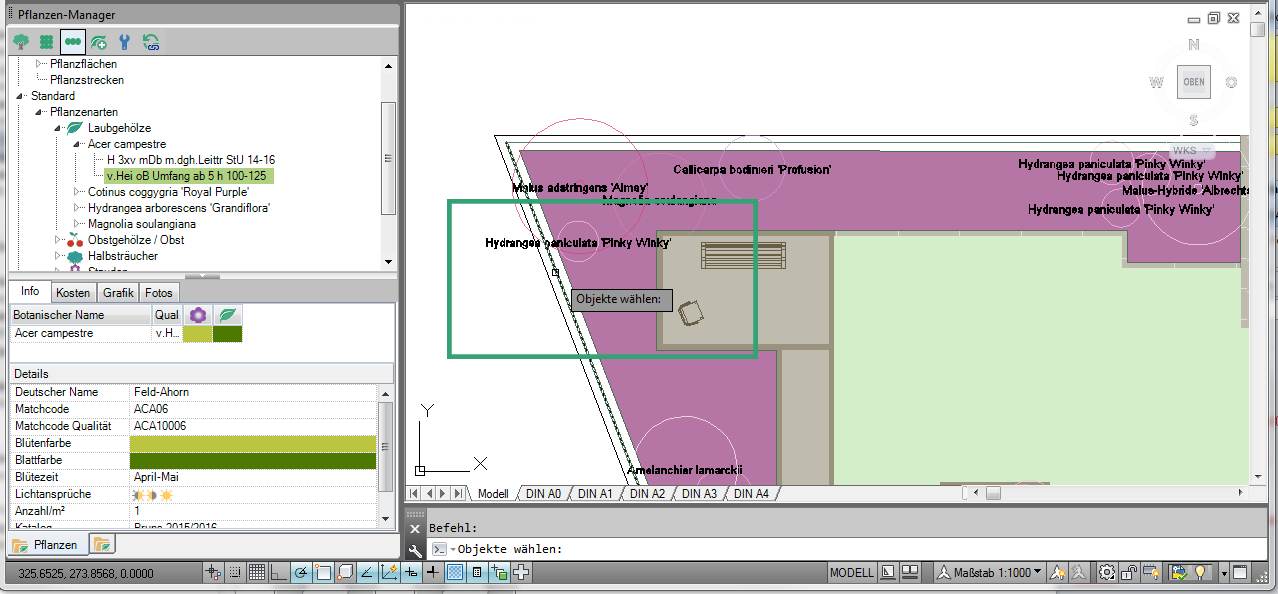
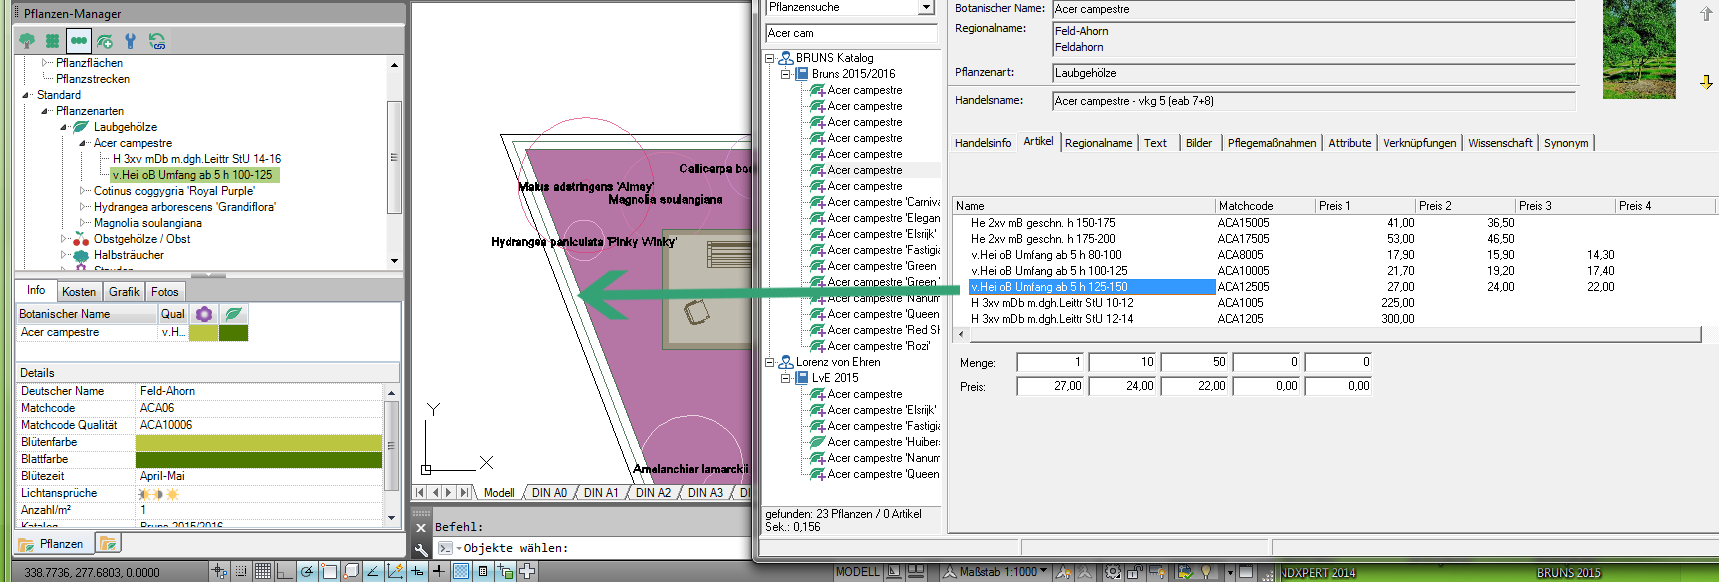
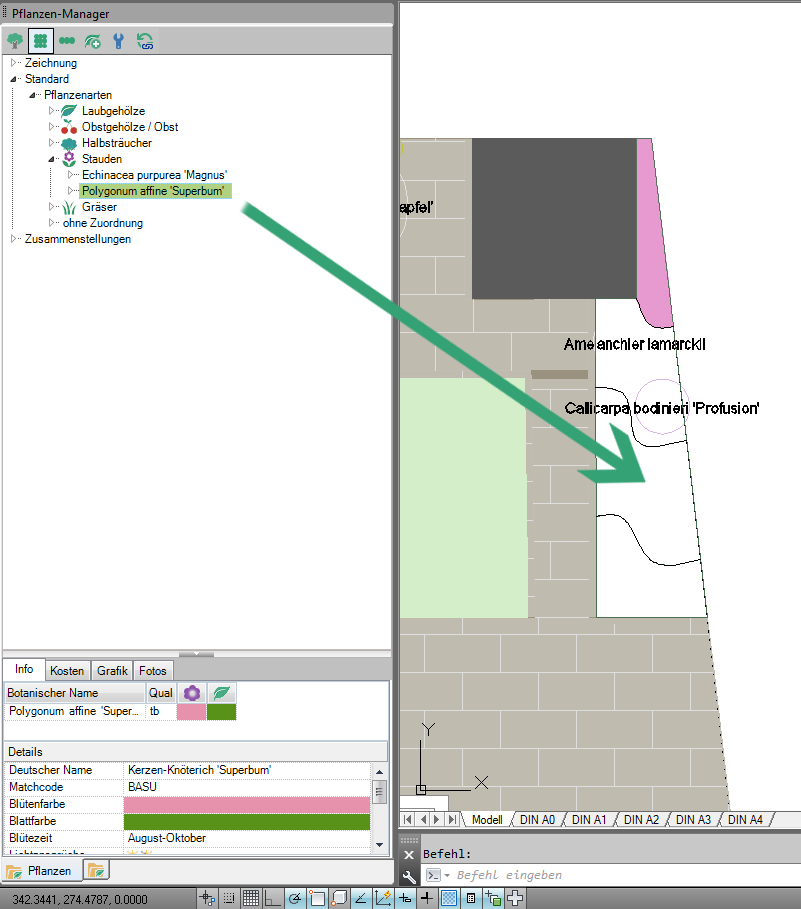
With drag & drop
The easiest and fastest way is to add through Drag and drop. For example, from your open BUSINESS or DATAplants select the desired plant and click on the target node in the tree of the Plant Manager pull (e.g. in a planting area, on a planting path or in the knot Standard).
If you already have plants in the knot Standard you can also plant over from there Drag and drop add to the drawing.

New plant
If you choose the variant using the button  New plant you must define beforehand how this new plant to be added is to be used. To do this, select an insert mode using the corresponding buttons: Solitaire
  , Area
  or Linear
  .
.
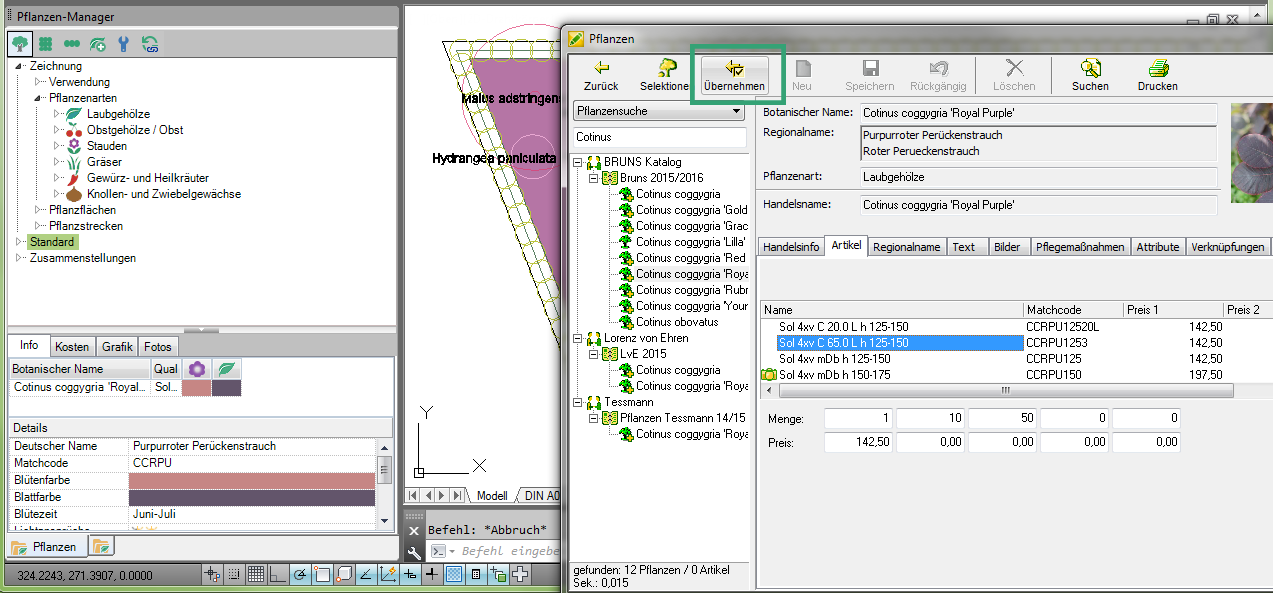
If you now have the new plant using the button the plant catalog opens.

Select your plant and click  . Select the insertion point and confirm with the left mouse button. End the command with Enter.
Set solitary plant
To place solitary plants, select the insert mode Solitaire in the toolbar of the Plant Manager out. You now have the following options for placing a specimen plant in your drawing:
- Drag & drop from the node Standard in the tree of Plant Manager.
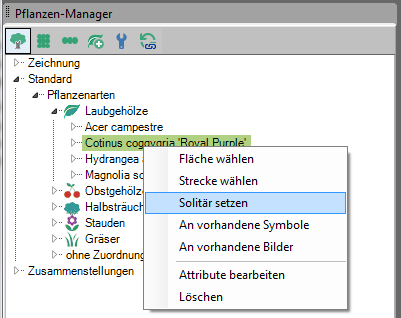
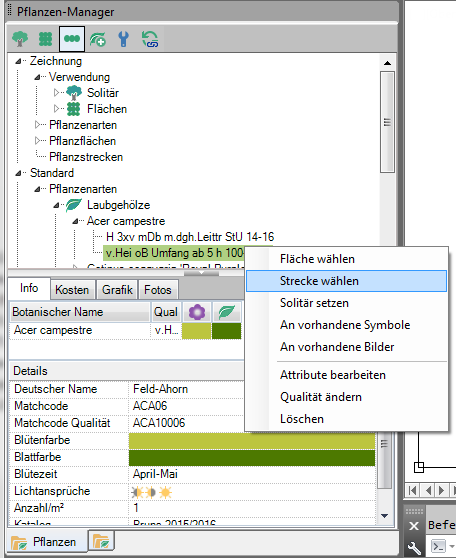
- Via the context menu from the node Standard in the tree of Plant Manager. To do this, right-click on a plant and choose Set solitaire. Select the insertion point in the drawing.
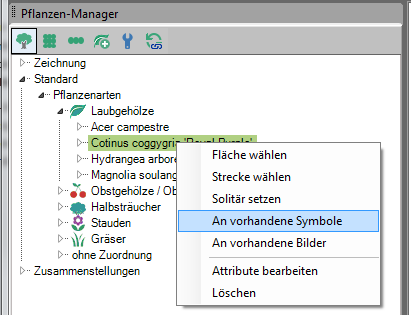
- Via the context menu from the node Standard in the tree of Plant Manager to existing images and symbols. To do this, right-click on a plant and choose To existing symbols or To existing pictures. Select the object in the drawing.
- Using drag & drop BUSINESS or DATAplants.

- Adding a plant via the selection in the plant catalog. To do this, select the button
 New plant . Select the desired plant in the catalog and click on the button
  . Select the insertion point in the drawing.


Planting lines
To set plant stretches, select the insert mode Route  in the toolbar of the Plant Manager out. You now have the following options for placing a line planting in your drawing:
- Drag & drop from the node Standard in the tree of Plant Manager. After selecting one or more objects, plants are placed on the selected route.
- Via the context menu from the node Standard in the tree of Plant Manager. To do this, right-click on a plant and choose Choose route. Select an object in the drawing. The plants are placed on the selected route.

- Using drag & drop BUSINESS or DATAplants. After selecting one or more objects, plants are placed on the selected route.
- Adding a line planting via the selection in the plant catalog. To do this, select the button New plant. Select the desired plant in the catalog and click on the button . Select an object in the drawing. The plants are placed on the selected route.


Planting areas
Create planting area
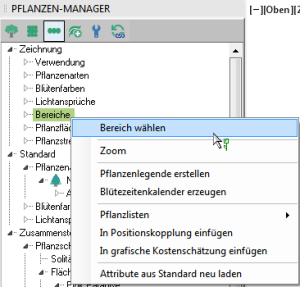
Right click on the node Planting areas and then select the entry Select area.

You will be asked to choose an object. With a click on the desired object, the area is assigned to the planting areas in the Plant manager added.
Create sub-surfaces
In order to subdivide an extensive planting, you can create sub-areas. To do this, right-click on the planting area and choose Create sub-surfaces

Select the object that divides the planting area and confirm the command with Enter, the sub-areas are now created.

Fill planting areas
You now have the following options for placing plants in the planting areas:
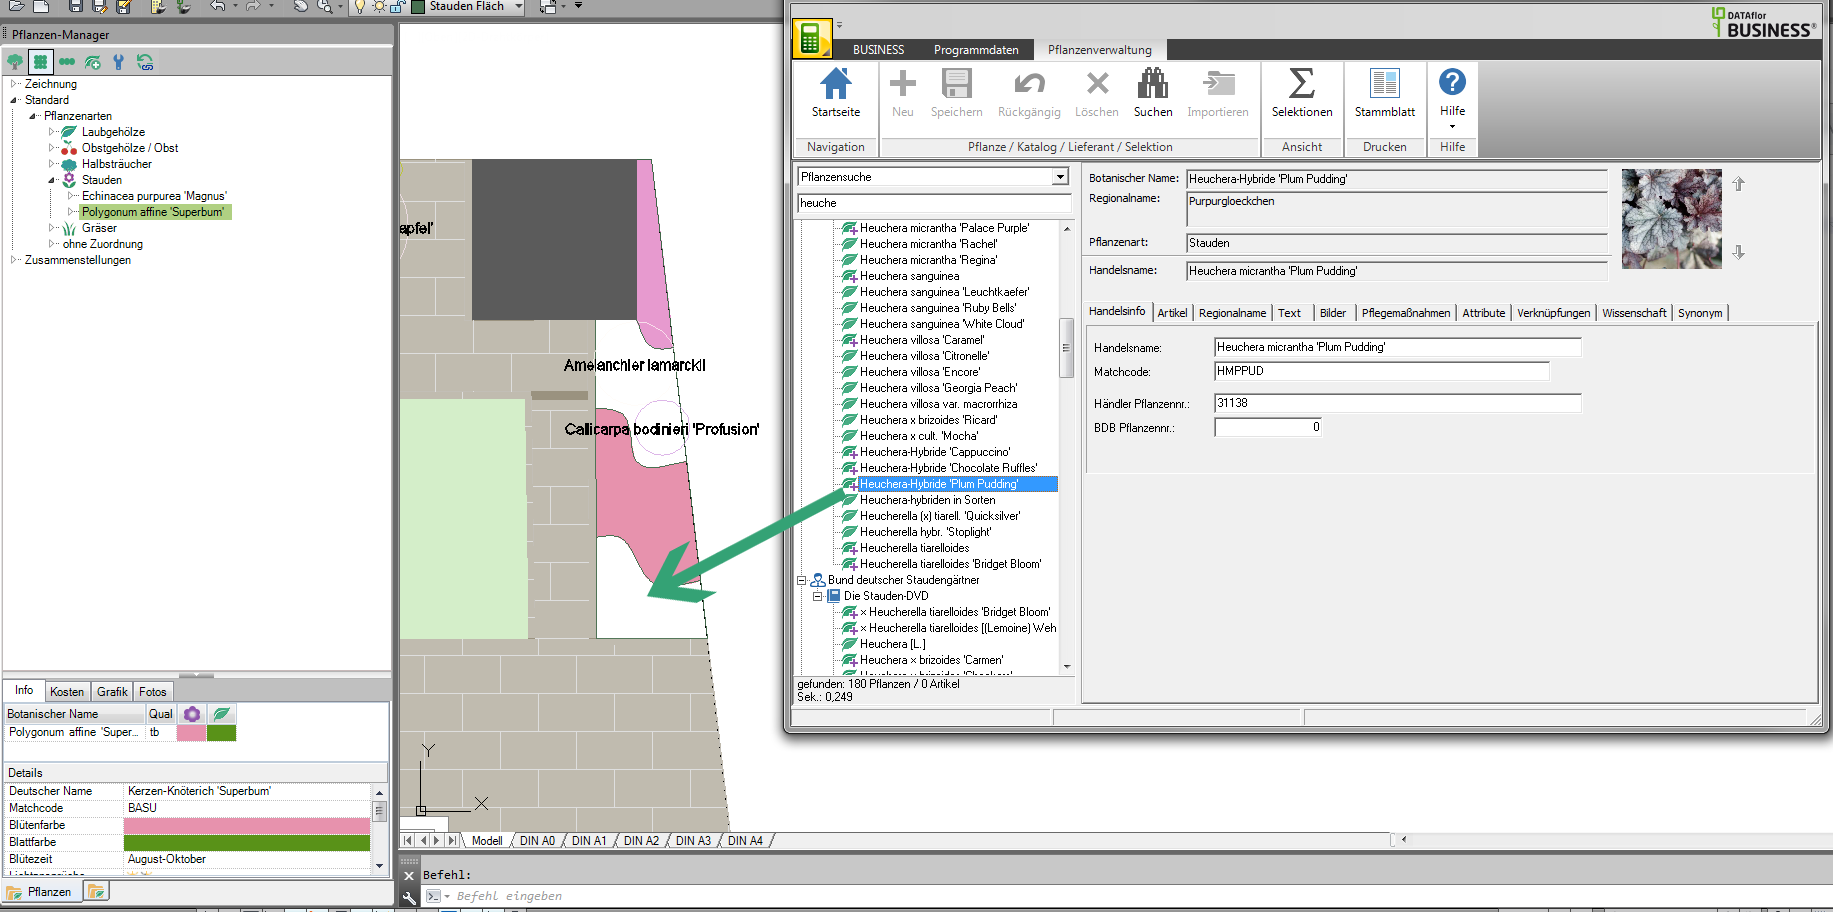
- Drag & drop from the node Standard in the tree of Plant Manager. To do this, drag the desired plant into the previously defined planting area or sub-area. You can also place several plants in one area.

- Using drag & drop BUSINESS or DATAplants. To do this, drag the desired plant into the previously defined planting area or sub-area. You can also put several plants in one area.
- Adding an area planting via the selection in the plant catalog. To do this, select the button New plant. Select the desired plant in the catalog and click on the button . Select the planting area object in which the plant is to be placed. If the plant is to be placed in a sub-area, first select the planting area and then the desired sub-area.

- Via the context menu from the node Standard in the tree of Plant Manager. To do this, right-click on a plant and choose "Select area". Select an object in the drawing. After confirmation, this is filled with the plant and a planting area is created directly.


Define areas
In order to structure a large planting plan, it can be helpful to subdivide it into areas (e.g. in the garden and front yard). You will then have cost overviews for these areas, Plant legends or even the Flowering calendar is available for storage, management and analysis.
- Right click on the node Areas and click select area.
- You will be asked to choose an object.
- After the selection, confirm the command with Enter and the area is created.
- Now you can open the created area in the tree with the button F2 Rename (e.g. front yard).

A multiple selection is available for all objects.