Table of Contents
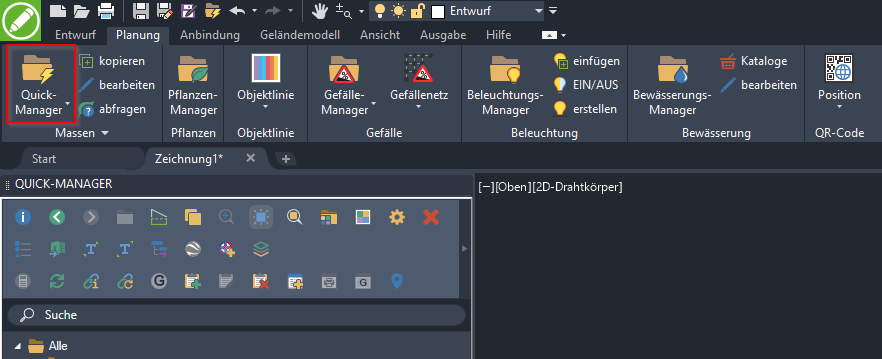
Quick manager
Command: DFQUICK
Description
The Quick manager  enables drawing objects to be captured (see Object manager), editing the layer structure (see Quick layer) and the use and management of library elements (hatches, images and blocks).
Application
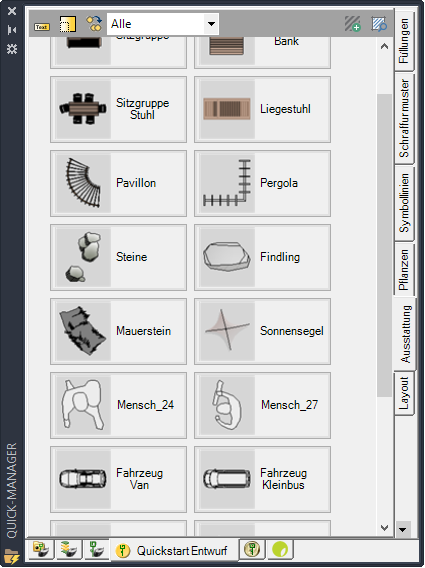
Insert picture or block
- Click with the left mouse button on an icon within the Range and hold down the mouse button.
- Drag the mouse pointer to the drawing area and release the mouse button.
- Pick the first insertion point.
- Drag the pointer diagonally. Click with the left mouse button when the desired size is visible or enter the desired size using the keyboard.
- Add more objects into the drawing by clicking the respective insertion point in the drawing.
- Finish inserting objects with the Enter Button.
Library elements with a lock shown at the bottom right of the preview image are encrypted and protected elements.
Insert hatching
- Click with the left mouse button on a symbol within the palette and keep the mouse button pressed.
- Drag the mouse pointer to the drawing area and release the mouse button.
- Select the object or objects to hatch.
- Confirm your selection with Enter Button.
You can also access the elements from the library directly on the folders or on the objects already recorded in the window Object manager pull. The objects then receive the selected graphic assignment.
Push block into pallets
- Create the desired drawing element, e.g. a parasol, as a block (see also Tips and Tricks > Create block).
- First select the block and then use the left mouse button to move it into the desired palette.
- The block appears in the palette.
Sometimes the block does not appear in the palette. To avoid this, choose the command BLOCK ICON with the option * before the block is to be moved to the desired palette.
Dynamic blocks
With the Dynamic blocks drawing objects are available that are already provided with technical details and standard dimensions. Instead of drawing them over and over again, fit them into the drawing after inserting them (see above Insert picture or block) only the dimensions of the current situation. If changes are made, all elements are updated in one step. Depending on the element, there are floor plans, views and sections for the areas Structural Engineering, Drainage planning, Sports field planning and Planning and layout present.
Drag the dynamic block to the palette
If you want to add your own dynamic block to your palette, you should keep it in a separate DWG-File saved. Make sure that the file name is not identical to the stored block name.
- Then open the Windows Explorer.
- Drag the file to the Quick Manager palette.
- Then use the right mouse button to set the following Features for the block one.
| Specify scaling: | Fixed factor | |
| Dissolve: | ja | |
| Insert on: | Left corner | Only if the insertion point of the block is not on x; y = 0; 0! |
Features
 | Show text: Displays the symbols with or without text. |
 | Image size: Displays small or large icons. |
 | different: Inserts the selected object multiple times or individually into the drawing. |
 | Choice of whether All Objects of a Range or only Hatching, pictures, blocks, symbol lines or Landscape objects should be displayed. |
| Create hatching: Open the window Hatch generator. | |
| Graphics browser: Open the window Graphics browser with the areas DATAflor Online library, BimObjects and Mtexture. |
The window Quick manager can you like the window Features Position or fix in the work area.
Pallet groups
In the lower part of the window you can choose between Object manager, Quick layer, Quick graphics and the existing groups of the library can be switched.
Right-click below on a palette group (e.g. Quickstart Design). With the functions Nach links and Nach rechts the order of the groups can be sorted. Here you can get one new group add a Rename group, a Delete group and Lock group.
You can also use all of the pallets Export group and on another computer again the Import group.
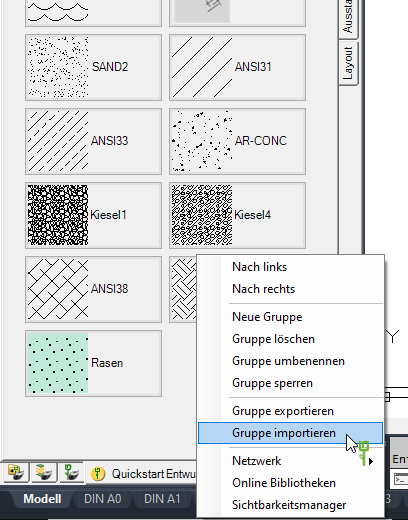
Go to the Import a group choose the one you want XML file (e.g. Dynamic Blocks_PageExport.xml) in your directory. The new group (in the example Dynamic blocks) is created with the contained pallets.
Once you get one Specify the network path, you have the option to access your libraries on the Network zu copy or to move. The library folders are shown in italics when you transfer them from the network to your workstation. With the option Lock group as the PasswordInput, it can be guaranteed that the objects contained in the libraries cannot be changed or deleted. Should changes be made, this can be done using the option Unlock group respectively.
Online library
In the DATAflor Online libraries and in the Graphics browser you will find extensive library elements that you can after inserting within DATAflor Can use CAD. Customers with a maintenance contract can find the Online library many other items available. in the Graphics browser these elements are marked with a lock symbol. With the help of the online library in Graphics browser you can put together your Bibo pallets according to your needs.
With the Visibility manager Entire libraries or individual palettes can be hidden and shown again, given a color and an individual symbol by clicking on the corresponding area (sun / snowflake, color area, symbol). These settings can be reset at any time.


Pallets
On the right side of the window are the Palletswhich also enable further functions via the right mouse button: New palette, delete palette, rename palette.
With the functions Up and Cable hanging down the order of the pallets can be sorted.
Individual pallets can also be used the exportier and on another computer again import.
Additional functions are available for the individual objects in the library (hatches, images and blocks). If you right-click an icon, you can view the object Delete, rename, copywhich Update tool image (Icon is updated automatically) and another one Specify picture (select the desired image for the symbol).
With the function exchange in drawing both images and blocks can be replaced with others. To do this, then select the images / blocks in the drawing that are replaced by the current Object should be replaced.
If images / blocks have already been selected in the drawing, they will be used directly when the function is selected exchange in drawing replaced.
Customize properties
In the Features Object-specific parameters can be defined using the symbol.
You can multiple objects in the library and thus adapt useful properties at the same time. To do this, hold down the button while selecting Shift or Ctrl pressed.

In the case of images and blocks, the property is particularly important Specify scaling Interesting. This determines how the scaling takes place. Standard is at the beginning, the scaling only queried before the first picture and adopted for all further pictures until the command with the Enter Button is completed. At all individually the scaling is requested for each image. At Fixed factor the scaling is not queried, but the value from the property for all images Size .
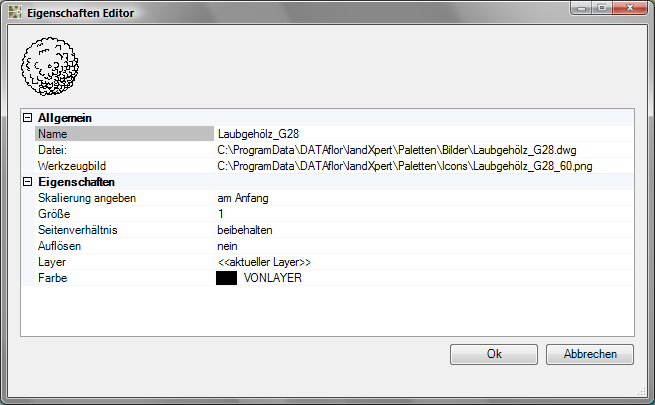
The property Dissolve for blocks defines how the object is inserted into the drawing: as Block or resolved into its sub-objects (lines).
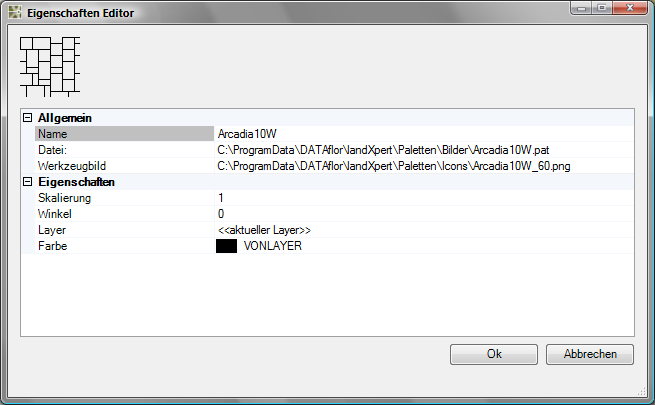
The property Shop consider Hatching Specifies a relative angle for the hatch pattern to the X-axis of the current user coordinate system.
Assign plants and materials
It is possible to add objects (pictures and blocks) in Quick manager assign a plant and / or a material, for example about the Object manager to receive a list of plants or materials.
If the object is inserted into a drawing, an entry is automatically made in the Object manager created. This entry consists of the storage location of the object in Quick manager and contains the number of objects inserted.
So you can click and drag from the Quick Manager to create a material or plant plan.
- Right-click on the corresponding symbol and select the entry from the context menu Features.
- In the window Features are located under Other two entries: material and plant.
- First click on the entry Unallocated and then on the button [...].
- The opens Material- or Plant editor.
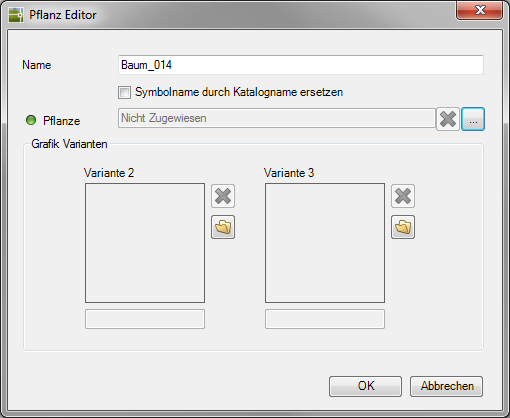
- In the dialog you can assign a new name for the object or replace the name with the catalog name of the material or the plant.
Click the button [...] , to select a material or a plant from the installed material / plant catalogs and assign it to the object.
Instruct the plants Quality to, this is used automatically when inserting. If no quality has been selected, you will be asked which quality should be used when inserting the plant.
You can also assign graphic variants 2 and 3. These are automatically saved in Object manager entered as graphic variants.
- Confirm your entries with [OK].
- Also close the properties editor [OK].
The preview image in Quick manager is now provided with a symbol at the top right.
You can tell from this symbol whether the object is a material  , a plant
  or material and plant
  assigned.