Table of Contents
Theme Manager
Description
You define with the topic manager Inscriptions, graphics and settings too Documentation in different subjects. You can assign these topics to the groups and objects of the Mass tree to assign.
Assign topic
Application
Functionality
To assign a topic, drag and drop the topic onto the group or the object into the Quick-Masses or select the function Apply to existing group. You can also do one Create a new group with this topic.
If a group is dragged and dropped from the Topic Manager into the Quick-Masses then all topics below the group are displayed as groups in Mass tree created.
With the function Derive theme from Quick-Mass Object you can transfer an active object and its graphic variant 1 from the quick masses to the topic manager. As soon as there are objects in this group, the text and graphics of the assigned topic are displayed.
Groups or topics can be created for use on other computers Export... and Import. To do this, click the right mouse button. You can also use the topic manager in Network use. To do this, enter a network path that is available to all users. Please ensure that you back up your data accordingly.
The folders and topics can be found in the topic manager with Shift and left mouse button postponed with a Ctrl and left mouse button copied .
Edit topic
Application
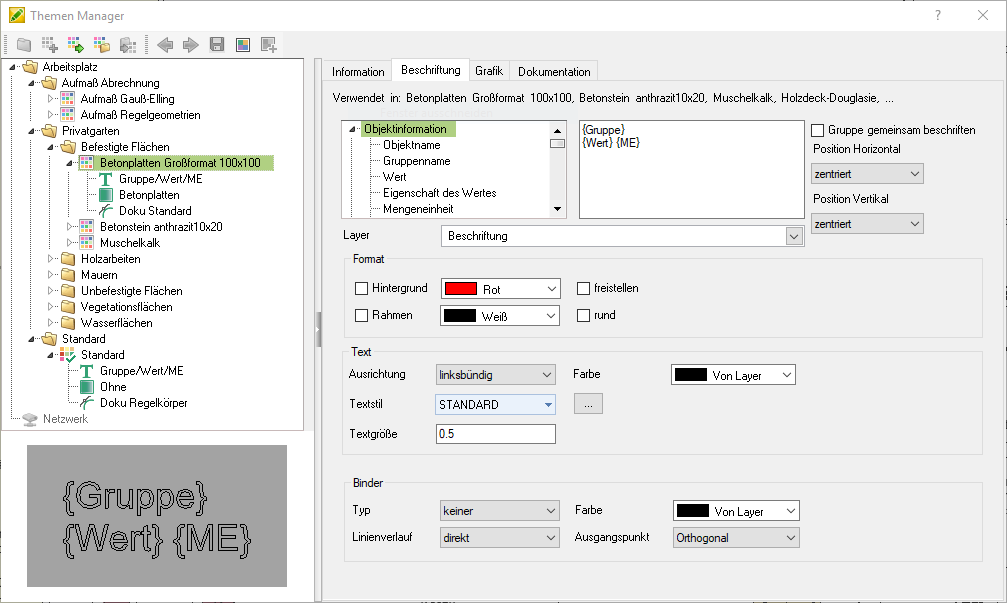
Labeling tab
Free text can be entered in the text field and / or with a Variable be filled. The property of the object is then used instead of the variable in the drawing. The variables Value and unit use the properties depending on the object type. This means that if both areas and routes are in a group, areas are automatically labeled with m² and routes with m.
There are others for the variables Special features of the labeling (please refer Label).
In the lower area you can define precise settings for the text layout.
The label created uses the currently set text style (command: STIL).
Graphics tab
To use graphics, you can use the field Graphic assignments Hatches, fills, symbol lines and image hatches can be added.
It is also possible to drag the graphics directly from the library (Quick Manager) into the Graphics Assignments area (using drag & drop). Then the existing properties are used as far as possible.
| | hatching | You can one Pattern from the hatch file acadiso.pat choose. |
| | filling | In addition to Solid with one color, can also be one color gradient with a second color and a corresponding gradient. |
| | Symbol line | You can choose a pattern from the list of symbol lines. This list can be supplemented with your own symbol lines (see Symbol line). |
| | Line type | Select a pattern from the list of loaded line types. In the dialog box Select line type (Layer Properties Manager), additional line types can be loaded. |
| | Image hatching | After selecting the picture you can factor and Shop using the button [Demonstrate] To be defined. Activate the option if the image is to be assigned to a segment and not to an area linear. |

Documentation tab
You will find all the information you need for verifiable and REB-compliant documentation here.

Use individual themes
All defined individual topics can be displayed in the subtree and their properties for labeling, graphics and documentation can be edited.
Open and close the subtree with the function Subtree  .
.
Changes made there in individual topics already used are applied directly to the topics.
In the subtree you can also do a Create a new single topic  and customize.
To apply it to a topic, select the single topic in the subtree and drag it onto the single topic in the desired topic. Properties and names are taken over directly.

Individual topics that are not used can be viewed in the subtree directly on the object using the right mouse button Delete. Or you can use the function on the higher-level node Delete unused.
Within a topic, you can right-click a Isolate single topic. This creates a copy of the selected individual topic both in the topic itself and in the subtree.