Table of Contents
Dunning text management
Description
In the program area Dunning There are a total of five dunning levels available:
- Remembrance
- Dunning level 1, 2, 3
- Internal reminder
For each dunning level, you determine after how many days a due but not yet paid invoice should receive the next dunning level and which dunning fees are added.
Dunning levels can be selected for the output of payment reminders and reminders in batch printing.
dunning
To define the dunning levels, open the menu Program data the selection menu Company and select the entry Company data.

Select the entry in the directory tree Dunning text management the desired dunning level.

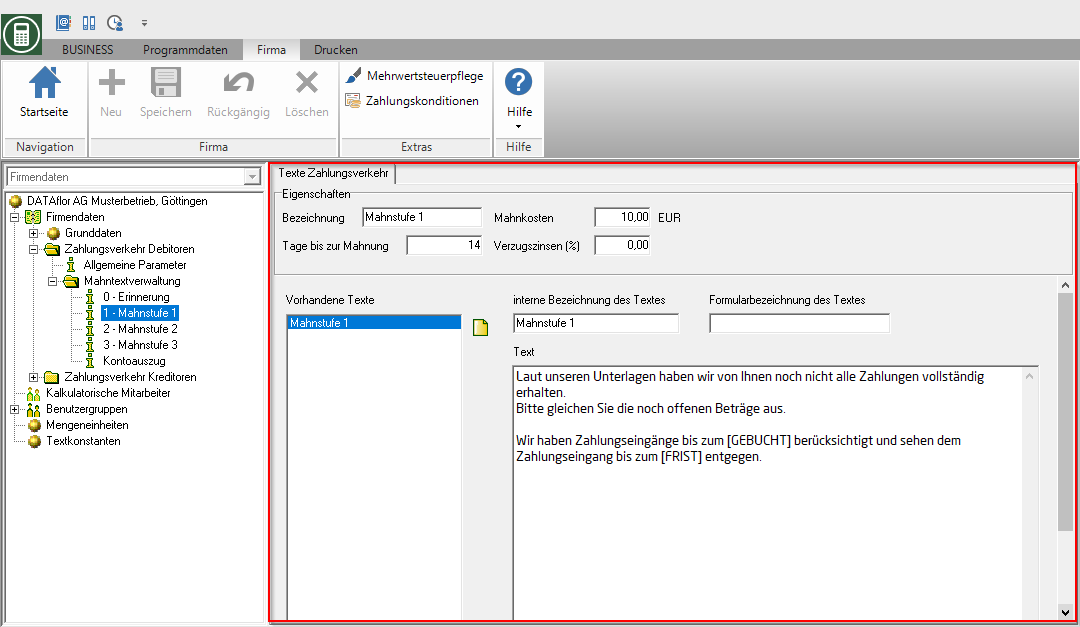
In the right half of the screen, you define the following properties for each dunning level:
| Data field | Description |
|---|---|
| designation | Enter the designation that is used in the directory tree on the left. |
| Days until the reminder | Specify how many days after the invoice is due or after the last payment reminder/dunning has been created, the open invoice will be dunned for the next time. |
The program checks whether the terms of payment plus days until the reminder have been met. Only then will the reminder be printed.
For example: If you have defined a payment term of 30 days in the payment conditions and 14 days for the dunning level until the dunning, the invoice will only be dunned or reminded after 30 plus 14 days after the invoice date.
After a dunning level 3 reminder has been printed out, the outstanding invoice receives the last dunning level Internal reminder.
The number Days until the internal reminder put in the Parameters for payment transactions debtors firmly.
Reminder texts
For every Dunning level you can predefine several dunning texts. In the Customer master data then determine individually for each client which reminder text is used for them.
To define reminder texts, open the menu Program data the selection menu Company and select the entry Company data.

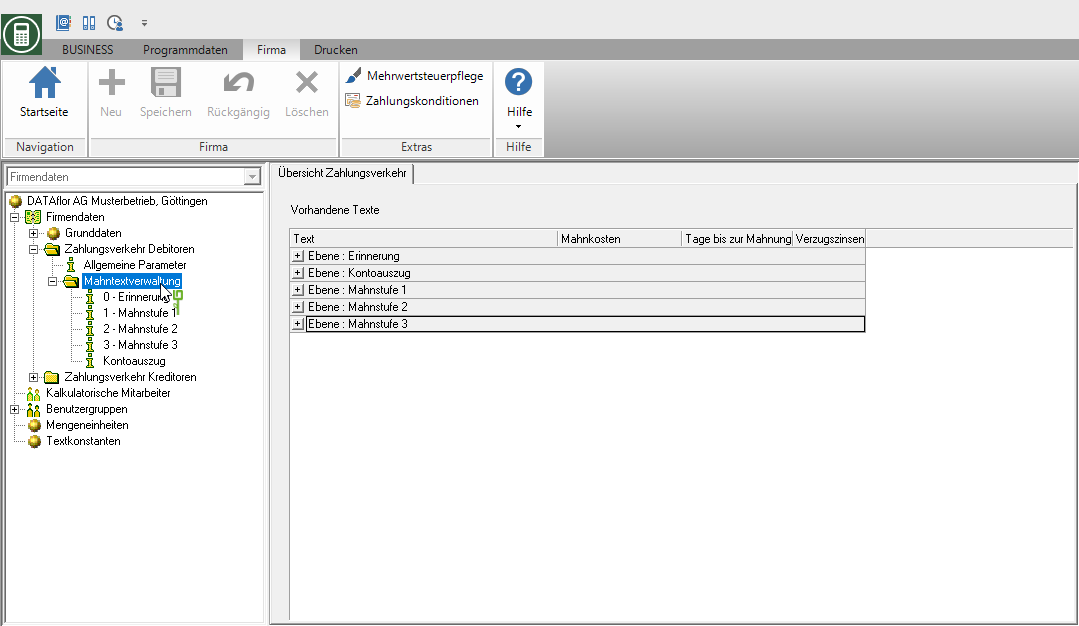
Select the entry in the directory tree Dunning text management. On the right side of the screen you will get an overview of the existing dunning levels.

In the directory tree, mark the dunning level for which you want to enter or edit a dunning text. You can store several texts for each dunning level or account statement. To add a new text to a dunning level, click on the data field Existing texts on  .
.

Make the following settings on the right side of the screen:
| Data field | Description |
|---|---|
| Internal description of the text | Enter a designation that distinguishes this text from any texts that may already have been saved, eg corporate customer reminder, private customer reminder. However, this is only necessary if you want these distinctions. |
| Form description of the text | Enter a heading for your form here. This heading is also printed as the name of the form. |
| text | Here you can now store your own individual text for the reminder, reminder and the account statement. |
Use in your texts Text variables, the program automatically inserts stored data and information.
The text variable [OR set-up] Positions the OP list in the reminder text so that texts can be stored that are printed on the reminder before or after the overview of the reminded invoices.
Confirm your entries by clicking on  in the menu.
collection expenses
Je Dunning level you can set a reminder fee that is automatically added to the total of the open items when payment reminders and reminders are printed out. For example, you can use the reminder fee to cover the costs that you have incurred as a result of the default in payment and for the creation of the reminder.
To define the dunning costs, open the menu Program data the selection menu Company and select the entry Company data.

Select the entry in the directory tree Dunning text management the desired dunning level. In the right half of the screen, enter the amount of the dunning fee for each dunning level.

The amount is shown on the reminder as follows.

late payment interest
For the output of Payment reminders and reminders you can automatically calculate default interest.
You store the percentage of interest on arrears used for each period in the financial administration of your DATAflor BUSINESS.
Open Financial Management by clicking  in the menu Program data.

Select the entry in the financial management directory tree late payment interest and click on  in the menu.

In the group late payment interest a new entry is added and the tab on the right-hand side of the screen late payment interest displayed. Enter the interest rate and specify the date from which the interest rate is valid.

Save the entries made by clicking on  in the menu.
The interest rate is now in Reminder print for the calculation of default interest.

