Table of Contents
Data import
Description
In data import you can Addresses from .CSV- Or . TXT-Import files. The imported data can be the Address manager then added individually or collectively. Likewise you can existing Addresses update with newly imported data.
Before you import large amounts of data, you should do a complete Data Backup from DATAflor BUSINESS carry out. If necessary, carry out the import as a test with three to four Addresses before you import a large quantity. This makes it easier for you to check the result in the address manager and adjust the import file if necessary.
He is also happy to take on this service DATAflor Service for you. Write to us at service @dataflor.de.
Data preparation
In Microsoft Excel you can very easily check all data fields and also identify gaps in the entry. If necessary, add missing address content, correct incorrect ones and remove those that are no longer required Addresses From the table. Excel offers you numerous program functions for this purpose.
Ideally, use the same field names as in the Excel table BUSINESS (please refer Importable data). Additionally recognizes BUSINESS for the automatic field mapping further names.
The address fields for which no data is imported from the CSV file are automatically filled with the data from the Default are defined. For example, define before Addresses-Import how display names and letter salutations are put together, and save yourself the subsequent rework of the individual Addresses. A Addresses with different defaults To import, prepare your address data in several tables, e.g. for
- the setting of different target groups and / or demand status
- the distinction of Addresses by address type (person/company)
- etc.
Importable data
The following address data can be imported:
| Feld | Note |
|---|---|
| Address designation | |
| Title | - The data is entered in the fields of the same name on the tab Details > Address in the category Name adopted. |
| Title | |
| First Name | |
| Other Names | |
| Name | |
| name suffix | |
| Feature | |
| Addresses | |
| Business address | - In BUSINESS three addresses can be stored for each address. The data is entered in the fields of the same name on the tab Details > Address in the category Address adopted. - The address marked as the postal address will be used for printouts (e.g. letter, offer, invoice) to this address. Before importing the CSV file, select in the Default, which of the three addresses for all imported Addresses is automatically marked as a postal address. |
| Street / P.O. Box (business) | |
| Postcode (business) | |
| Location (business) | |
| Region (business) | |
| Country (business) | |
| Private address | |
| Street / P.O. Box (private) | |
| ZIP (private) | |
| Place (private) | |
| Region (private) | |
| Country (private) | |
| Further address | |
| Street / P.O. Box (others) | |
| ZIP (more) | |
| Location (more) | |
| Region (other) | |
| Country (other) | |
| Communication data | |
| Business phone | The data is entered in the fields of the same name on the tab Details > Address in the categories Phone and Internet adopted. |
| Phone 2 (business) | |
| Fax (business) | |
| Smartphone | |
| Switchboard company | |
| Callback number | |
| car phone | |
| Phone Number | |
| Telephone 2 (private) | |
| Fax (private) | |
| Phone (others) | |
| Telephone 2 (more) | |
| Fax (more) | |
| ISDN number | |
| Primary phone number | |
| Radiotelephone | |
| Homepage (business) | |
| Homepage (private) | |
| Homepage (more) | |
| Website | |
| Email 1 | |
| Email 2 | |
| Email 3 | |
| IM address | |
| Further information | |
| Assistent | The data is in the field of the same name on the tab Details > Address in the category Professional details adopted. |
| Bank | |
| Name of bank details | The data is used on the tab Details > Banks created a bank account. |
| BIC | |
| IBAN | |
| Accounts receivable data | |
| Customer no. | - The data is in the field of the same name on the tab Details > Clients adopted. - In addition, the address is automatically the property Clients assigned. - Before importing, make sure that the customer numbers in the CSV file correspond to the number of digits in the Financial management is defined for the personal account length. |
| Terms of payment Address Designation | - There is no corresponding one in the company data Terms of payment it is created automatically. They are created in the order and then displayed in the selection lists in which they are used for the first time in the CSV file. If necessary, influence this order by sorting the data records in the Excel table before import. - In addition, the payment terms of the address are shown on the tab Details > Address assigned as a default setting for printing quotations / invoices. - If the CSV file does not contain any designations for the terms of payment, they are generated automatically, e.g. 10 days 3%, 18 days 2,5%, 30 days net. |
| Terms of payment address discount 1 days | |
| Terms of payment address discount 1 percent | |
| Terms of payment address discount 2 days | |
| Terms of payment address discount 2 percent | |
| Payment terms address value days | |
| Terms of payment Address payment term | |
| Accounts payable data | |
Vendor no. | - The number is in the field of the same name on the tab Details > Contractor / supplier adopted. - In addition, the address is automatically the property contractor assigned. - Before importing, make sure that the vendor numbers in the CSV file correspond to the number of digits in the Financial management is defined for the personal account length. |
| customer number | The number is in the field of the same name on the tab Details > Contractor / supplier adopted. |
| Terms of payment Vendor name | - There is no corresponding one in the company data Terms of payment it is created automatically. They are created in the order and then displayed in the selection lists in which they are used for the first time in the CSV file. If necessary, influence this order by sorting the data records in the Excel table before import. - In addition, the payment terms of the address are shown on the tab Details > Contractor / supplier assigned as a default for incoming invoices. - If the CSV file does not contain any designations for the terms of payment, they are generated automatically, e.g. 10 days 3%, 18 days 2,5%, 30 days net. - The terms of payment for vendors are only imported in connection with the import of the vendor number |
| Terms of payment creditor discount 1 days | |
| Terms of payment creditor discount 1 percent | |
| Terms of payment creditor discount 2 days | |
| Terms of payment creditor discount 2 percent | |
| Terms of payment vendor value days | |
| Terms of payment Vendor payment term | |
Application
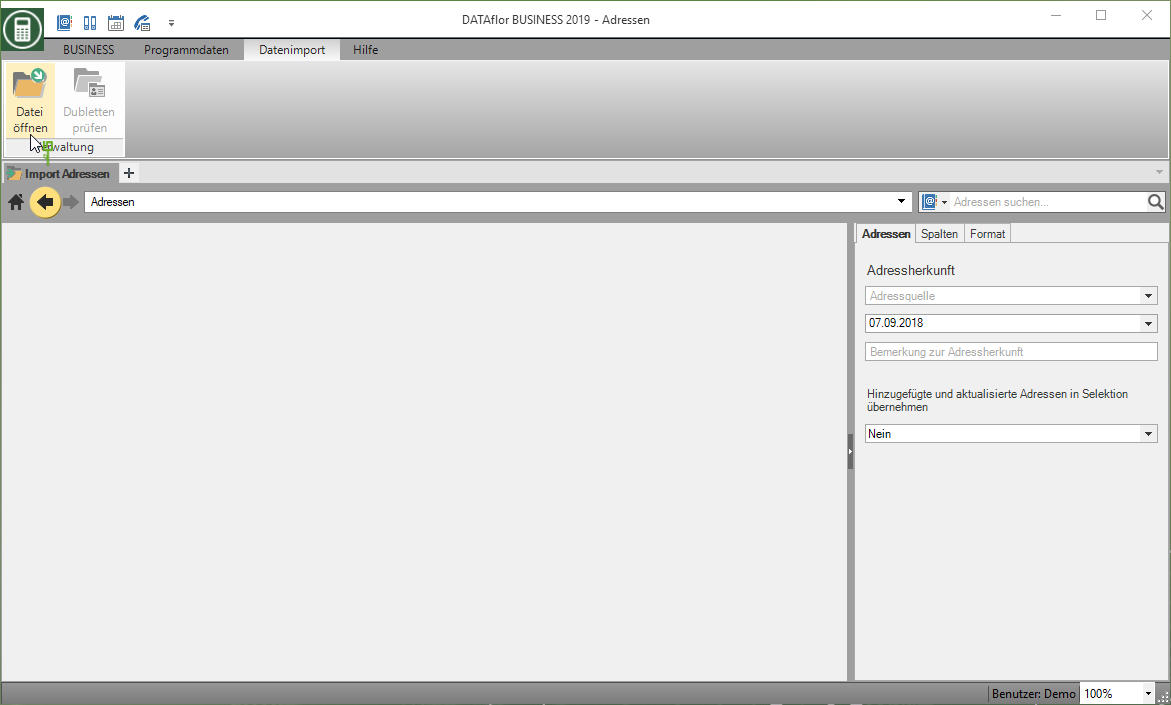
Start the Addresses-Import by clicking  in the menu Addresses.

The Addresses-Import is started. click on  to select a file.
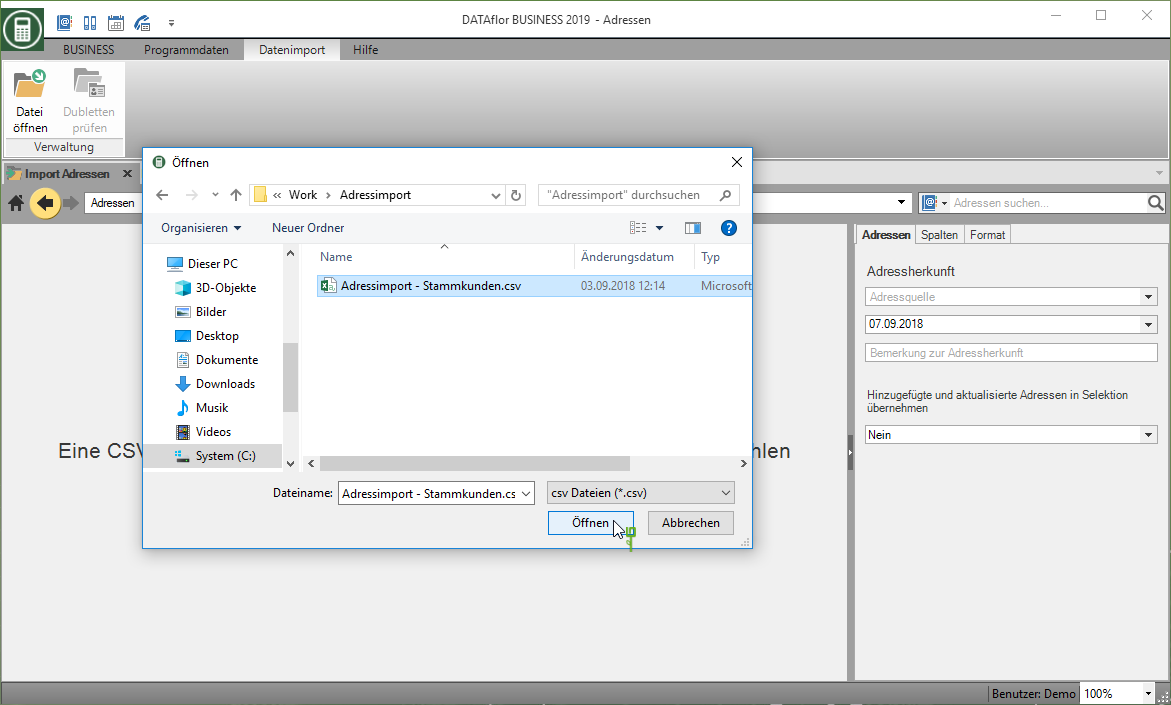
The Windows file selection dialog opens. Select the desired file and confirm with [To open].
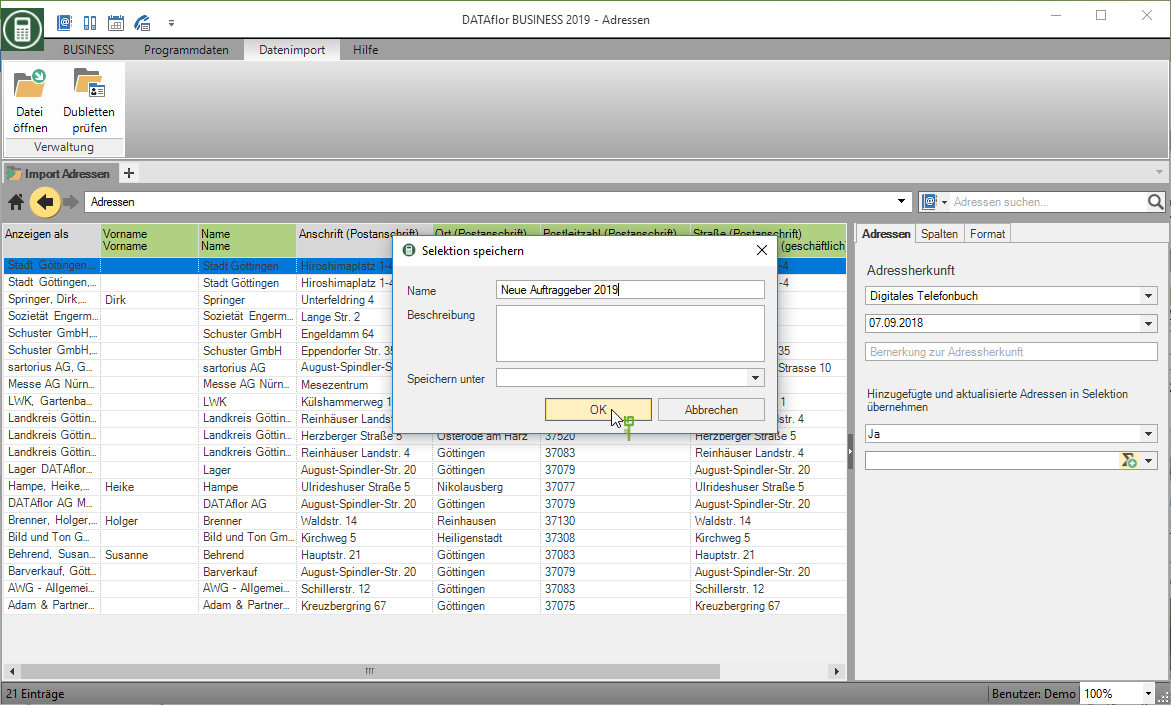
The imported data is displayed.
- In the right section of the screen, enter the Address origin at. You can choose this from the selection list or enter it freely. This field is a required field.
- Date and comment can be given as required.
- You can also use the Addresses as a selection to save.
- You can assign one or more identifiers to an address, which will help you to call up various information about suppliers or customers as quickly and individually as possible. Share yours Addresses before the import into corresponding groups and create a selection during the import. You can then use these selections in the Multiple machining all Addresses assign the corresponding identifier or several identifiers to a group in one step.
- During the Multiple machining there are also other functions available for a selection of Addresses eg address data such as target group, demand status and region, information on data protection, etc.
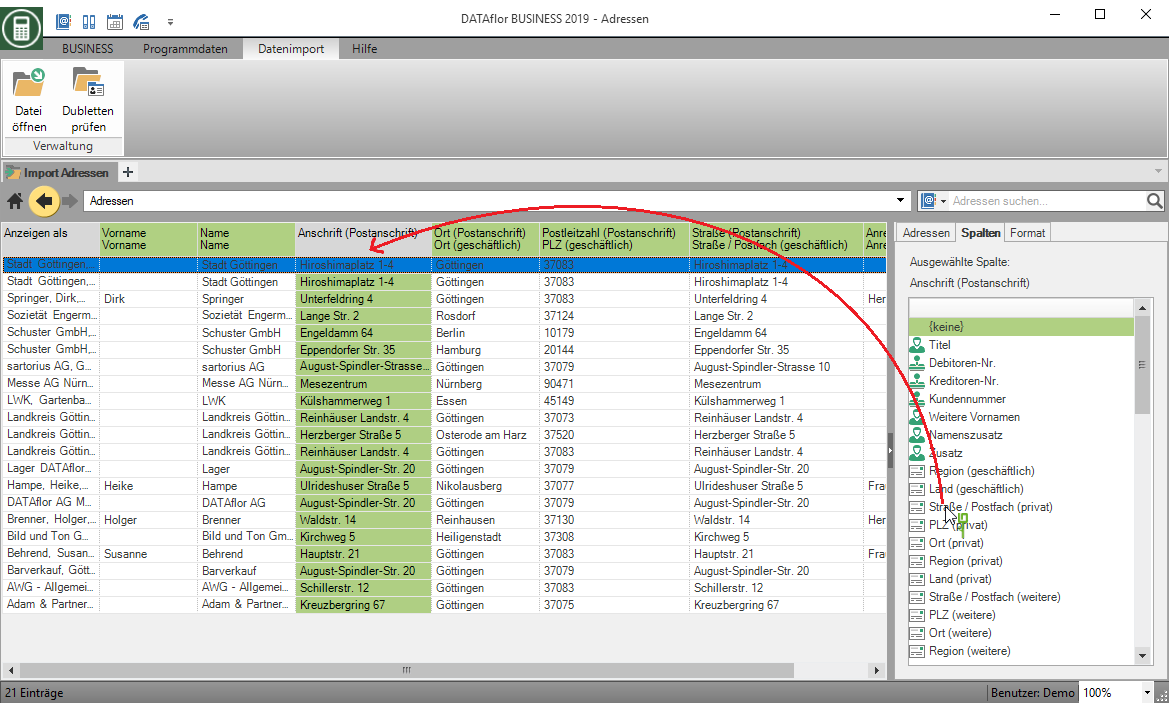
On the next tab you arrange the Split of the imported data to the fields in the address manager.
- Alternatively, you can also assign the columns using drag & drop by selecting the field entry from the tab Column Drag to the corresponding column header in the table.
- Do the same with all columns that you want to import and that are not automatically assigned.
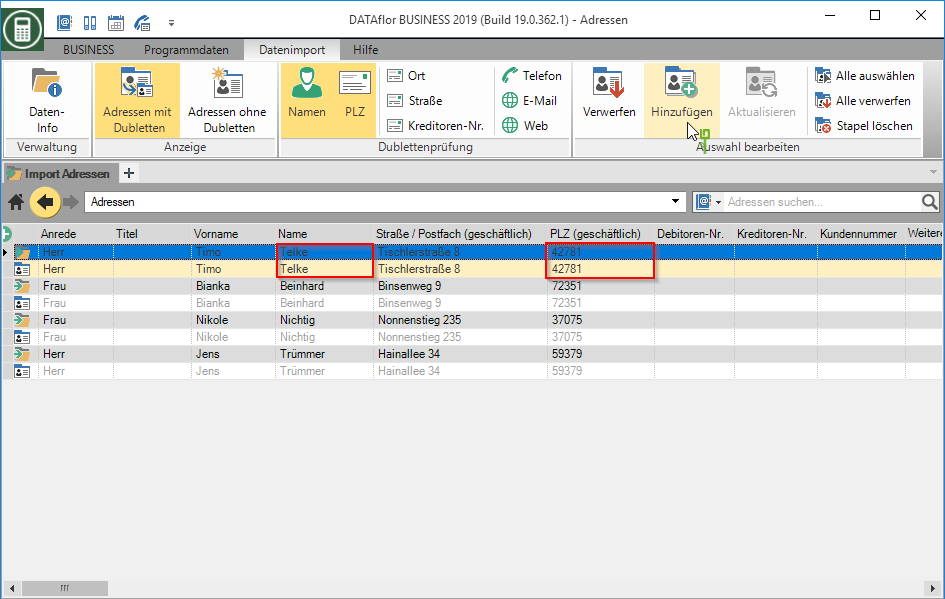
click on  to check in the next step whether the Addresses already exist in the database. It will be the first Addresses with duplicates displayed.
- The preset duplicate check checks for duplications in the name fields and the zip code. You can find these and other test options in the menu in the group duplicate check. By clicking on the respective option, this is also checked. Another click deselects the exam.
- Work the imported Addresses off by going to the menu in the group Edit selection the function Add or discard choose.
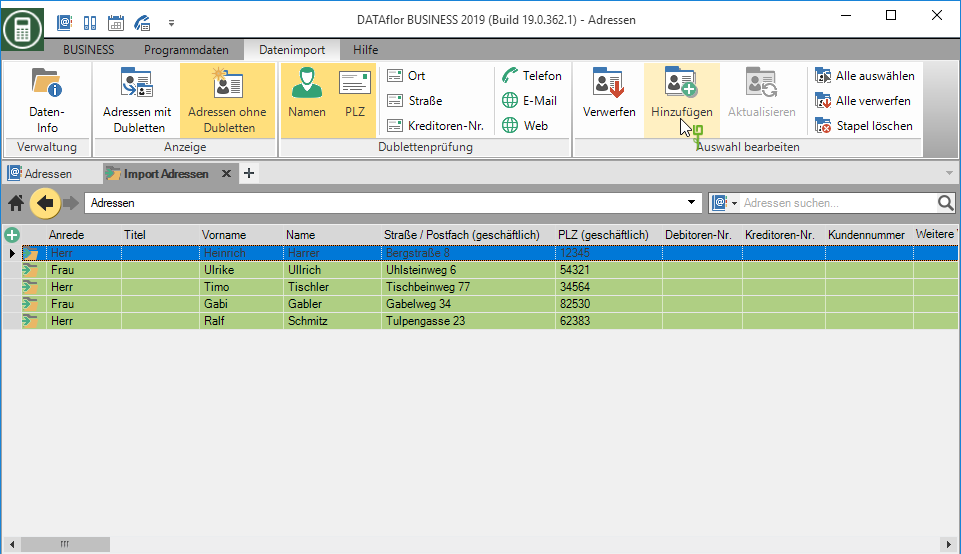
If Addresses are in your import batch without duplicates, this will be displayed to you after the duplicates have been stored. Choose in the menu  Addresses without duplicates and work off the stack. You can also work through the batches in different order.
Features
 | Data info | Displays information about the imported file such as file name, storage location and data origin. |
 | discard | Discards the marked ones Addresses and thus removes them from the import stack. This Addresses are therefore not included in your address management. |
 | Add | Adds the marked Addresses added to address management. This Addresses then you are in BUSINESS is available for storage, management and analysis. |
 | Update | Updates the selected ones Addresses in the address management with the information from the imported duplicates. The existing information is completely overwritten with the new data from the import. |
 | Select All | Selects all shown Addresses for editing. |
 | Discard all | Discards all displayed Addresses and thus removes them from the import stack. |
 | Delete batch | Deletes the entire import batch and thus all imported data. This affects all data in all views. The current import is thus completed and released for a new import. |


