Table of Contents
Data import
Description
In the data import you can choose addresses .CSV- Or . TXT-Import files. The imported data can be the Address manager then added individually or collectively. You can also update existing addresses with newly imported data.
Application
- click on
 to select a file.
 - The selection dialog opens.
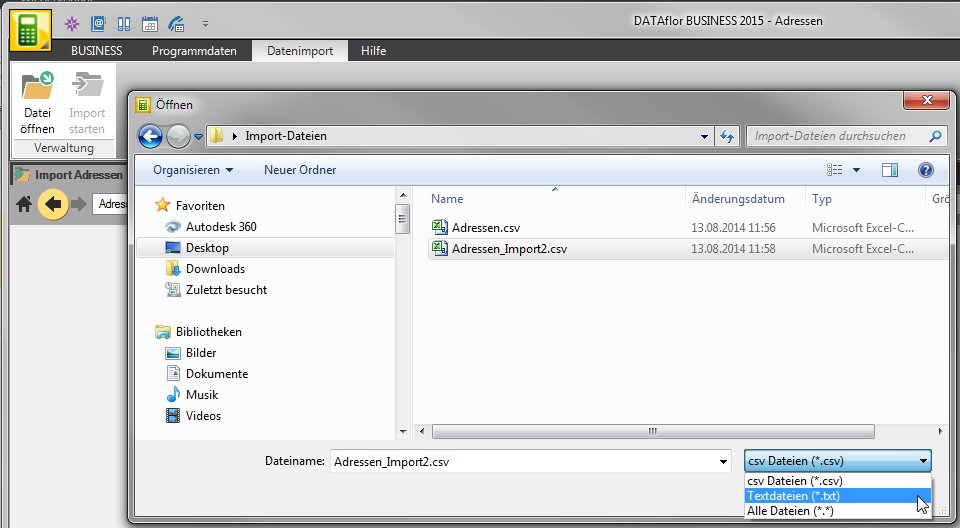
- Select the desired file and confirm with [OK].
- The imported data is displayed.
- In the right section of the screen, enter the Address origin
The Address source you can choose from the selection list or enter it freely. This field is a Required.
Date and comment can be given as required.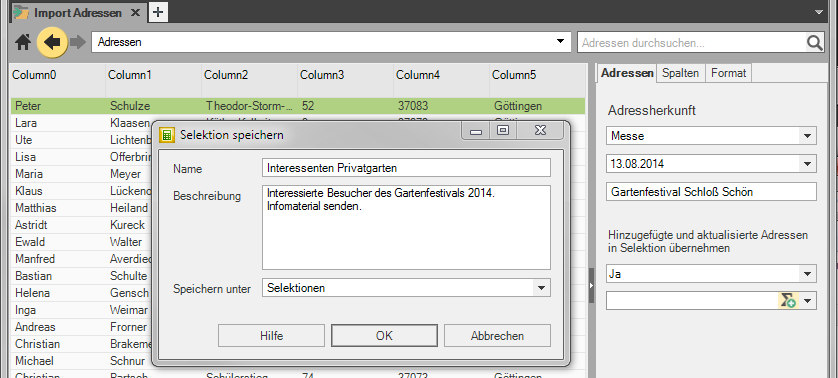
- On the next tab you arrange the Split of the imported data to the fields in the address manager.
For example: In the table, click on the column header under which the first names are listed. The column is highlighted in green.
Then click on the entry in the column selection . The column is assigned.
Do the same for all columns that you want to import and that were not automatically assigned.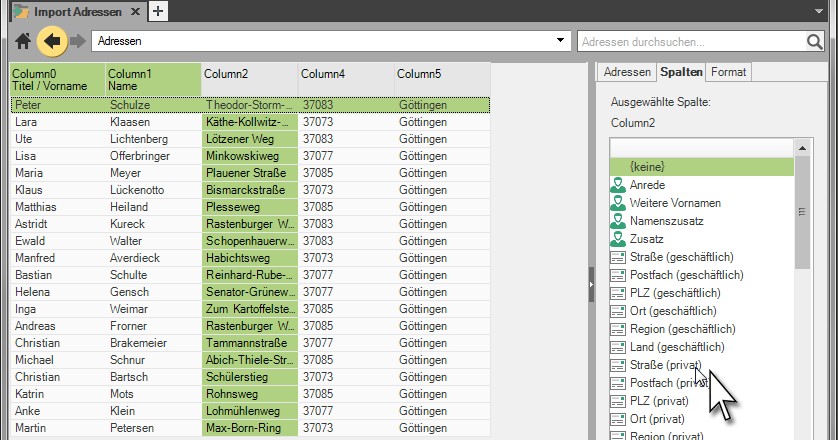
- click on
 to start the import.
 - It will be the addresses first with duplicates displayed. The preset duplicate check checks for duplications in the name fields and the zip code. You can find these and other test options in the menu in the group duplicate check. By clicking on the respective option, this is also checked. Another click deselects the exam.
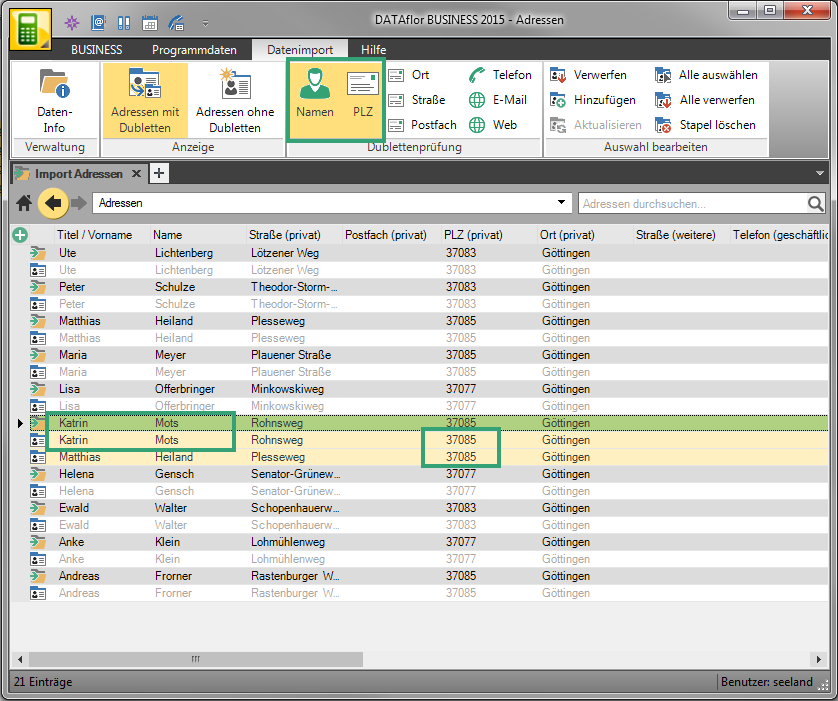
- Columns with show the new imported addresses.
 at the beginning of the column shows that the address is already in the address manager is present.
 - Process the imported addresses by going to the menu in the group Edit selection the function Add or discard choose.
- If there are addresses without duplicates in your import batch, this will be indicated to you after the duplicates have been stored.
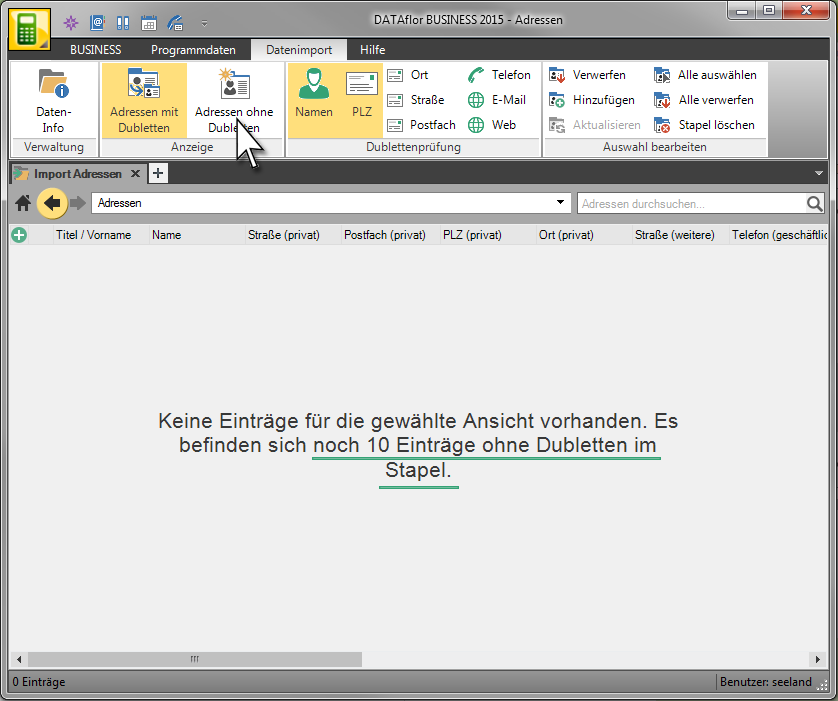
- Select in the menu
 Addresses without duplicates and work off the stack. You can also process the batch in different order.
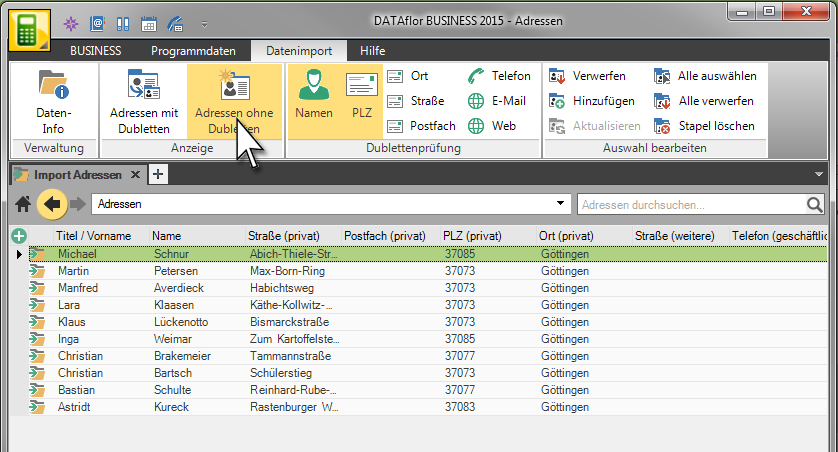
If your address data contains several additional fields, you can use a formula to enter both fields into the from BUSINESS import the specified additional field. To do this, open your Excel table and enter the following formula in a separate column.
Addition 1 = column A; Addition 2 = column B;

The cell contents of columns A and B are now displayed in column C with a line break. in the BUSINESS the additions are now imported with the specified line break. You then only have to make the assignment, as described above under point 6.
Features
 | Data info | Displays information about the imported file such as file name, storage location and data origin. |
 | discard | Discards the marked addresses and thus removes them from the import batch. These addresses are therefore not included in your address management. |
 | Add | Adds the marked addresses to the address management. These addresses are then available to you in BUSINESS is available for storage, management and analysis. |
 | Update | Updates the selected addresses in the address management with the information from the imported duplicates. The existing information is completely overwritten with the new data from the import. |
 | Select All | Selects all displayed addresses for editing. |
 | Discard all | Discards all displayed addresses and thus removes them from the import batch. |
 | Delete batch | Deletes the entire import batch and thus all imported data. This affects all data in all views. The current import is thus completed and released for a new import. |