Table of Contents
Print preview menu
Description
In the print preview, each printout can be checked again on the screen via the Functions of the menu bar shown differently and various settings in the Print options to be hit.
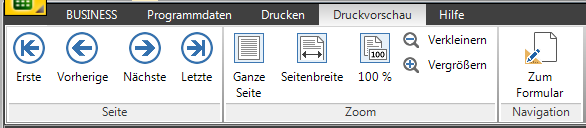
Functions in the menu
 | First | Preview the first page of your document. |
 | Previous | Preview the previous page of your document. |
 | Next | Preview the next page of your document. |
 | Last | Preview the last page of your document. |
 | Full Page | Displays the entire page in height and width in the preview. |
 | Page width | Scales the page in the preview to the entire width of the page. |
 | Present in several = 100% | Displays the document in the preview in its original size. |
 | Zoom out | Reduces the view of the document in the preview. |
 | Enlarge | Reduces the view of the document in the preview. |
 | To the form | Switches to form management. There you can edit a print variant in the designer. |
Print options
In the top control you can choose how you want to output the document. The option is standard Print elected. A click on the button starts printing. There is also the possibility of the document as a fax or as email to send.
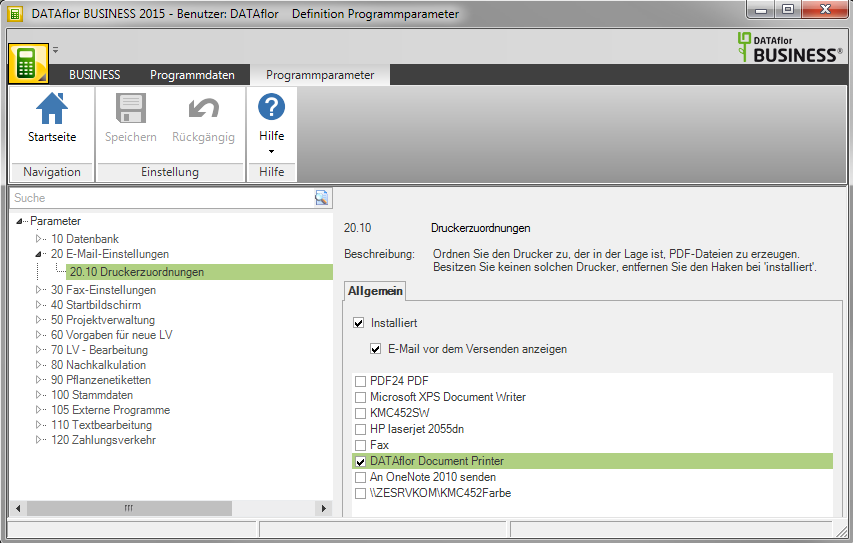
For output as e-mail, you have to use the Program parameters 20.10 Printer assignments select a printer that will be used to create PDF files for sending e-mails. Of the DATAflor Document printer is from BUSINESS installed by default and can be selected here.
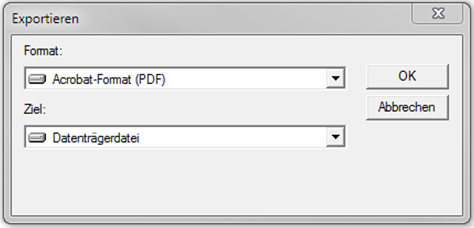
As further options, you can use the document save as a file. After confirming the option, a dialog for selecting the document to be exported opens. With confirmation by [OK] the export starts.
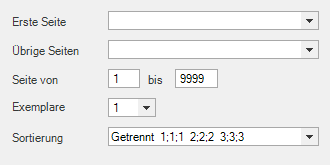
If the option Print is selected, you have the option of several in one step copies to create a document. Just click on to create a copy  . Separate settings for the printer, the print settings and the print variant can be made for the document and each subsequent copy. If there are more than three copies, small arrows appear that you can use to navigate through your copies.

Print settings
By clicking the button Print settings the area for further print settings opens. Clicking the button again hides the area again.
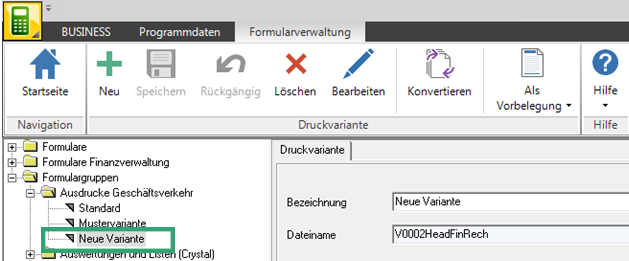
Print variants
You can use a Pressure variant to adjust. Print variants can be found in the form management under Program data> Forms> Form groups> Business transactions printouts
Include in building file
Is the status button Include in building file is selected (highlighted in yellow), the document is stored in the construction file of the current address. The dialog for storing the document opens with confirmation of the print. Only the document and not the copies are stored.
Document header
By clicking the button Document header the area for further print settings opens. The entries made here will be used after the takeover  transferred to the document header. Clicking the button again hides the input area.

Document settings
letters
In the Document settings for letters header and footer texts can be inserted and edited. A click on the button opens the editing area. Here header and footer text can be shown and hidden using the plus symbols.
By removing a text using the plus symbols, this not deleted but only in the document hidden.
With a click in the text fields Text editing menu active. You can use this to edit the text as usual and quick parts Deploy and Lay down. Width of the text in the document can be set using the slider on the right edge of the text field (A4: min. 5 cm; max. 17 cm).
To enlarge the text fields and to be able to edit a lot of text more clearly, just click on  and the text field becomes larger. Another click on
  reduces the text field again.
| | Apply changes |
| | Enlarge text field |
| | Shrink text field |
Lists
In the Document settings for lists you can adapt the form designation and format the list according to your requirements. Please note the information on program operation.
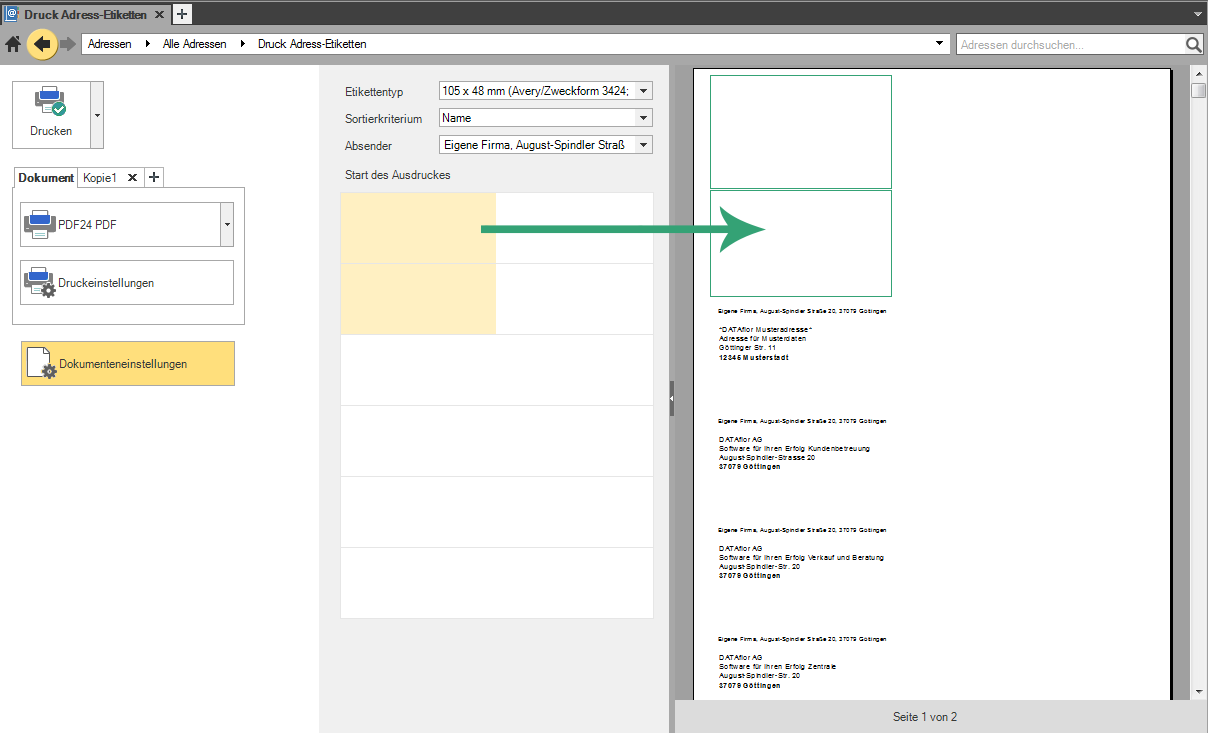
Address labels
In the Document provision for address labels can you do that Label type choose that Min and of the address and determine whether the Sender should be specified with. You can also use the Start of the printout Select to reprint free labels on label paper that has already been used.
To do this, simply select the start of printing in the preview by clicking on the scheme. The areas with a yellow background are not printed. The print preview is automatically adapted to your changes.