Table of Contents
GIS
Description
GIS enables the continuous processing of drawing and analytical tasks in one system. Here, drawing objects with the associated object data table can be switched between the DATAflor CAD and AutoCAD Map are exchanged. GIS data from many systems can be processed together with AutoCAD Map.
Prerequisite for the import and Export of GIS data is AutoCAD Map as the basic system.
Import of GIS data
With the GIS function, you are able to convert GIS data that can be imported into AutodCAD Map into DATAflor Import CAD. In the first step, a function of AutodCAD Map is used. The second step is the actual data import into the Object manager. Objects with a corresponding data table are required for this.
You will get the best results with data in the so-called Shape format (ArcView Shape file * .SHP). If possible, please request the data in this format.
Preparation
DATAflor CAD needed objectswhose properties are defined in a data table.
When you receive GIS data, it can often contain a great deal of information that you will not need for the current planning, but that can generate very large amounts of data when imported. For this reason it is advisable to select properties.
In the following application description, the import of an ESRI Shape (*.SHP) File explained.
- Please make a backup copy of the data so that you can import data later that you do not need at the moment.
- Start a spreadsheet (e.g. Microsoft Excel) and open the DBF-File that resides within your GIS data.
- Now you can see the various properties of the objects in the columns (A / B / C /…). Delete the columns whose information you do not need (in the picture for example column B = COUNT and column C = AVE_AREA).
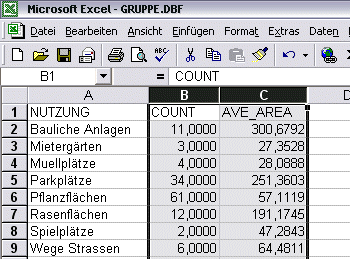
Also replace umlauts, special characters and spaces (public playgrounds ⇒ public_spielplaetze).
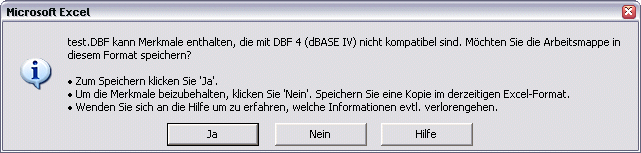
- Save the table again as DBF-File, confirm the following query (Excel 2000) with [Yes] and exit the spreadsheet.
- The data are now prepared and AutoCAD Map can be started.
Import into AutoCAD Map
There are 2 different import commands available within AutoCAD Map that can be used to import GIS data. These are different program versions of the interface, which have different capabilities. The command is current MAPIMPORT. The command MAPIMPORT4 still comes from the AutoCAD Map 2000 to 2002 version.
If you have problems importing the data with MAPIMPORT, try the MAPIMPORT4 command.
The following application example is based on AutoCAD Map 3D 2006 with the command MAPIMPORT. There may be differences in other versions of AutoCAD Map.
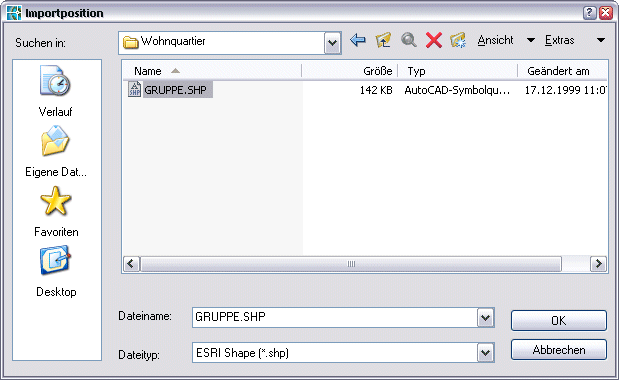
- Enter the command MAPIMPORT on. After you have called the function, the following dialog appears. Set the file format to ESRI Shape (* .SHP) around.
- Select the shape file you want, then click [OK].
- The settings for the import must be made in the next dialog.
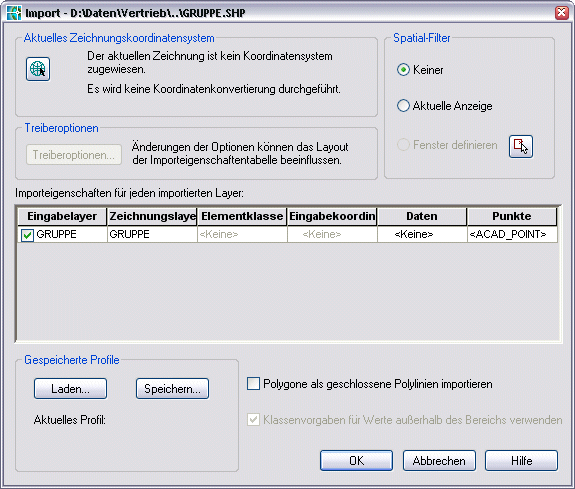
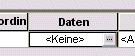
- First select the data information that is to be imported. This is done by clicking in the table field of the column data and then on [...].
- In the dialog for the attribute data is the option Create object data to use. This creates the area in the middle object data active and you can select the required information from the desired object data table.
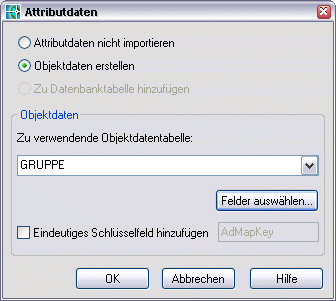
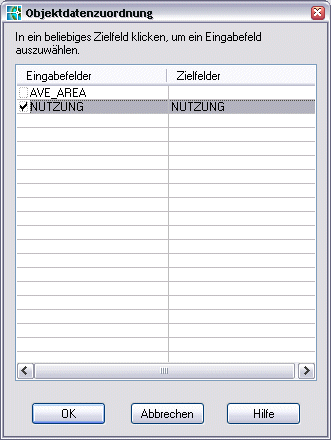
- With [Select fields ...] all information is listed. Select the entries you want.
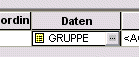
- After the dialog for data selection has ended, the field entry in the column changes data from on the name of the object data table.
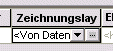
- Furthermore, the drawing elements can now also be stored on the correct layers. This is done by clicking in the table field of the column Drawing layer.
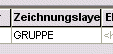
- Choose one Data field out. Based on this data field, new layers are created on which the drawing elements are then sorted.
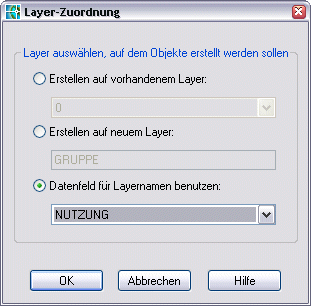
- After ending the dialog for the Layer assignment the field entry in the column changes Drawing layer on .
- After closing the dialog with [OK] the data is read.
Enable the option too Import polygons as a closed polyline. This saves some work steps later.
With the current MAPIMPORT command Umlauts not imported. The command MAPIMPORT4 should be used here.
Import into the object manager
The import of the data in DATAflor CAD is very simple.
- Start the Object manager and call from the menu Bulk> from AutoCAD Map .
- You will now be asked to select the objects that you want to import. So you can sub-areas or by entering ANY capture all objects in the drawing. End the entry with the right mouse button or the Enter-Button.
- In the next dialog, the object data that could be derived from the drawing elements are displayed. Here you can select which data you want to import (which object data table, if several are available, and which object information). You can also define how this data should be derived.
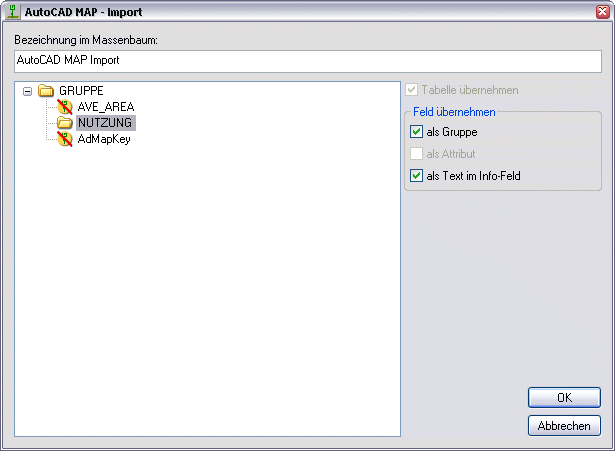
- All check boxes are in the area Apply field deactivated, the corresponding information is not adopted. This is marked with a red line.
- After confirming the dialogue with [OK] the new mass tree appears in the Object manager.
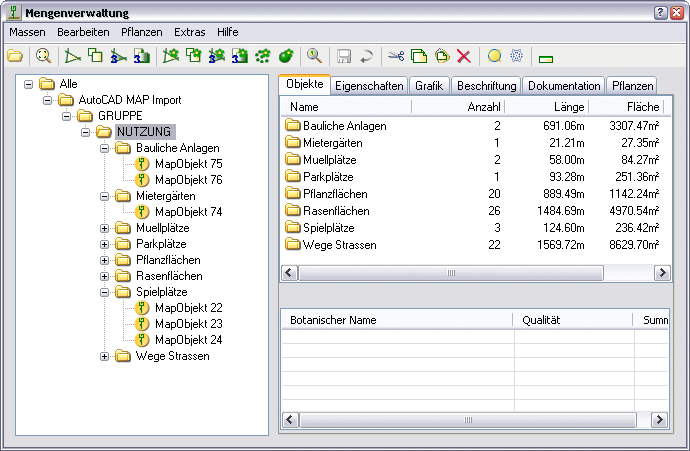
The advantage of this import is that several pieces of information can be read in on one object.
Alternative, without creating object information: Provided that the data is sorted according to Drawing layers has taken place, a completely normal acquisition can be carried out as a drawing object. Since the objects on Layers with the appropriate designation, a corresponding mass tree structure can be built from this.
An object with multiple attributes
Several groups are created within the object manager (e.g. use, plant community, biotope value, etc.). If an object that is to be assigned to several groups is now recorded again within the second group, the name of the group is used not as a Object data field exported.
So that everyone Attribute can also be correctly exported to an object later, the object must be in the mass tree copied .
For example:
An object is within the group use detected. Then the object is within the group Biotope value captured a second time. After this Export after AutoCAD Map no value appears for the group Biotope value. However, if the object is copied in the mass tree, both attributes are listed.
Export of GIS data
All objects created with the DATAflor CAD object managers can be exported and transferred to other GIS systems via the AutoCAD Map interfaces. Assigned properties and the mass tree structure are stored as object properties in an object data table. As with data import, two steps must be carried out for this. The handover of the in DATAflor CAD-generated data is just as easy as data import.
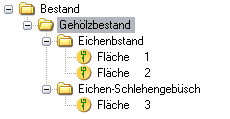
Correct tree structure for the Export
The AutoCAD Map object data fields are filled with values via the group membership, whereby the last group in the hierarchy Value indicates and the parent group can designation of the object data field.
The Export must then be carried out from the next higher level.
For example:
Areas 1 and 2 are to be exported to AutoCAD Map. The factual information Oak stock to be handed over. As can be seen from the graphic, an object data field with the designation Woody stock created and the objects receive the value Oak stock. The Export must be on the plane File otherwise no values can be entered.
Export from the object manager
Create data for other GIS systems.
- Call the Object manager and mark the group whose subgroups you want to export.
- Then choose from the menu Bulk> to AutoCAD Map.
- In the dialog you can enter a table name for the object data table in the top line, the DATAflor CAD creates. You will also get an overview with an example for each hierarchy of how the data is created and which values are assigned.

The overview can be opened with the button [To press] issued. - Will the dialogue with [OK] confirmed, the data is transferred to AutoCAD Map. A new layer is automatically created with the designation of the table name entered. This layer contains copies of the objects from the Mass treeto which the corresponding object data was written. The objects that are managed in the mass tree are not changed!
The new layer should be isolated for output from AutoCAD Map.
Export from AutoCAD Map
Within AutoCAD Map there are 2 different commands for the Export with which GIS data can be exported. These are different program interfaces that have different capabilities. The command is current MAPEXPORT. The command MAPEXPORT4 still comes from the AutoCAD Map 2000 to 2002 version.
Should you have problems with Export of the data with MAPEXPORT, also try the MAPEXPORT4 command.
The following application example is based on AutoCAD Map 3D 2006 with the command MAPEXPORT. There may be differences in other versions of AutoCAD Map.
- Enter the command MAPEXPORT .
- After you have called the function, the following dialog appears.
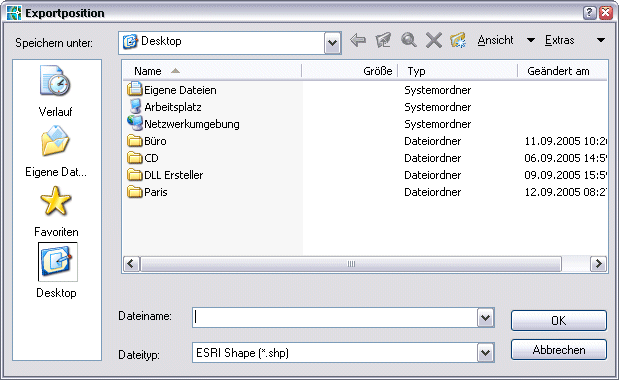
Set the file format to ESRI Shape (* .shp) around. - Select the desired directory and enter a name. Then click on [OK].
- The settings for the Export hold true. On the tab selection set for that Export of surfaces the Object type polygon .
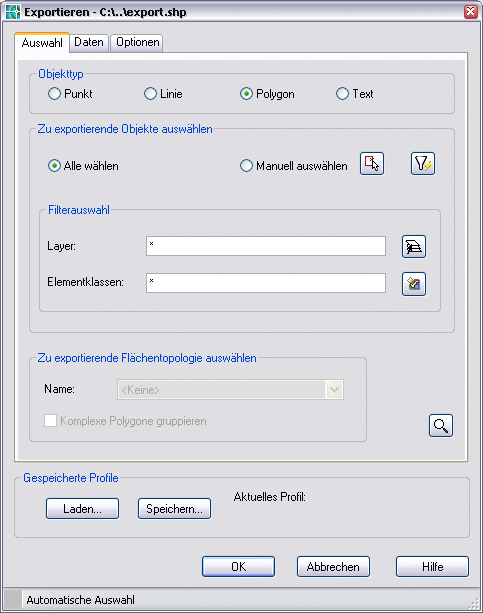
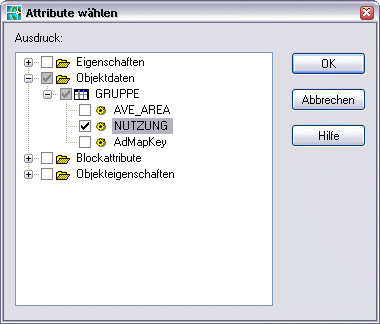
- On the tab data the factual data can be defined that are Export should be handed over with. This is done with the button [Select attributes ...]
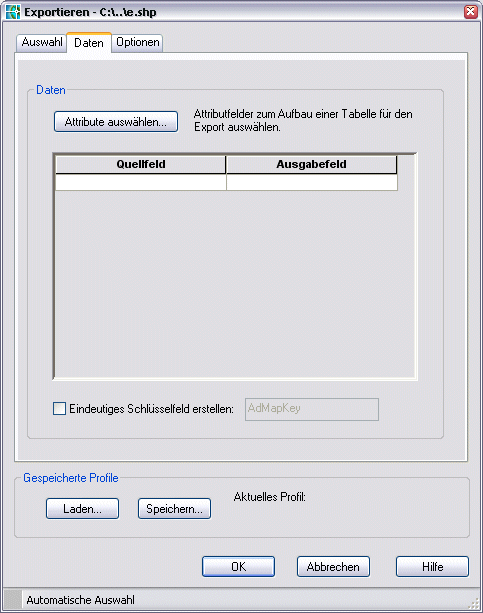
- All object properties can be used as attributes, as well as the data that was imported with the function from AutoCAD Map were generated. These are below the entry object data a DAK Bungalow.
For the correct designation of the object data fields, you can use the *.DBF Post process with a spreadsheet program (e.g. Excel). A direct change in AutoCAD Map is not possible.