Table of Contents
Extended GAEB import
Description
With the GAEB interface, GAEB files can be converted directly into DATAflor CAD can be read. Here in the Object manager a Mass tree created, which results from the structure of the GAEB file. By assigning drawing objects, the properties (areas, lengths, etc.) can be entered as a position quantity. The imported GAEB file with the determined dimensions can then be exported again. Alternatively, a REB-compliant quantity certificate according to REB 23.003 (D11) or a * .CSV file can be generated for further work in a spreadsheet program (e.g. Microsoft Excel).
The Im- and Export of data is carried out by calling a function from the Object manager and then happens once, ie a GAEB file must be read in or generated again for an update.
Application
- The extended GAEB import can be done via the tool
 in the Object Manager and via the context menu in the mass tree Coupling> Extended GAEB import be called.

- After calling the function for the import, the appears DATAflor GAEB import dialog.
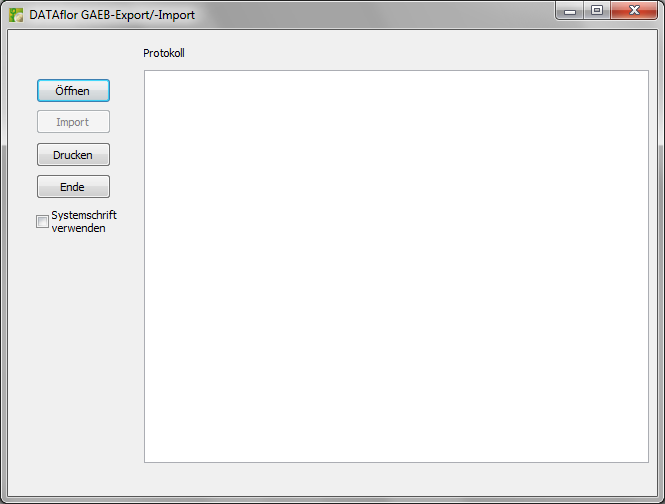
click on [To open] and select an existing GAEB file in the following dialog.
The import function supports the following data formats:- GAEB XML format (* .x *)
- GAEB 2000 format (* .p *)
- GAEB 90 format (* .d *)
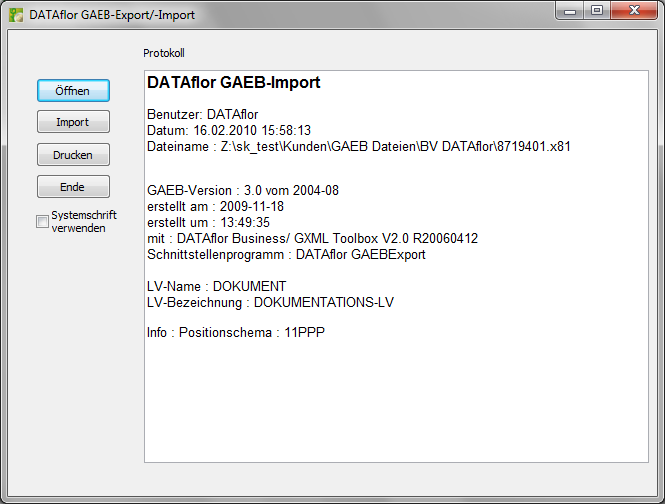
- After selecting the file to be imported, the Minutes Information on the GAEB file to be imported is displayed.
click on [Import] and after confirming the import [The End].

The GAEB-LV has now been imported and a Position coupling with DATAflor BUSINESS created. Then the LV behaves as with the Position coupling.
Operation
By assigning objects below the GAEB groups, their properties are defined as a set of items Export entered.
If there are already quantities, these will be overwritten by the new quantity properties. If no objects are assigned, the original item quantities are not overwritten.
The unit of measure is specified in the GAEB file. Alternatively, the mass of another attribute can be used Export be entered (attribute name: GAEB AMOUNT). To do this, assign a formula with the designation GAEBMenge to the GAEB group (position). This value is now used regardless of the specified unit of measure for the item.
For example: There are only surfaces in the drawing. A volume is to be assigned to a position, which is composed of an area x layer thickness.
Application:
- Record the areas and assign them to the groups (positions).
- Define one Formula with the names GAEB AMOUNT. unity should accordingly m³ and the formula eg {area} * [layer thickness]. Read about it too Formulas & Lists.
- The new formula must be assigned to the group (position). The layer thickness is queried during the assignment. As a result, the sum of all areas below the group (position) is multiplied by the specified visibility.
The allocation of the GAEB quantity must take place at the level of the groups (positions). An assignment at the object level has no effect.
Add GAEB file
GAEB files imported into the drawing can be edited.
Um Standard services to add, do the following:
- Select the top GAEB group in the Mass tree.
- Select in the context menu Graphic cost estimate>
 Expand GAEB file

- Now lets in the context menu Graphic Estimation > Services choose. The standard service catalog opens.
- To add supplements to an item, the entry can be selected in the standard service catalog and dragged and dropped to the desired item.
It takes place save automatic updating of the numbering. The numbering of the position is required manually.

New levels and positions are assigned in a dialog with the ![]() pairing information.
pairing information.
- Select the top LV level in the mass tree.
- In the tool box Coupling / documentation call with the command
 Show pairing information the dialogue Link .
 This can also be done in Info dialog call:
 Link.
Link.
- In the position table shown there, you can attach hierarchies and positions using the right mouse button.

- Enter a designation. You can also customize numbering, description and more.

These work steps are explained in more detail in the following films:
GAEBExport
GAEB files imported into the drawing can also be exported again. Proceed as follows:
- Select the top GAEB group in the Mass tree, otherwise the export function is deactivated.
- Then select in the context menu Graphic cost estimate> Expand GAEB file
- Now in the context menu below Graphic cost estimate the entry GAEB>
 Generate GAEB file . call
 - Choose the Status for the specification of services and confirm this with [OK].
- Im Export-Click dialog [Export].

- The Filename for the new file can be freely entered. Likewise, you can GAEB format Select (XML, 2000, 90). After selecting Filename and File Type [To save] The file.
- Close the window with [The End].

The generated GAEB file can now be read into any calculation program that supports the GAEB standard.
Only GAEB files read into the drawing can also be exported again. A Export Freely defined subtree structures as GAEB files are not possible.
REBExport
As an alternative to the Export A GAEB file can be used to output a REB-compliant proof of quantity in data exchange format D11. Prerequisite for this is an existing documentation. To export a file, the top GAEB group in the Mass tree marked, otherwise the export function is deactivated.
The function can be activated with the right mouse button Proof of quantity> ![]() Output as REB file or over
Output as REB file or over  in dialogue Mass list be called.

Once you get one Mass list is automatically created in BUSINESS a project CAD CAD created. After function call for the REB Export a file selection dialog appears. The name for the new file can be entered freely. However, the data type is preset (*.D11). The proof of quantity is generated according to the REB standard 23.003.
The generated REB file can now be read into any calculation program that supports the GAEB / REB standard.
A prerequisite for REB-compliant documentation is the supplement BUSINESS Quantity verification, since the objects have to be broken down into standard geometries in order to write the file.
You will find further functions for quantity verification (e.g. deleting the quantity verification) in the chapter Mass list or in the chapter assignment.