Table of Contents
Object height
Description
You can use the object height quickly and effectively Objekten or assign graphics to groups in the drawing. This gives you the option of defining removal and application areas through the object height in the area of checking the dimensions.
For example: Object height 2.5 units
Application
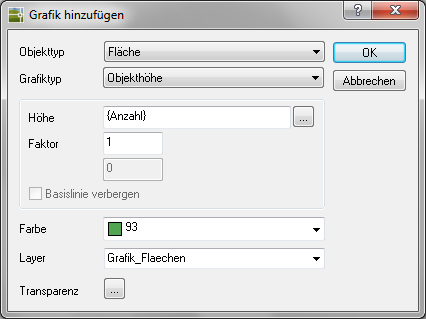
- Choose the Property Type and Graphic type Object height .
- In the field Height you can work with fixed values (eg 4) or with object dependencies (eg {area} +10). The factor can be used to increase or decrease. In the example, the height is = {Number} x 2.5 (in numbers 1 x 2.5 = 2.5). Alternatively, object heights can also be set depending on the area size. Thus, for example, an isometric view can be used to show which areas are the largest.
- Nachdem Color and Layer have been selected, the dialog can be opened with [OK] getting closed.
- The last step is to save the change
 .
. - You can also use a Transparency define for the object in which you click [...] click (at DATAflor CADXPERT available from AutoCAD 2011).