Table of Contents
LANDXPERT Network installation up to version 2017
Autodesk has stopped trading network licenses for AutoCAD MAP for OEM contracts on 01.02.2021/XNUMX/XNUMX.
This technology is also used within the LANDXPERT Network version used. Single-user versions are not affected.
If you have any questions, please contact us: info@dataflor.de
Description
Here you will find detailed information on installing and setting up the DATAflor LANDXPERT-Software in the network up version 2017.
The installation guide for DATAflor LANDXPERT ab version 2018 see here.
System Requirements
You can find all information about this on our Website .
Installation and setup
Installation order
- Install the Autodesk License Server
- Request the CAD server license
- Configure the Autodesk License Server
- Install DATAflor LANDXPERT
- Setting up the CAD server license at the workplace
optional:
- Install DATAflor BUSINESS -AVA
- Install the BUSINESS License server
- Request the server license for the BUSINESS Supplement
- Reading in the server license for the BUSINESS Supplement
- Setting up the BUSINESS License server at the workplace
The installation of DATAflor LANDXPERT A 30-day demo version is not possible with a network license. As long as she DATAflor LANDXPERT nicht bei DATAflor register and have received a valid network license, the program will not work.
Licensing of DATAflor LANDXPERT takes place via the DATAflor AG. You will receive your network license within a few working days.
The complete system for the planning office: Dataflor BUSINESS -AVA
In addition to the classic tasks such as tendering, awarding and billing DATAflor BUSINESS - AVA a multitude of functions that make a modern office more efficient and more responsive. Address management for all clients, contractors and project addresses is also part of it, as is a connection to DATAflor LANDXPERT.
By means of the unique connection between the drawing and the specification sheet, a quantity can be determined directly DATAflor LANDXPERT create. Among other things, the complete BRUNS plant catalog is available for planning your planting.
Read more about this under arguments for DATAflor BUSINESS -AVA.
Install the Autodesk License Server
The Autodesk license server is used to configure and manage the CAD server license.
- Current version of Autodesk Network License Manager:
Before starting the installation, check which server type (32-bit or 64-bit) it is about. Then select the appropriate entry for the installation kit.
AutoCAD support program LMTOOLS
- port sharing:
On the server is the Firewall to configure. To do this, the TCP ports 2080 and 27000 - 27009 can be activated (preferably as an incoming and outgoing rule).
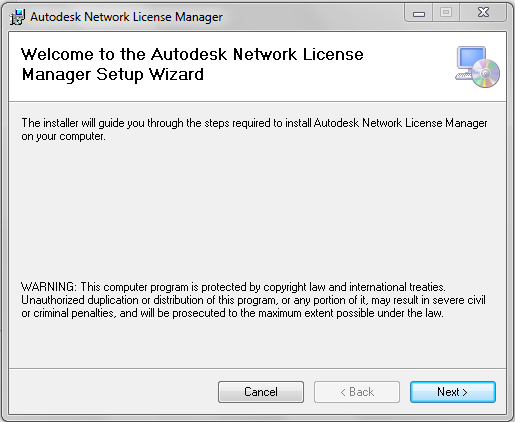
How to install the Autodesk license server
- Connect the USB stick with the DATAflor LANDXPERT Installation to the future license server and open the removable disk in Windows Explorer. Start the file CD_Start.EXE with a double click.
- Via the menu Network license> Installation of Autodesk license server the installation is started.
- click on [Next>]to start setup.
- click on [Next>]to start the installation.
- click on [Next>]to find the installation path made C: \ Program Files \ Autodesk Network License Manager to use or click the button beforehand [Browse ...]to specify a different path.
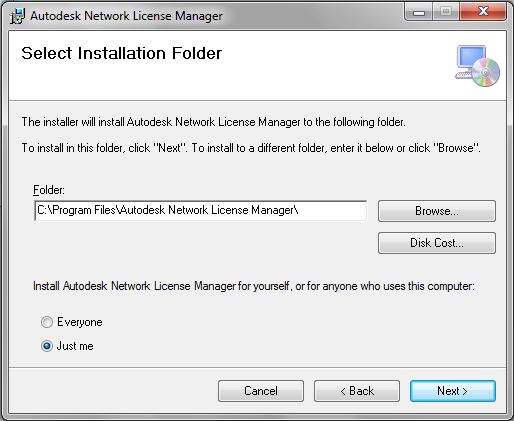
Install the Network License Manager not on a remote drive. When installing the Network License Manager file, provide a path to a local drive, including the drive letter. Specifying UNCAddresses shall not unterstützt.
- click on [close]to complete the installation.
Request the CAD server license
- Start the Autodesk license server. Click on Windows Start> All Programs> Autodesk> Network License Manager> LMTOOLS Utility.
- Select the tab System Settings.
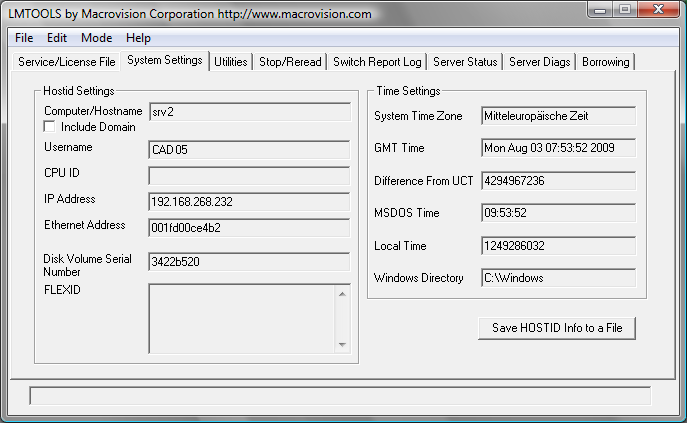
- Click the button [Save HOSTID Info to a File].
- Enter a file name (e.g. CompanyGartendesign.TXT) and click [To save].
- Close the Autodesk license server. Click on the menu File> Exit.
- Email the saved file to license @dataflor.de. You will receive your activation code within a few working days.
It is recommended to save the license file in the same path where you installed the Autodesk license server.
Configure the Autodesk License Server
You configure the Autodesk license server so that you can manage the server license that you receive from DATAflor have received. Use the utility to configure the license server lmtools.EXE.
You should be logged in as an administrator to work with the LMTOOLS utility.
How to configure the Autodesk license server
- Start the LMTOOLS utility from Windows Start> All Programs> Autodesk> Network License Manager> LMTOOLS Utility.
- Select on the tab Service / License File the option Configure using Services.
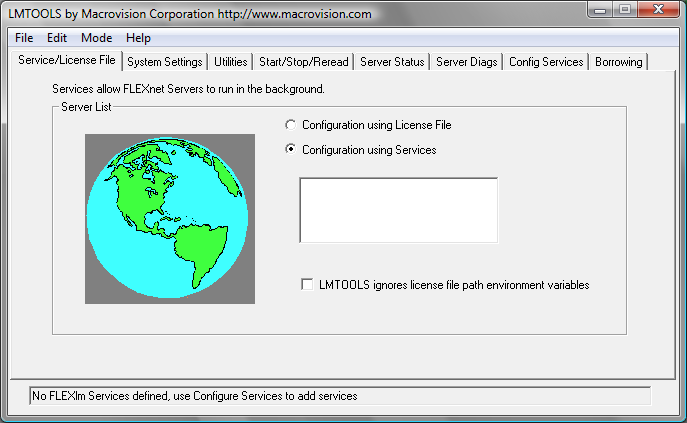
- Click the tab ConfigServices.
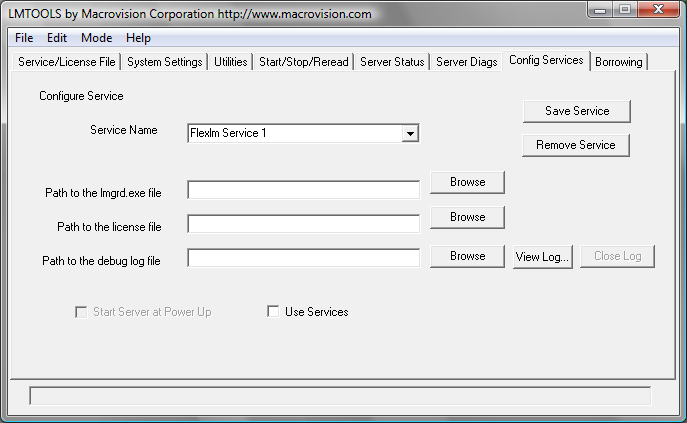
- Select from the list of Service Name the service you want to use to manage licenses. By default, the service name is FlexLM Service 1. If FLEXnet® in addition to LANDXPERT If you manage other software on your computer, you can enter a service name, e.g. LANDXPERT.
- Select in the field Path to lmgrd.exe file the path to the Network License Manager daemon (lmgrd.EXE). Click the button [Browse]to find the file. By default, this file is located in the folder C: \ Program Files \ Autodesk Network License Manager.
- Select in the field Path to the license file the path to your license file. Click the button [Browse]to find the file. This is the path where you saved the license file.
optional: Select in the field Path to the Debug log file select a path for creating a troubleshooting log. Click the button [Browse]to find an existing log file.
You should save the folder in the C: \ Program Files \ Autodesk Network License Manager choose. The log file must have the file extension .Log feature. New log files must have the file extension .Log entered manually.
- Select Use ServicesTo lmgrd.EXE run as a service.
- Then select the option Start server at power upto view the file lmgrd.EXE to be carried out automatically at system start-up.
- click on [Save service]to save the new configuration under the one created in step 4 Service Name save. Confirm the request with [Yes].
- Click the tab Start / Stop / Reread: Choose [Startup Server]to start the license server.
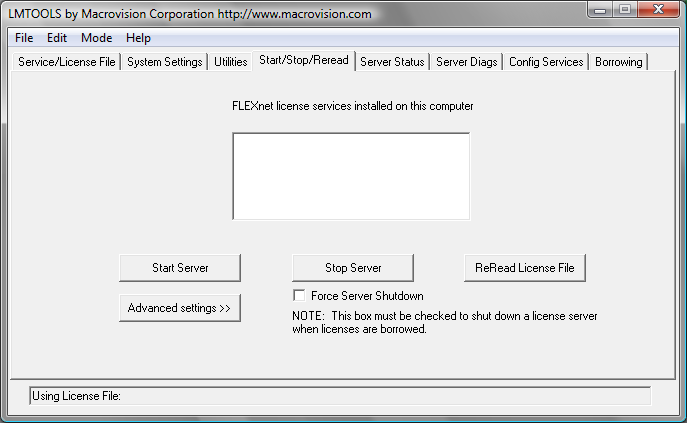
The license server is running and ready to respond to client requests.
- Via the menu File> Exit close the Autodesk license server.
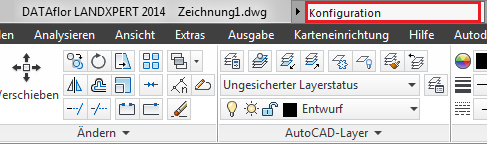
More information on the subject Configuration get in the help. To do this, enter the term in the search field of the info center (see figure below).
Install DATAflor LANDXPERT
- Connect the USB stick with the DATAflor LANDXPERT Installation at My Computer and open the removable disk in Windows Explorer. Start the file CD_Start.EXE with a double click.
- In the next step, choose whether you want to run the installation for a 32- or 64-bit system.
- The installation is carried out via the menu Installation> DATAflor LANDXPERT to install started.
- Select the language and confirm it with [OK].
- In the further process, select the license type Network license.
- Follow the instructions in the subsequent dialogs.
- Nachdem DATAflor LANDXPERT has been successfully installed, end the installation with [Finished]. The computer will then be restarted automatically.
Setting up the CAD server license at the workplace
Configure DATAflor LANDXPERT at the workstation to use the licenses made available with the Autodesk license server.
This is how you set up the CAD server license at the workplace
- Start on the workplace DATAflor LANDXPERT.
- In dialogue FLEXnet License Finder select the option Specify the License Server System and then click on [Next>].
- Enter the port and name of your license server here: 2080 @ servername.
Make sure that the server name entered here corresponds to that of your license server.
- click on [Next>].
- Successful licensing is confirmed with: The FLEXnet license finder has completed. Press Finish to return to the application.
- End the licensing with [Finish].
- The CAD server license is now available at this workstation.
Install DATAflor BUSINESS -AVA
Refer to the product installation instructions and follow the instructions on the screen. With the installation of DATAflor BUSINESS - AVA will automatically install a demo license with a term of 30 days.
Install the BUSINESS License server
To the BUSINESS To use supplements, you need that BUSINESS License server. Of the BUSINESS In principle, the license server can be installed on any computer in the network, provided it has at least Windows 7 as the operating system and can be addressed by the other computers via the TCP / IP protocol. A server that is constantly in operation and that has a functioning data backup is best suited.
How to install the BUSINESS License server
- Connect the USB stick with the DATAflor LANDXPERT Installation to the future license server and open the removable disk in Windows Explorer. Start the file CD-Start.EXE with a double click.
- Start the installation from the menu Network license> Installation BUSINESS License server.
- After selecting the language for the license server, the installation starts. There is no selection for the installation directory. The license server is imported into the common files of the computer.
- After the installation, restart this computer so that the license server starts automatically.
- After the restart is the DATAflor License server registered as a service on the computer. It is therefore sufficient that the computer is switched on in order to use the license server.
Request the server license for the BUSINESS additions
- Connect the USB stick with the DATAflor LANDXPERT Installation to the future license server and open the removable disk in Windows Explorer. Start the file CD_Start.EXE with a double click.
- Start the request from the menu Network license> BUSINESS Request server license.
- After making your selection, a form will open in which you can enter your data.
- With [OK] the format is generated.
- Email the information to license @dataflor.de. You will usually receive the license file on the day of the request.
Reading in the server license for the BUSINESS Supplement
- Start the DATAflor License manager. Click on Windows Start> All Programs> DATAflor > DATAflor Tools> License Manager.
- Select in the menu License> New> Read in license.
- In the dialog that opens, select the license file (LICFile) that you can download from DATAflor have received.
- Confirm your selection with [To open]. After the successful import, you will receive a confirmation. the BUSINESS Server license is now available for the workstations.
A transfer of the server license to other computers (as with the single workstations) is not possible. Instead, you can borrow licenses.
Setting up the BUSINESS License server at the workplace
Configure the license manager to allow a workstation to access the BUSINESS Enable license server. If a computer is to be permanently removed from the license server, it must be logged off from the license server. Then access to a local workstation license is possible.
How to set up the BUSINESS License server at the workstation
- Start the on the workstation DATAflor License manager. Click on Windows Start> All Programs> DATAflor > DATAflor Tools> License Manager.
- Now select in the menu Select License> New> License Server.
- In the dialog, the IP address of the server be registered.
If you don't know the IP address, use the command prompt to find the IP address of the server to use. Click on Windows Home. Give cmd in the field and confirm with Enter. Enter the command in the window ipconfig and press the Enter-Button.
- After entering the Tab Button to press.
As soon as the server has been found, the available network licenses appear in the dialog. The preset port is 49300. This can normally be left as it is. If communication with the server does not work, please contact the DATAflor Support on. - Select the server license and close the dialog with [OK].
- The license is now displayed in the top left. As soon as it is marked, the included program parts appear below.
- Now select the program parts in the lower area that are to be used on the local computer. These are then automatically released when the program is started.
How to log off a workstation from the license server
- Start the on the workstation DATAflor License manager. Click on Windows Start> All Programs> DATAflor > DATAflor Tools> License Manager.
- Select in the menu License> Log off license server.
License borrowing
Borrow license from Autodesk license server
If you are using a network license and your network administrator allows the license borrowing feature, you can borrow a license from the Autodesk license server to use DATAflor LANDXPERT to use for a period of time when your computer is not connected to the network.
Your license will automatically be returned to the license server when the confirmation date that you specified when you borrowed it has expired. You can also transfer a license back before the licensing period expires.
How to borrow a license from the Autodesk license server
- Starten Sie DATAflor LANDXPERT on the workstation on which the license is to be borrowed.
- Enter the command LICENSE .
- Select a valid date for the license borrowing.
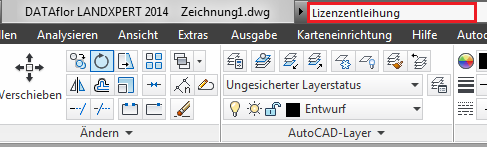
- Click the button [Borrow license]to perform the license borrowing.
More information on the subject License borrowing get in the help. To do this, enter the command in the search field of the info center (see figure below).
Borrow license with the BUSINESS License server
With the BUSINESS License server you can borrow network licenses on the local computer in order to work with the program when the computer is not connected to the network. You can return borrowed licenses to the BUSINESS Return license server.
How to borrow a license with the BUSINESS License server
- Start the on the workstation DATAflor License manager. Click on Windows Start> All Programs> DATAflor > DATAflor Tools> License Manager.
- Select in the overview on the left below the entry Server licenses the corresponding network license.
- The product with the available number is displayed in the lower area. Now select the program parts in the lower area that are to be transferred to the local computer.
- Select in the menu License> borrow from the server.
- Enter how many days the license should be borrowed. You can borrow the license for a maximum of 30 days.
- After confirming with [OK] the license is transferred to the local computer and can be used here without a network connection.
How to give the borrowed license to the BUSINESS License server back
- Start the on the workstation DATAflor License Manager: Click Windows Start> All Programs> DATAflor > DATAflor Tools> License Manager.
- Select in the overview on the left below the entry Local licenses the corresponding license to be returned to the network.
- Select in the menu Return license> to server.
- The license has now been returned to the server and the local computer is automatically logged on to the license server again.
If the license is not returned to the license server, it expires after 30 days on the single workstation and is automatically available again in the network.
DATAflor Network Access
Working with DATAflor LANDXPERT is only really effective if all users can access the same fundamentals and data. With the tool Database and network access the local workstation can be adapted to the network environment. DATAflor LANDXPERT then uses the assigned configuration.
For more information on this topic, please refer to the chapter Database and network access.