Table of Contents
Tabs
Description
For each node in the tree of the Plant Manager, the most important information and functions are context-related on the tabs Info, Costs, Graphic, Photos and Label displayed in the lower area of the Plant Manager.

Info
On the tab Info the most important information about the node currently selected in the tree is summarized.
At the plant level, details about the plant or the quality are displayed. The information (e.g. botanical name, quality and number) of the plants is displayed in a list on the nodes above.
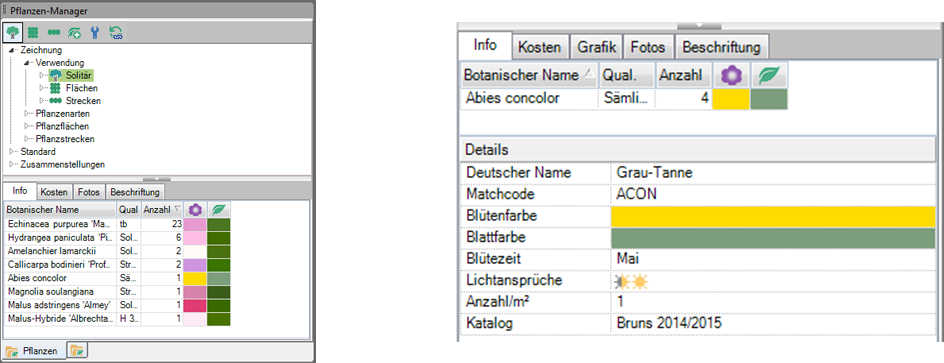
You can these Overview tables in your drawing insert. Click on a row in the table and drag and drop it into the drawing.
Costs
On the tab Costs you get an overview of the costs of the node currently selected in the tree.
At the plant level, the cost of this plant is displayed. When the nodes above are activated, the costs are compiled in a list and you get a quick overview of your planning.
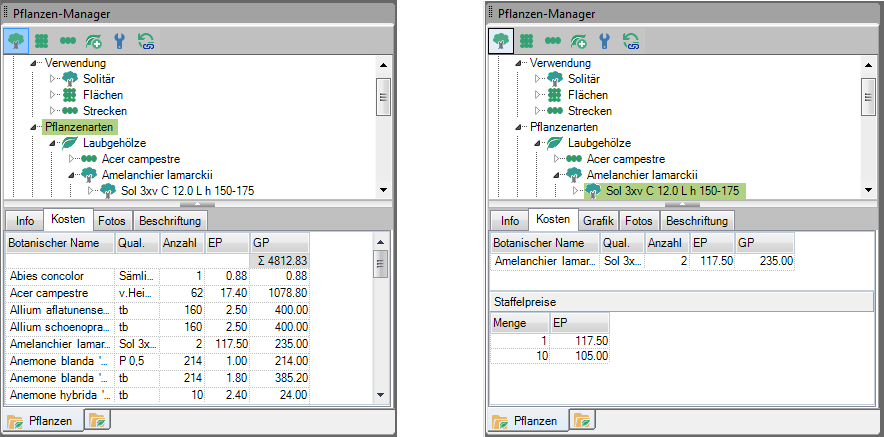
You can these Overview tables in your drawing insert. Click on a line in the table and drag and drop it into the drawing.
Graphic
On the tab Graphic all graphic variants of the Autoview plants are displayed.
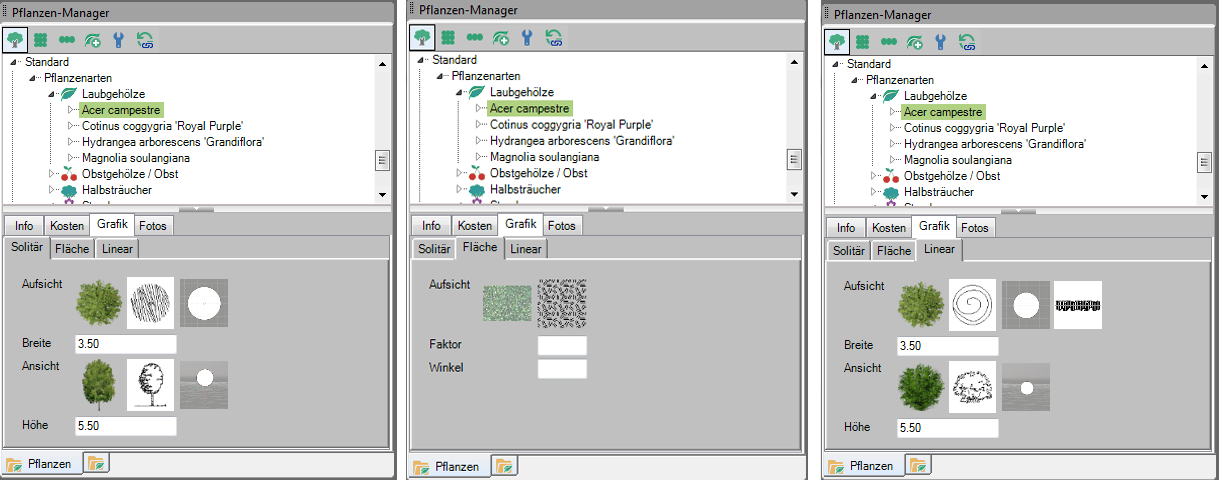
Here you have the opportunity to adjust the graphics and the size of the plants.
The graphics of solitary and linear plantings are different.
Customize graphics
The easiest way to change the graphics is by dragging and dropping them from the Quick manager out.

You can use the graphics for the plant in general Standard to adjust. Then this is always inserted into your drawing with the adapted graphic settings. You can also adapt individual plants of a node or the entire node.
The measured values can be transferred to a PC via the Online library is a new palette watercolor with plant graphics available. You can do this through your Quick manager .
adjust size
You can change the sizes of the graphics on the tab Graphic by adjusting the height and width. All sizes of the underlying nodes are always adjusted. This gives you the option to display individual plants larger or smaller, or to adjust all plants under one node.
Photos
On the tab Photos all pictures of the plants that are located under the selected node are displayed. These give you a quick impression of your planting. These can be inserted into your drawing individually or in the form of a photo strip.
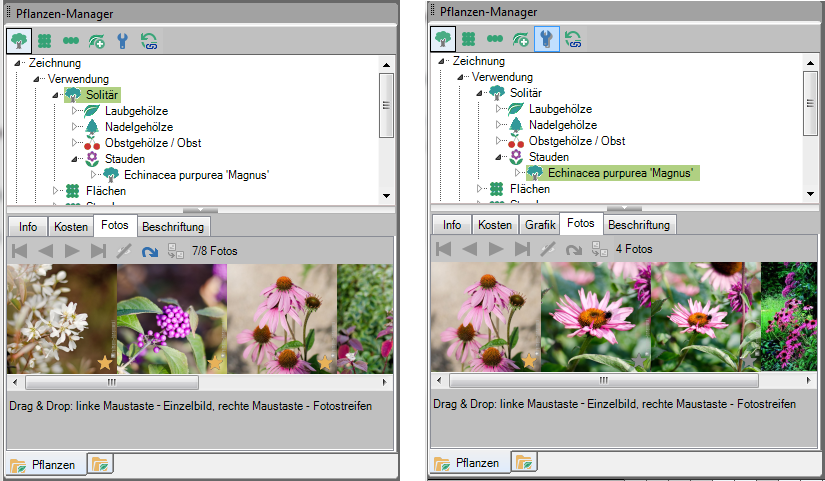
On the level of a plant or quality, all stored photos for the selected plant are displayed (if available).
On the nodes above, only those for each plant are shown as  Favourite marked images.
The favorites will be out BUSINESS or DATAplants. However, you can easily change this marking by clicking on the layers of a plant  in the lower right corner of the photo, make your desired picture a favorite. This picture is then also used as a photo for picture lists and the like.

Put together photo strips
You can put together each photo strip according to your wishes. The following functions are available for this:
 | Sort by | Move the selected photo step by step forwards or backwards or at the very beginning or at the end of the strip. |
 | Hide | Hide the selected photo from the picture bar. |
 | Fade in | All hidden photos are displayed and can be shown again. |
 | Change | Swap a picture of a plant without resetting the favorite. |

Insert photos or photo strips in the drawing
Um individual images to insert into your drawing, click the left mouse button on a photo and drag and drop it into the drawing. You will be asked for the destination point. Click with the left mouse button and then drag out the frame for the picture. End the command with the left mouse button.
Around entire photo strip insert, click the right mouse button on a picture and drag & drop the photo strip into the drawing. You will be asked for the destination point. Click with the left mouse button and then drag out the frame for the photo strip. End the command with the left mouse button.

Label
On the tab Label, you can add one to the selected node in the  Configuration Assign a compiled label theme. All underlying plants are then labeled in this way.

Summarize the labeling
To label plants together, select the option "Combine labeling" on the desired node in the tree. The individual text labels are then combined into one text label.
Update
If you have made changes to your drawing and, for example, have placed new plants, these will be saved by clicking on [To update] labeled with the assigned label theme.
Hand over text subjects
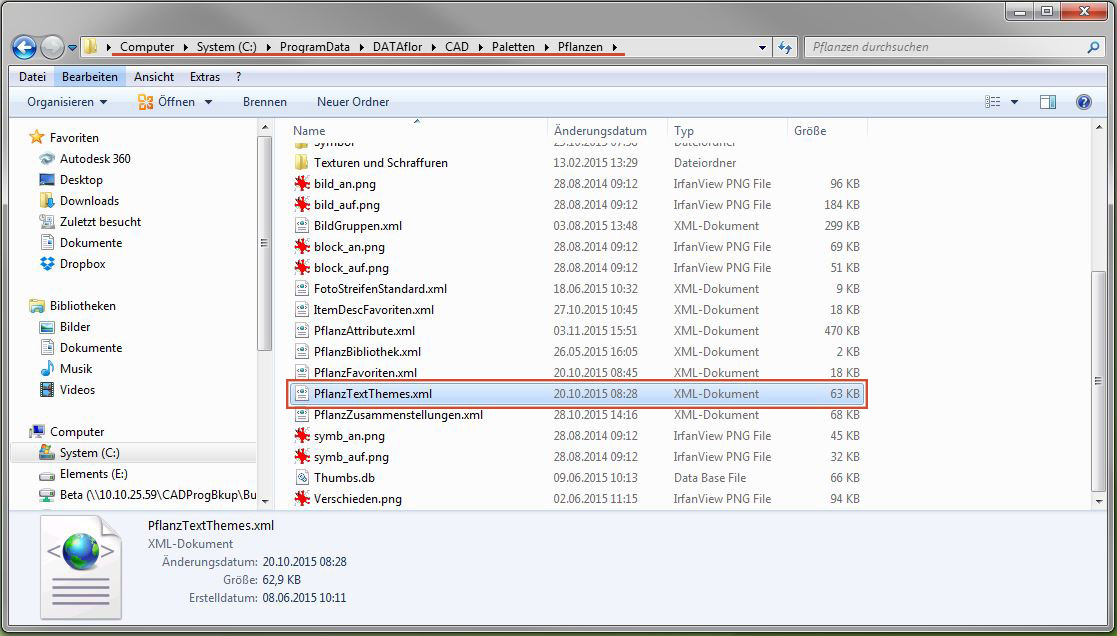
- Open the following folder at the workstation whose text topics are to be transferred: C: \ ProgramData \DATAflor\GREENXPERT, CAD or LANDXPERT\ Pallets \ Plants
- Copy the file PlantTextThemes.xml.

- Paste this file into the same folder on the target computer. The file can be replaced.
- Start the program again. The text topics are reloaded and are available for selection in the Labeling tab.