Table of Contents
Set or assign
Description
With the Material manager Already existing drawing objects can be assigned materials (see chapter Assign materials later). You can also enter new drawing objects and at the same time create material information (see chapter Create new material objects). It is also possible to create individual materials directly without any existing drawing objects.
There are four different types of material:
- individual materials (e.g. parasol)
- Allocation to routes (e.g. water pipe)
- Allocation to areas (e.g. paving)
- Allocation to volume (e.g. gravel)
As far as the calculation, graphics and labeling options are concerned, each material type has its own properties that are tailored to the object properties.
Features
The Material manager enables two different ways of working, which can also be combined with one another as desired. In both working methods, new symbols are used in the mass tree - so it is immediately apparent that materials have been used here.
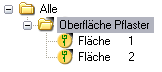
| Symbol | feature |
|---|---|
 | Group with assigned materials |
 | Group with assigned material and plant properties |
 | Area and distance to which material properties have been assigned |
 | Objects to which material properties and void areas have been assigned |
 | Areas and routes with assigned material and plant properties |
 | Objects with assigned material, plant properties and withdrawal areas |
 | 3D surfaces, 3D segments and volumes with assigned material properties |
 | 3D surfaces to which material properties and void surfaces have been assigned |
 | 3D surfaces and 3D routes with assigned material and plant properties |
 | 3D surfaces with assigned material, plant properties and deduction areas |
 | Single plant with assigned material properties |
 | Single object with material |
 | Material position in the LV |
Create new material objects
In this way of working, materials are assigned directly when they are entered. Existing drawing objects are saved in the Material manager provided with material information. There is also the possibility of individual materials directly from the Material manager to apply.
Material on existing objects
It is called up via the menu Material> acquisition via> contour tracking  or existing objects
  or with the right mouse button.
With this function, existing objects are recorded as material objects. The determination of the material quantities refers to the 2D processing, ie even if 3D-Objekte are selected, a quantity determination is carried out in the projection.
When recording, the program automatically recognizes whether it is a stretch or an area. Different calculation and distribution parameters are displayed accordingly.
If the objects are not connected, the assignment can also be carried out with the help of the contour derivation.
If a non-closed surface or a surface is recorded as a non-closed contour, the program derives a route.
Functionality
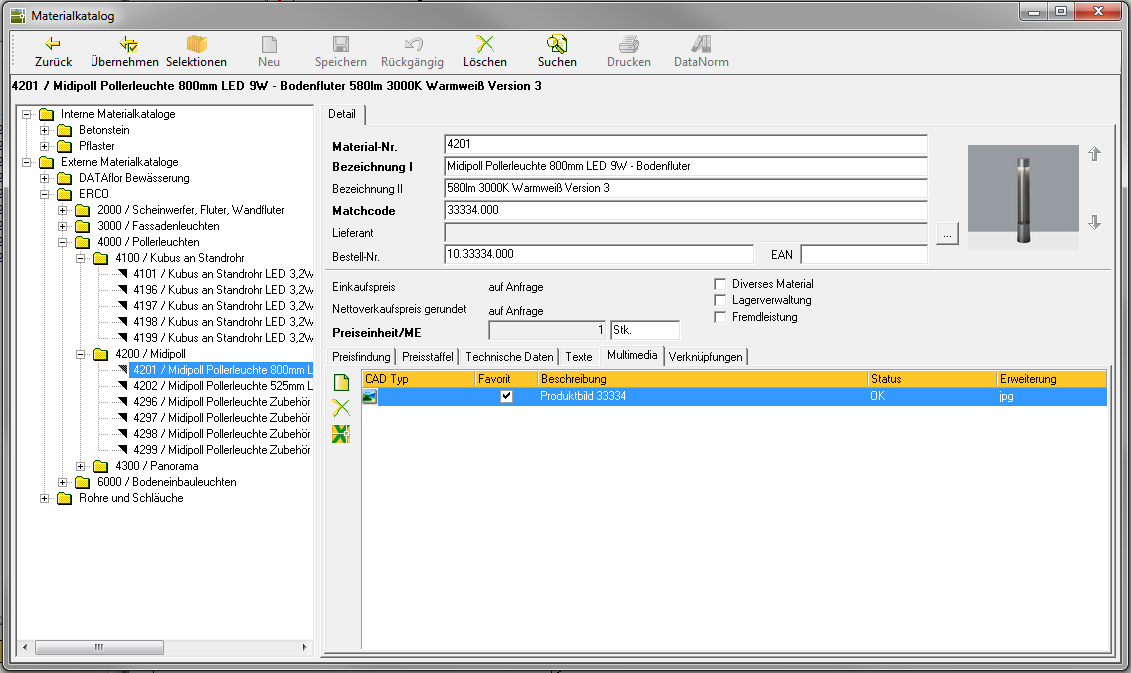
After calling up the function, the selection of the material to be used follows. The material dialog opens for this purpose. The exact functionality of the selection, the material research etc. is described there in the help.
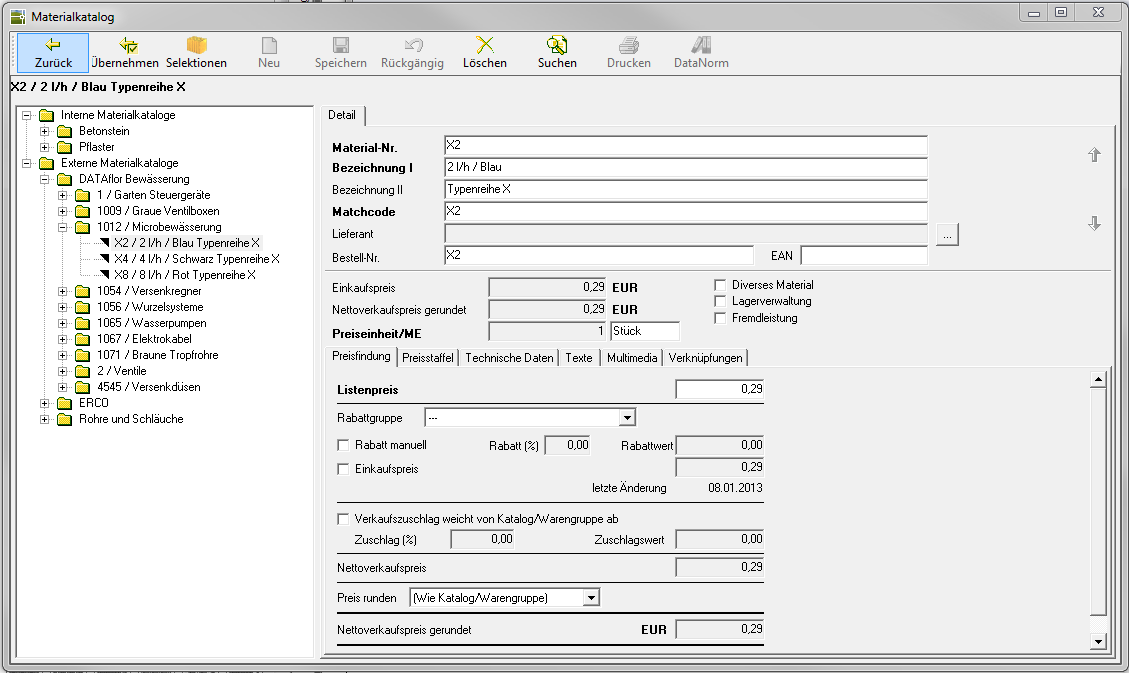
Once the decision for the material has been made, the selection is made with [Take over] applied. A later change is of course possible (see Edit and copy > Edit material).
Now you have to select the lines and areas in the drawing to which this material is to be placed. Multiple choices are possible. After confirming the selection, the dialog for graphics and calculation appears.
If lines and areas are selected at the same time during the acquisition, the corresponding dialog appears for each object type. If more than one object is selected, a dialog asks whether these settings should apply to all objects - if this is not the case, the dialog must be with [No] beeing confirmed.
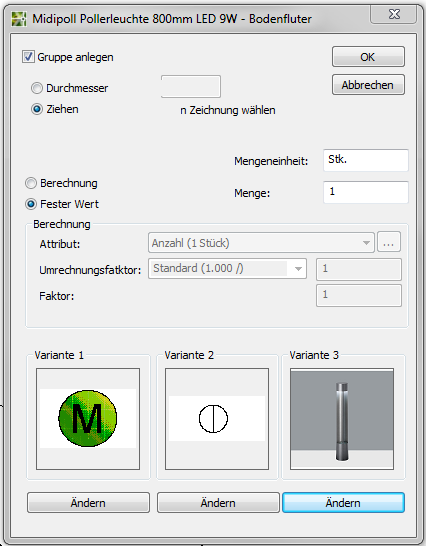
Example: Dialog for assignment to areas
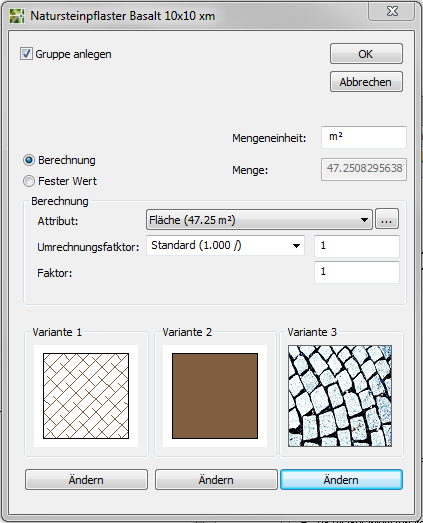
The option Create group sorts the new material object into a new folder that bears the name of the selected material - this creates clarity.
unit: The unit of measure from the material catalog is preset here. Otherwise the field can be freely defined.
Is the option calculation activated, the amount of material is calculated depending on the object. With the option Fixed number of pieces an absolute value is entered that has no relation to the object size.
If the calculation is activated, you can go to section calculation the parameters for this can be set. in The Field Attribute become the available Attribute from the tab Features listed. In addition, over [...] the formula editor must be started. New attributes can be created or assigned here. These are also in the tab Features and after taking over in the field calculation listed as default.
Conversion factor: All conversion factors that are in the tab are displayed here Technical details are available in the material catalog. Of the factor is freely definable. With this, different surcharges, layer thicknesses, increases, etc. can be implemented. The value for the compression factor from the tab is preset Technical details in the material catalog.
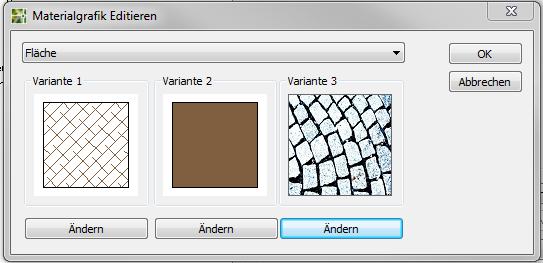
You can define 3 graphic variants, which are then saved in Material manager used in the Graphics tab. If available, the 3 graphic variants will follow the graphic specifications from the tab Multimedia Taken from the material catalog. You can access the graphic variants there using the button ![]() (Add CAD graphic) define.
(Add CAD graphic) define.
If no graphic variant is defined in the catalog for the material, a standard symbol is used. This symbol ![]() is also inserted if an object type is selected for which there is no suitable graphic variant.
is also inserted if an object type is selected for which there is no suitable graphic variant.
After confirmation, in the mass tree with [OK] the corresponding group with the selected objects is created. The assigned material type from the material catalog is used as the group name.
Materials to existing 3D-Objekte the erfass
The function can be activated via the menu Material> acquisition via> contour tracking 3D  or existing objects 3D
  or can be called with the right mouse button.
This function corresponds approximately 1: 1 to the function acquisition via existing objects (see chapter above Record material on existing objects). The difference is that the determination of the material quantities relates to the 3D development. This almost always results in an increase in volume, since there are actually no completely flat projects.
The query for the 3D reference comes first.
Link material to existing symbols
Calling the function  is done via the menu Masses> existing symbols or with the right mouse button.
With this function, material information is linked to existing objects. In this way, a list of the materials required can be created very quickly for an existing design.
Functionality
After calling up the function, the material to be used is selected. The material catalog opens for this purpose. The exact functionality of the selection, the material research, etc. is described directly there in the help.
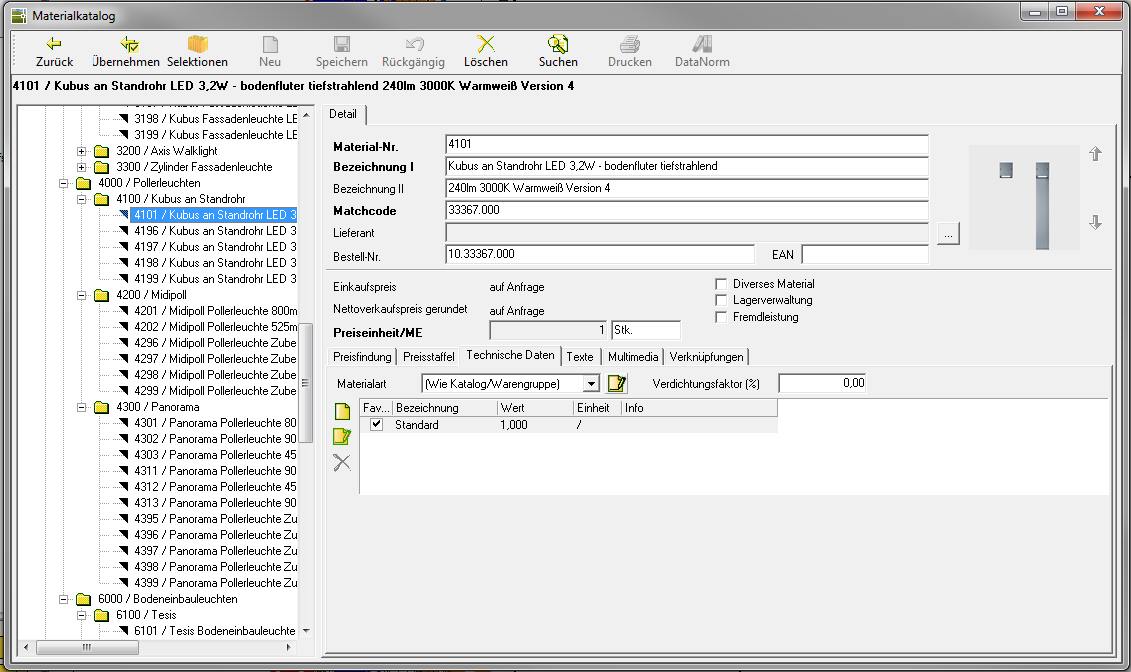
Once the decision for the material has been made, the selection is made with [Take over] applied. A later change is of course possible.
Now you have to select a symbol (Block) on which this material is to be placed. DATAflor After the selection, CAD analyzes the drawing and searches for blocks with identical names. This means that all blocks of the same type in a drawing can be defined as material objects in just one step. All details about the block are displayed in the dialog that opens.
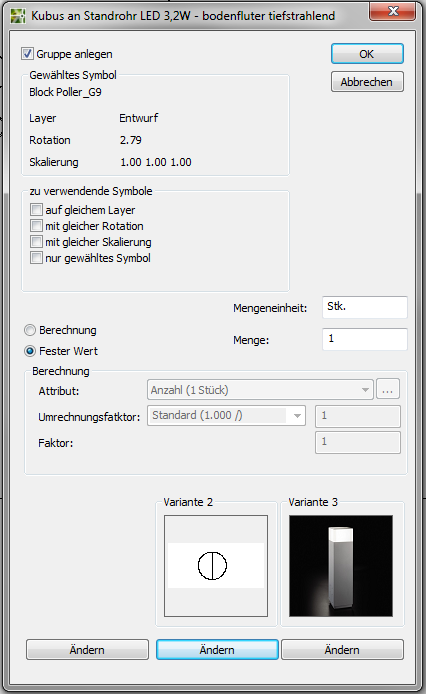
The option Create group sorts the new material object into a new folder that bears the name of the selected material - this creates clarity.
Various Filter functions enable a targeted selection for the application. The number of selected blocks that are to receive the material information is displayed below.
You can define 3 graphic variants, which are then saved in Material manager in the tab Graphic be used. If available, the 3 graphic variants are based on the graphic specifications from the tab Multimedia Taken from the material catalog. You can access the graphic variants there using the button ![]() (Add CAD graphic) define.
(Add CAD graphic) define.
The selected block is automatically created as graphic variant 1, which is why there is no setting option for this variant.
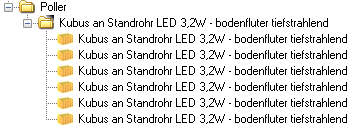
Im Mass tree will be confirmed with [OK] the corresponding group is created with the objects (an object is created for each material).
Occupy new symbols with material
With this function new symbols are inserted into the drawing, which also have material information at the same time. In this way, a design with materials can be created very quickly from an empty drawing.
Functionality
Calling the function  is done via the menu Material> to new symbols or with the right mouse button.
Now you have to choose the material to be used. The material catalog opens for this purpose. The exact functionality of the selection, the material research, etc. is described directly there in the help.
Once the decision for the material has been made, the selection is made with [Take over] applied. A later change is of course possible. Now the graphic properties of the material are defined.
The option Create group sorts the new material object into a new folder that bears the name of the selected material - this creates clarity.
When entering a Diameter the symbol can be placed directly in the drawing. Is Pull activated, the size can be controlled once in addition to the insertion point, which is then retained for the other materials in this work step. The symbol can also be inserted several times by repeatedly clicking. The option Select in drawing refers to the graphic of variant 1. With this option, the block of the first variant is selected from the drawing and not taken from the default settings.
You can define 3 graphic variants, which are then saved in Material manager in the tab Graphic be used. If available, the 3 graphic variants are based on the graphic specifications from the tab Multimedia Taken from the material catalog. You can access the graphic variants there using the button ![]() (Add CAD graphic define).
(Add CAD graphic define).
If no graphic variant is defined in the catalog for the material, a standard symbol is used. This symbol ![]() is also inserted if an object type is selected for which there is no suitable graphic variant.
is also inserted if an object type is selected for which there is no suitable graphic variant.
Im Mass tree will be confirmed with [OK] the corresponding group is created with the objects (an object is created for each material).
Assign materials later
If the objects are already in Material manager material information can also be assigned retrospectively. For example, if the areas have already been recorded for an area calculation and a material list is to be created afterwards.
Assign materials to the existing groups and objects
Groups and objects in the mass tree are subsequently provided with material information.
The assignment, like all properties, is inherited downwards, ie if a material is assigned to a group, all subordinate groups and objects receive this property. Unless a material has already been assigned to the objects.
Functionality
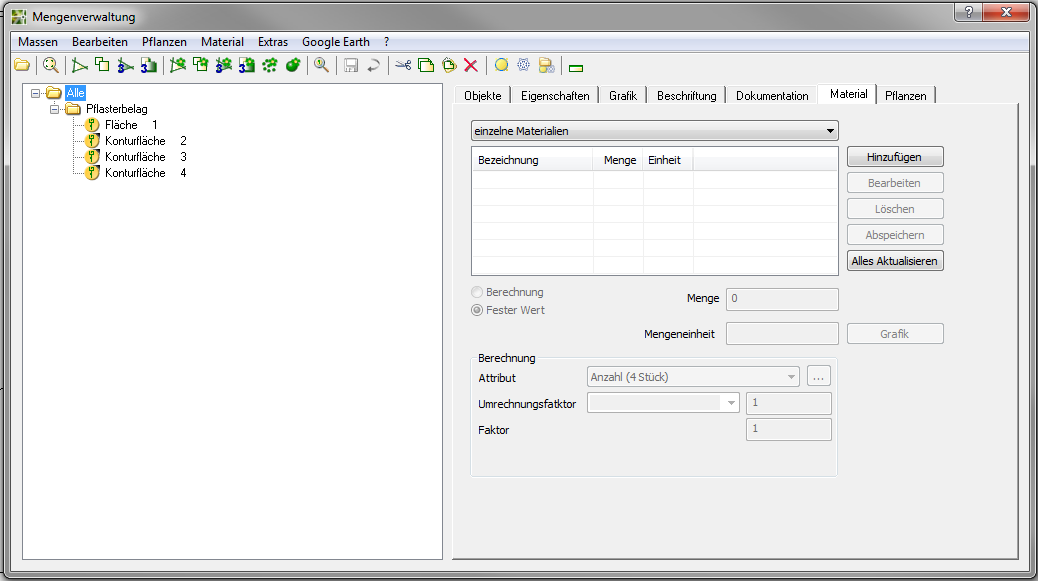
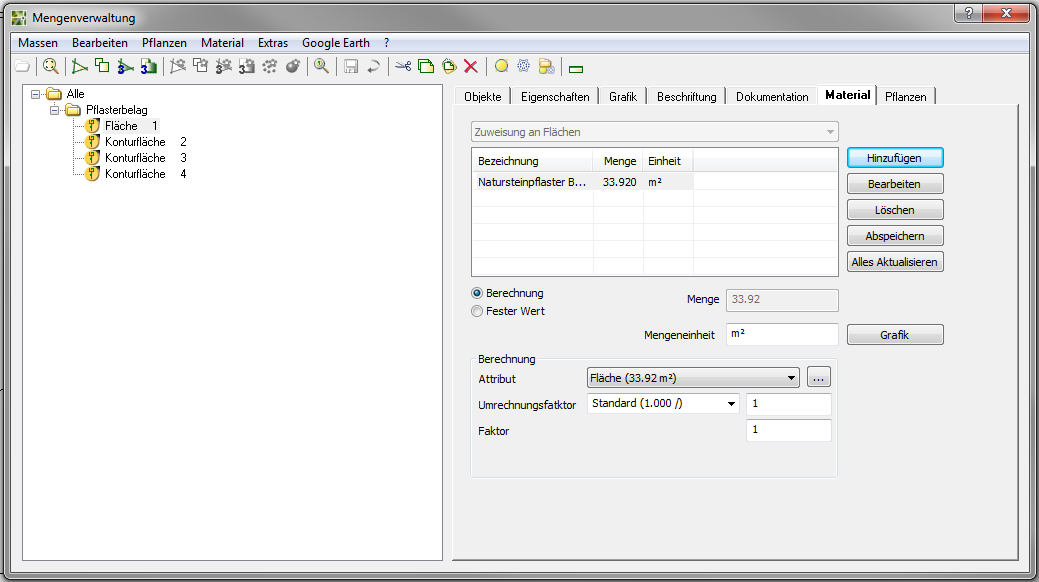
Select the group or object to which materials are to be assigned. Then switch to the tab Material. The assignment is made using the button [Add].
After the call, the material to be used is selected. The material catalog opens for this purpose. The exact functionality of the selection, material research, etc. is described directly there in the help.
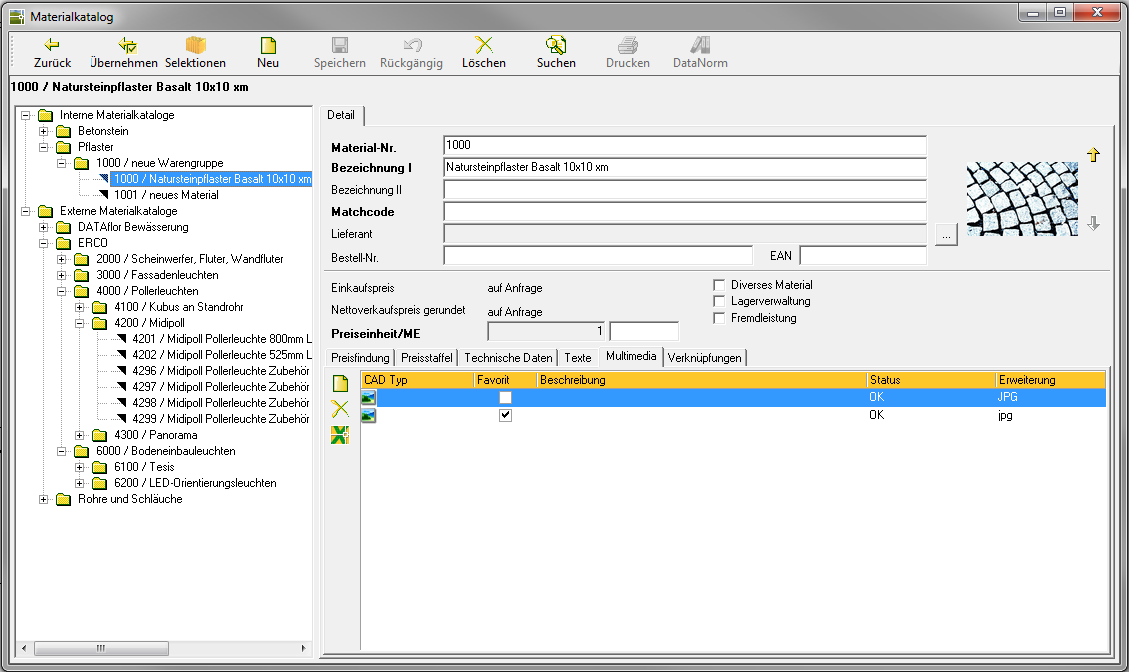
Once the decision for the material has been made, the selection is made with [Take over] applied. A later change is of course possible.
After saving, the material is created - also visible through the changed symbol in the mass tree. Also in the tab Material there is a change. The assigned material is listed in the table. For changing the calculation the corresponding parameters are available at the bottom of the dialog. These have already been explained when assigning them to new groups and objects (see Record material on existing objects).
The assignment can also consist of more than one material. To assign further materials, repeat the insertion using the button [Add].
When assigning materials, the corresponding plan graphic is created at the same time. The Graphic can be predefined in the material catalog. The setting options are also explained here.
The tab Material is context-dependent, ie if an area is marked in the tree on the left, the settings for the assignment to areas can be edited on the right. All assignment types are available at group level.
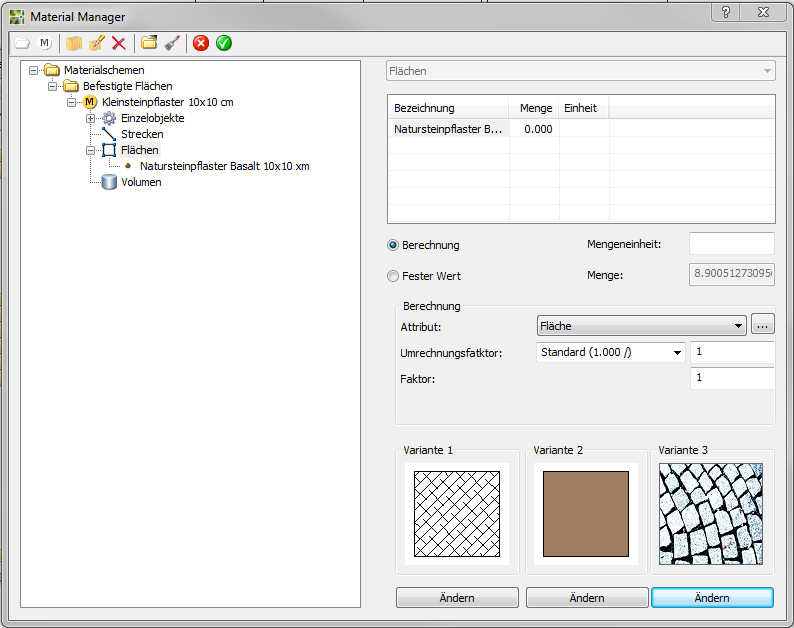
If several materials are assigned that could also be used in several projects, the can be used Material manager
Material manager
It is called up via the menu Material> Material Manager.
The material manager is a special way of assigning materials to groups or objects. Several materials can be combined with one another. For example, you can define a complete route structure. After the allocation to an area, the program gives you the requirement in m³ for frost protection, base course and sand, as well as the total weight of the covering.
Features
| Symbol | feature |
|---|---|
 | Create a new group |
 | Create a new scheme |
 | Add new material |
 | Edit material |
 | Delete material |
 | Create a new group with these properties |
 | Apply to existing groups |
 | break up |
 | Exit and save |
Other functions such as Delete, cut out, Insert and Copy can be used with the right mouse button.
The right area essentially corresponds to the dialog for the assignment of materials (see Set new symbols with materials).