Table of Contents
Import point file
Command: PIMPORT
Description
With the command Import point file (From file) point files saved in ASCIIFormat are available, can be read into the drawing. A Point set created.
Application
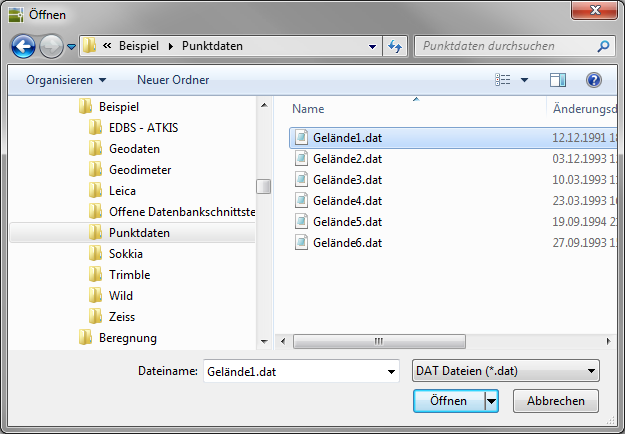
- After using the command
 (Import points), select a file in the selection dialog.
- In the following dialog you can determine how the height points are to be read in: The top line shows the name of the selected file. With the option Point format the respective format can be selected (X value = easting value / Y value = northing value / Z value = height / description).
Please note that in gardening and landscaping usually in the sequence X, Y, Z, in the measurement, on the other hand, is measured with Y, X, Z.
- Since there are period or comma files as Decimal separator there, this can be set. The content of the file is displayed for this purpose.

- Especially when there are point files that are very large and contain a lot of information that lies outside the processing area, there are more Filter Options available.
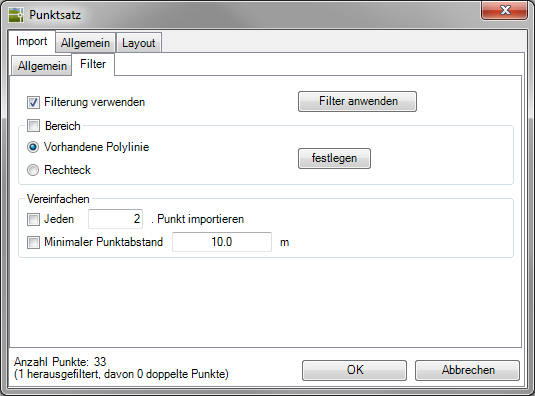
- In the section Area you can specify that only point information within a certain area is read in. If the processing limits have already been drawn in, you can select the option Existing polyline select and with establish determine.
- In the section Simplify the point set can be simplified if it has an unmanageable collection of points (point cloud). If the distance between the individual points is smaller than the specified one Minimum point spacing, corresponding points are deleted. If the value is larger, the point is retained in the point set. You also have the option here to select only every x. Point of ASCII-Import file.
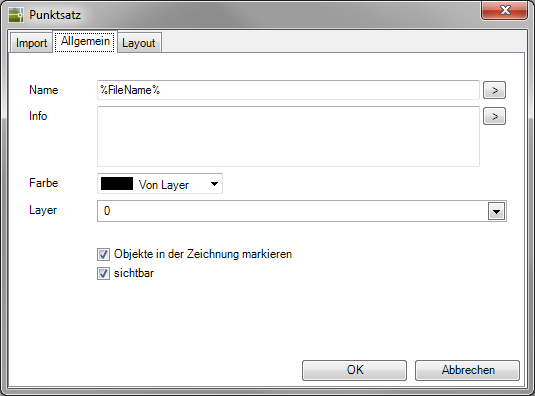
- On the tab General is the option visible activated. The point information is saved in the drawing database and is available for further work, e.g. for creating a triangulation. If the points are to be switched invisible later, this can be done in the Quick-DTM (AutoCAD based) be performed. If the points are visible, they are automatically zoomed to the limits of the point set after they have been inserted.
- With [OK] the points are inserted into the drawing and the point set is created.
Functionality
Before the points are inserted, a check is carried out to determine whether the point file double points are included. These are points that have identical X and Y coordinates. Such entries are not permitted, as different heights cannot exist at one point on a site. If there are duplicate points, these are automatically filtered out. This information is in the tab Import> General tab displayed.
Will be very many double points This can also be an indication that the correct point format was not selected for the import.
If the point set is a Point number included and with the option free format is read in (see chapter Use of the free import format), these point numbers are used in the point set.
Point labeling (Layout tab): The points can also be assigned the coordinates of the current coordinate system (UCS coordinates) are labeled. The lettering is also used for Data exchange to Excel, into a ASCII- or CSV file exported. This function is used, for example, when setting out with the Leica Total station required.
Further steps
Use of the free import format
In the event that the existing point set file does not correspond to the specifications of the pre-defined point formats, a free import format can also be defined. To do this, choose on the tab Import> tab General> Point format Free format out. Then the tab Free format open.
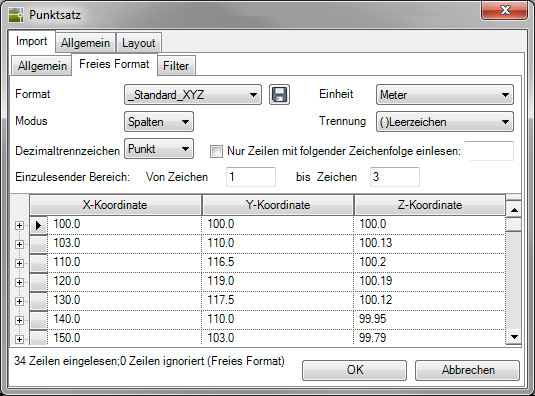
The first time it is called, the file is already analyzed and the entries in the Mode> Columns sorted into the appropriate columns depending on the format selected.
If the point set also provides a point number and the meaning point number is assigned to this column (e.g. in the _Standard_IXYZ format), these point numbers are used in the point set.
Another alternative is available via the option modus available: if you Sign you can use the field length to define a column. This enables you to read files in which no separators have been used.
To do this, select a column and enter the Area to be read in the fields Of characters the start value and up sign the end value within the line.
Format settings created once can be saved for subsequent imports.
Information about the ASCII file format
The point specifications must be within the point lines of the ASCII-File must be separated from each other (space, tab, comma or semicolon). Each point is described in a line of text. Each line of dots can be a maximum of 255 characters.
The order of coordinates and additional information (e.g. a comment on the point) within the point line is arbitrary, but it must be identical for all point lines that are to be read in in one operation.
Any comment text can follow at the end of a coordinate line.
If the comment is not at the end but within the dot line, it must form a word. In this case, none of the separators described above may be used within the comment. Otherwise all characters can be used in any order.
Example: Punkt23, Punkt_23