Table of Contents
Contours
Command: CONTOUR
Description
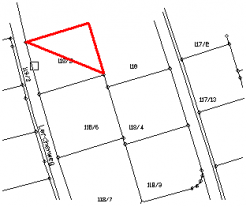
With this command new derivatives (open or closed) can be created on the basis of already constructed drawing elements. Any kind of linear drawing elements can be used for this, eg lines, polylines, but also rectangles, arcs, circles, splines.
Application
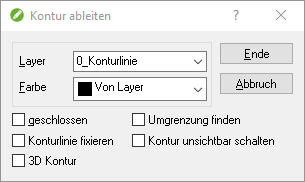
- After the command has been called, a dialog appears in the upper left corner of the screen that remains active during all contour derivation and controls the properties of the contour.

- The contour derivation is based on the specified Layer 0_Contour line sorted. However, all layers in the drawing can also be used or a new layer can be created automatically by entering a name. When choosing the color, the Color for the current derivative, not the color of the layer.
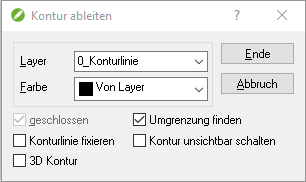
- It can be open and closed Contours are created, with closed contours either by selecting the individual elements or by automatically finding the Boundary can be defined. Become Fixed contour lines there is no adjustment if the underlying drawing elements are changed. You can ... a Switch contour invisible. Your drawing objects will not be displayed twice. These contours can be in Object manager can be made visible again. (please refer Visibility Manager)
The option Switch contour invisible is only available to you during contour acquisition in the Object Manager.
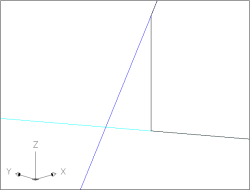
- Contours can also be derived from objects that are at different heights. With the option 3D contour In contrast to the actual contour, an almost vertical edge is created at the intersection (assumed intersection point) of two lines that meet / intersect. The actual contour interpolates the values at this interface.
without the 3D contour option with option 3D contour 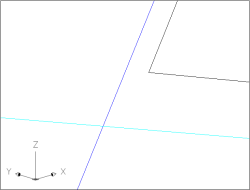
The settings in the dialog always relate only to the current derivative and not to all derivatives within the command call.
- Now select the desired drawing elements from the drawing (with the option Find the boundary must be clicked into an area). These will be redrawn in the order of your line selection. Any gaps are usually closed using the shortest possible route.
If the contour is not drawn as desired, you can undo as many steps as you want by clicking in the empty graphic area.
- When confirming with Enter or with the right mouse button, the contour derivation is generated and a new derivation can be carried out.
- To finish the entry, this can be done in the dialog with [The End] happen, or by confirming twice with Enter or the right mouse button.
With the option disabled closed a route can also be derived from closed objects.
Using the options
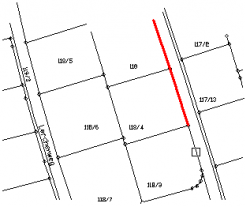
- Deriving a route closed with disabled option.
- Deriving an area by clicking on the boundary lines closed with the option enabled.

- Deriving an area by automatically finding a boundary closed with options enabled and Find the boundary.

The new contour depends on the original object and changes with the change of the original object.
Please note the following: The contour is attached to the original objects with invisible definition points. These are the points that you selected when you created the contour. If the position of the original objects is changed, the contour is tracked. However, if the definition points are outside the area definition after the change, the contour is tracked differently.
Changes in the starting objects
 | Initial Situation: Defined closed contour derivation. The definition points (1-4 blue) are located between the corner points. |
 | Change 1: After moving the line (black), point 3 is still within the area definition. |
 | Change 2: After moving the line (black), point 3 is now outside of the old area definition. The contour is now tracked differently. |
Are contours with the command ORIGIN dissolved, the contours disintegrate into connected or closed polylines, which are no longer traced when the original objects are changed in their position. The definition points are generated as separate vertex points.
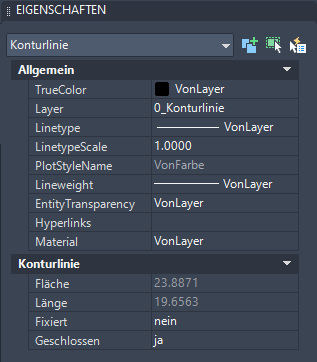
Another possibility: A double click opens the window Features. Changes can be made here without an extra command.