Table of Contents
DATAflor Adjust title block
Description
The DATAflor Template files contain predefined layouts. A dynamic block is integrated into this, which can be adapted to the paper size. The plan stamp contained therein can be adapted to the needs of your company.
Application
There are two different approaches to adapting the fields.
Adjust company data
You should make these changes once in the template file you are using. These are automatically available to you with every new file you create.
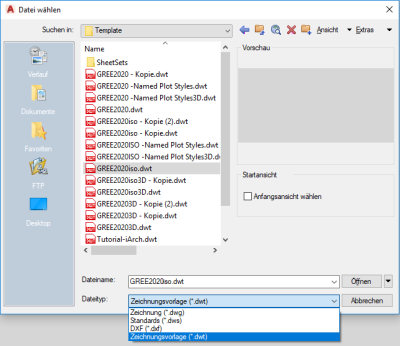
- Once you have selected the file type to open a file Drawing template (*. Dwt) selected, the template file (e.g. GREE2020iso.dwt) can be selected from the list for changing.
- Activate one layout.
- Select the block and then open the with the right mouse button Block editor.
- Enter the name and address of your company: Double-click on the text line and confirm your entry with ENTER.
- Your Logo place. Click the frame of the picture placeholder.
Newly added images are not automatically integrated into the dynamics of the block and would have to be assigned the desired functions via the block editor.
- Go to the menu Transportation and select the little arrow at the bottom right of the group Referenz.
- Right-click the entry in the list Logo placeholder and choose Select a new path ...
- Select your picture.
- Use the blue handles to adjust the image size and, if necessary, the position.
- Existing text content and its positions can also be adjusted (shown in the film under Functionality)
New, self-created texts and lines are not automatically integrated into the dynamics of the block and would have to be assigned the desired functions via the block editor.
- Close the block editor and save the changes to the block.
The plan stamp is automatically updated on all layouts.
- Activate the Model area.
- Save The template file to use the changes for new drawing files.
New drawings now contain the changed plan stamp.

The new plan stamp can be opened via the DesignCenter existing drawings Transferred without a plan stamp or with an older version. Method:
- Open the relevant drawing.
- The DesignCenter with the command ADCENTER Open and choose the template.
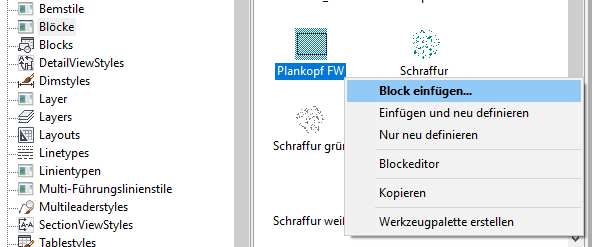
- Then right-click on the block PlankopfFW either Insert block (without plan stamp) or Just redefine (old version).
- If an inserted picture is not displayed correctly, the block editor must be opened in the relevant drawing.
- Select the image here and follow steps 6-8 above.
Enter project data
All data relating to the current project are changed directly in the drawing file. These project-dependent data are adjusted using the attribute editor. To enter this, proceed as follows:
- As soon as you have opened a new drawing and edited the project, activate the desired layout.
- Double click on an attribute, e.g. NAME client.
- This attribute is a multiline text. Click the […] button next to the value.
- With ENTER you get to the next line.
- Once you are typing with [OK] confirm, the entries are accepted and the attribute editor is opened.
- You can make further changes here. At single-line texts Illustrator and Date you can enter it directly in the line Value . make
- Finally confirm the changes with [OK].
- Activate the Model area.
- Save The drawing file.
How it works in the film
Adjust dynamic title block:
Update attributes and add new objects:
Becomes a new attribute put in the Features this attribute definition the entry Lock position on Jato anchor the position in the block.