Table of Contents
Edit picture
Command: IMGWORK
Description
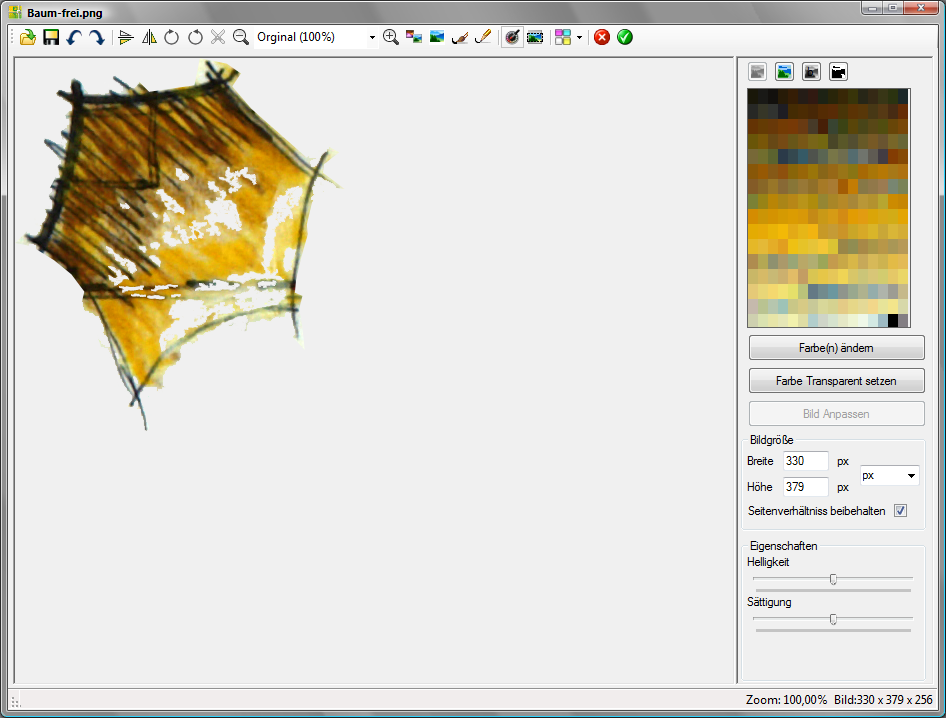
This feature allows you to view your images within DATAflor Change CAD in quality, orientation, size and color. The image selection can be made directly in the drawing, but also from the image editing dialog. After editing, you can save the picture and add it to the drawing.
Features
Command bar above
| To open: Opens a selected picture. | |
| To save: Save the picture in a new file. | |
| Undone: Undoes the last action (any number of steps are possible). | |
| Forward: Revises the last undo function (any number of steps are possible). | |
| Flip horizontally: Mirrors the image in the horizontal axis. | |
| Flip vertically: Mirrors the image in the vertical axis. | |
| Rotate 90 ° clockwise: Rotates the image 90 ° to the right. | |
| Rotate 90 ° counterclockwise: Rotates the image 90 ° to the left. | |
| Cut out: Crop the image to fit the selection. | |
| Shrink: Reduces the view of the image based on the defined zoom values in the selection list. | |
| Displays a selection list with defined zoom values. | |
| Enlarge: Enlarges the view of the image based on the defined zoom values in the selection list. | |
| Negative: Creates a color negative from the image. | |
| Polaroid: Creates a frame around the picture and makes it look like a Polaroid picture. | |
| Oil: Makes the image look like an oil painting, as if it was painted with a brush. | |
| Pencil: Converts the image to a pencil drawing. | |
| Pipette: With this color selection mode the current color of the picture can be selected. To do this, click on the desired color range in the image. The color is then framed in the color palette. You can also choose several colors. To do this, hold the buttons Ctrl or Shift pressed. |
|
| Selection: Use this selection mode to select a square or rectangular section of the image. Click with the mouse button on the first corner of the cutout, hold the mouse button down and drag the mouse pointer in the other direction. When you reach the second corner, release the mouse pointer. The image section can be adjusted in position and size using the markings. |
|
| Hintergrund: Changes the background color for transparent surfaces. The colors: cyan, magenta, yellow, white and black are available. | |
| Abort: Exits the dialog without saving the data. | |
| To confirm: Closes the dialog with saving the data and transfers the image to the drawing. |
Functions on the right
| True Colour: Displays the image in true color mode. | |
| 256 colors: Reduces the color depth of the true color image to 256 colors. | |
| Grayscale: Reduces the color depth to 256 shades of gray. | |
| Monochrome: Reduces the color depth to 2 colors (black / white). | |
| color palette | Display of the color palette of the current image. Here the color is selected that is to be edited. No color palette is displayed in true color mode. The color can also match the function Pipette to get voted. You can also choose several colors. To do this, hold the buttons Ctrl or Shift pressed. |
| Change color | Starts the dialogue Color and replaces the colors selected in the color palette with the new color (click on basic color or user-defined color). To use the user-defined colors, open the complete color selection with the button Define color.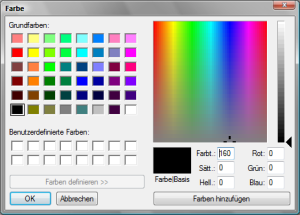 |
| Set color transparent | Sets one or more selected colors to transparent. The selected is for the transparent surfaces Background color displayed. |
| Adjust picture | Shows the changes from the areas Image size and Features in dialogue. |
| Image size | In this area you can recalculate the size of the image. The input fields are available for this Width and Height to disposal. You can also select the unit of measurement in which you want to make the settings. The option Maintain aspect ratio links the two values so that the ratio of image width to image height is automatically maintained. As soon as you change the height or width, the other value is automatically adjusted. The changes are not displayed until the button Adjust picture is pressed. |
| Features | The image can be adjusted using the slider. Thus, the Brightness and saturation to be changed. The changes are not displayed until the button Adjust picture is pressed. If an image is selected in the drawing, the sliders become Brightness, Contrast and Trays (Blanking with background) is displayed. However, their changes are only visible in the drawing after confirmation. |
Information at the bottom right
| Zoom | Display of the current zoom value. |
| BILD | Display of the current image size in pixels and color depth. |