Table of Contents
Print settings in print management
Description
The following description of the print settings applies to all printouts of the form groups with the addition "(Fast)":
- Print out business transactions (Fast)
e.g. offer, invoice
- Printouts and lists (almost)
eg address master sheet, address list
- Forms (almost)
e.g. EFB 221 (2018), EFB 223 (2018)
Depending on the selected output type, there are different settings for the output (e.g. selecting the printer for printing, specifying the e-mail address for sending e-mails) and setting options for page selection and design for printing and creating files to disposal.
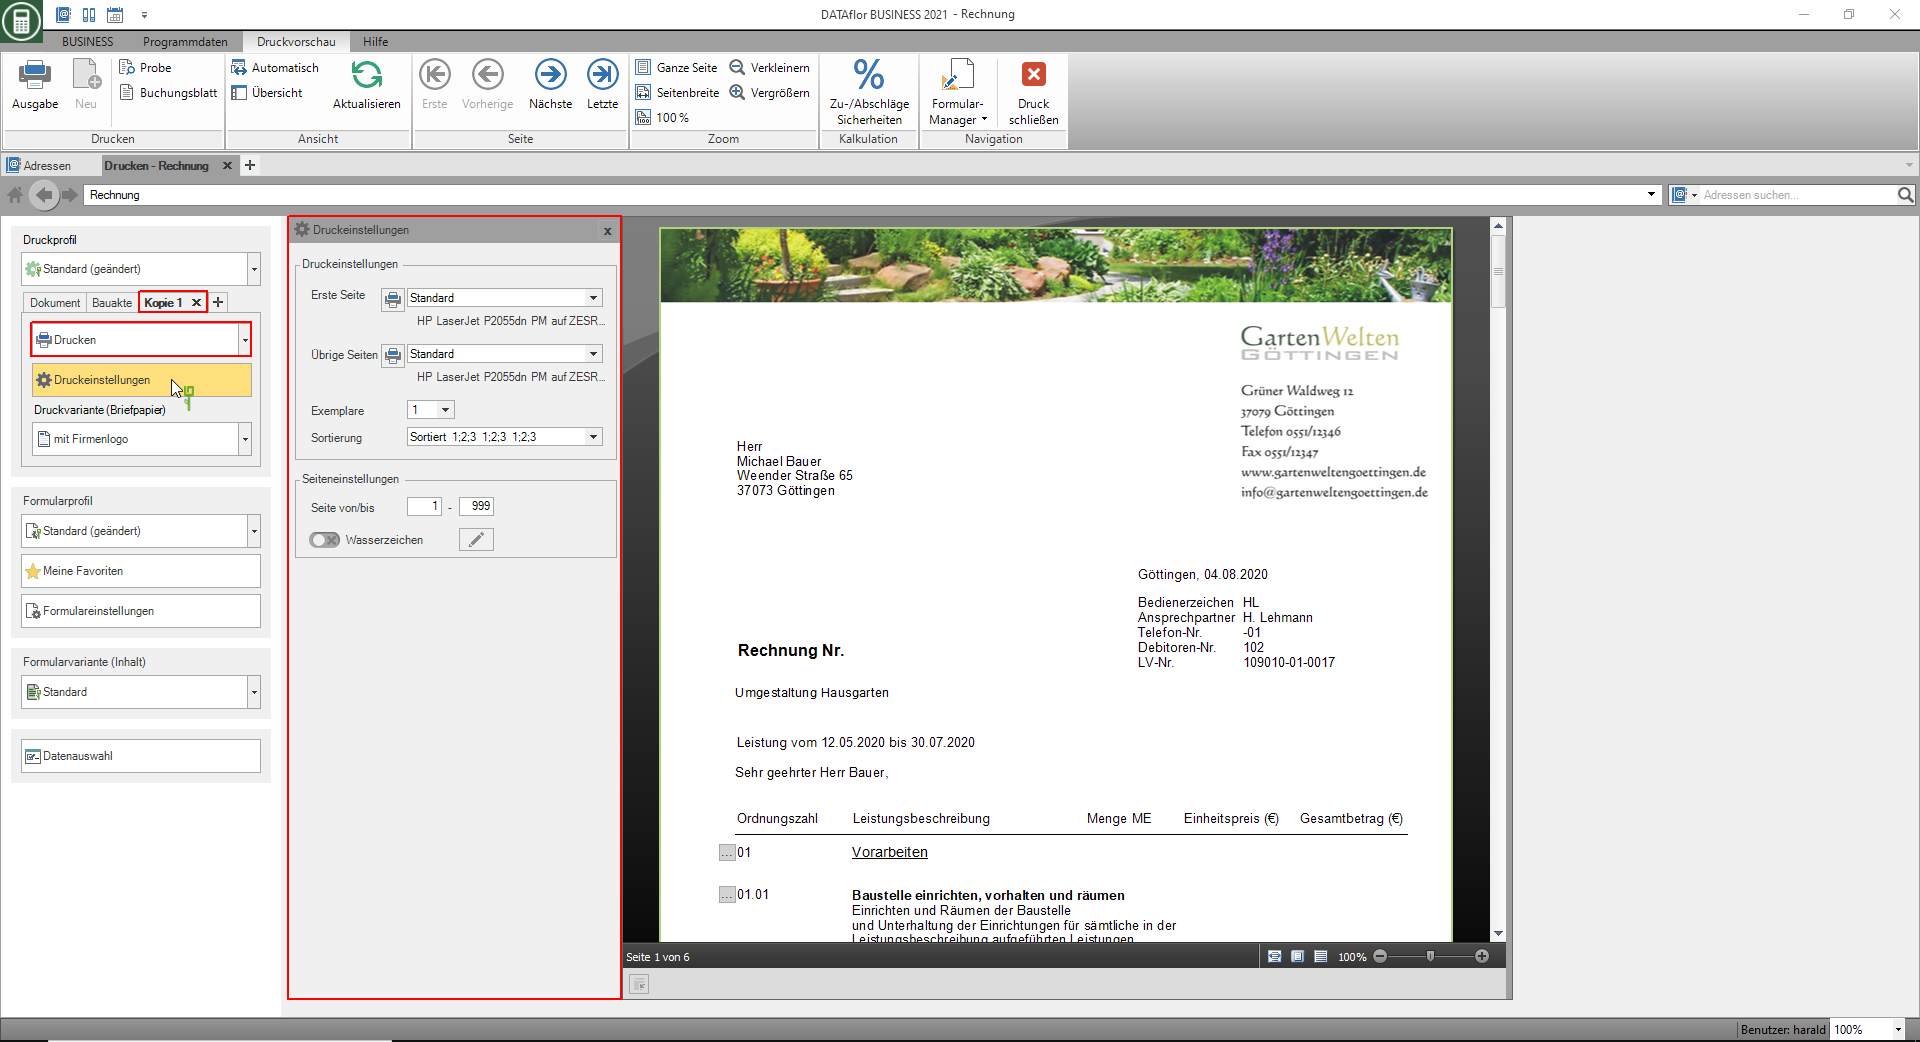
Several copies can be made at the same time for a form, including for the construction file and the reprint of order confirmations / invoices. The output type and its settings can be defined separately for each copy. If you select the tab of the copy, the associated settings are displayed.
For example: Print copy 1 of the invoice
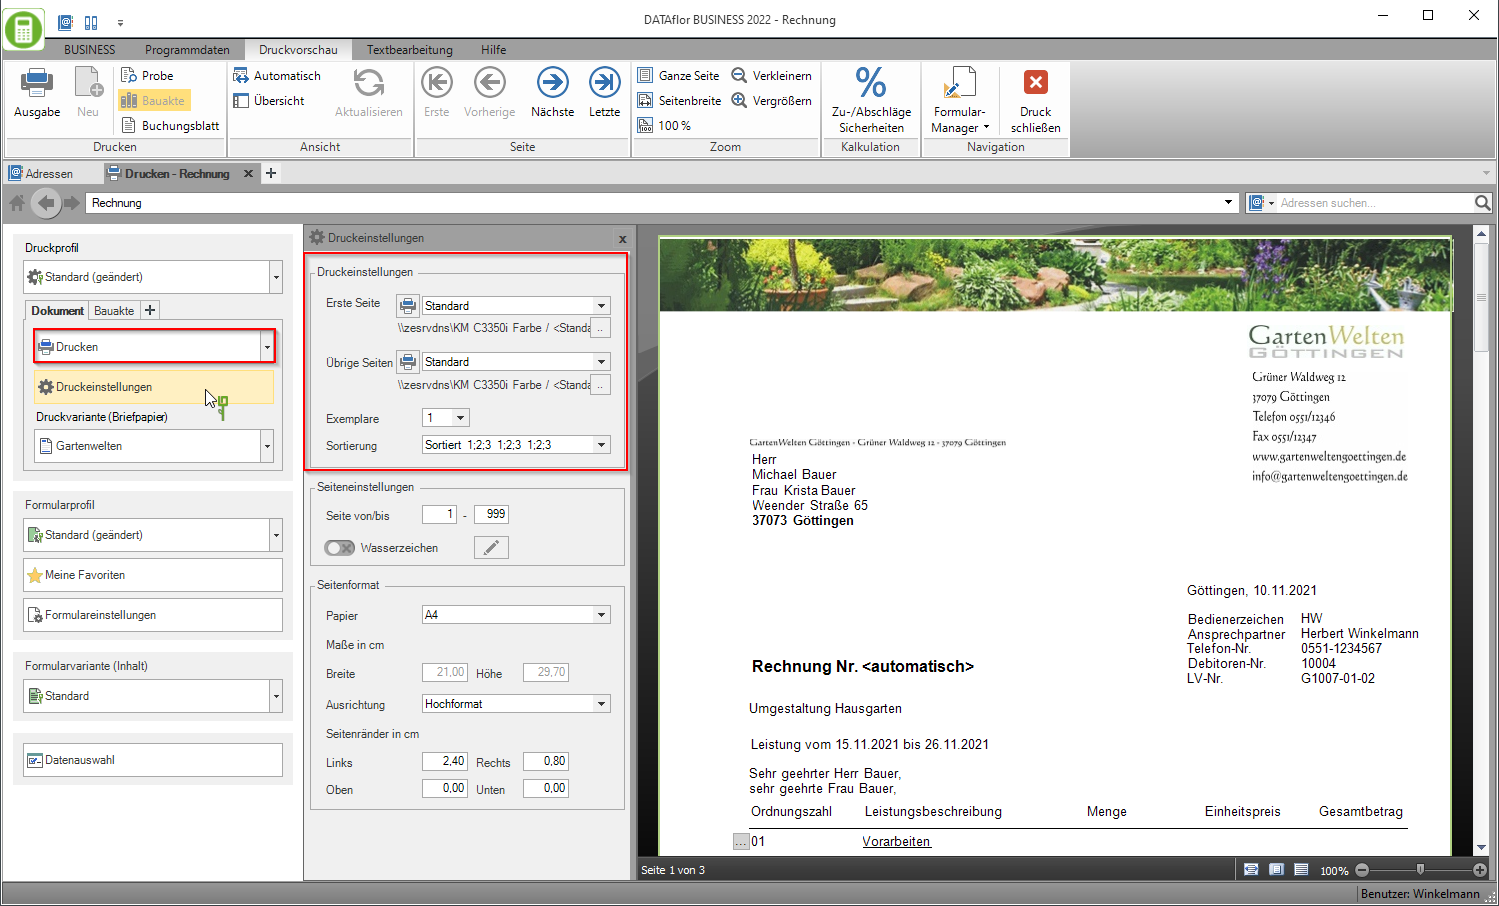
When selecting the output type Print the following print settings are available:
| Pressure setting | Description |
|---|---|
| First page / Remaining pages | By clicking The printer's paper trays, which are defined in the form manager, are available for selection. If you would like to permanently use a printer paper tray that is not yet available for selection, first define this in the Printer and slot assignment of the form manager. The tray selection that is defined in the selected pressure profile is preset. Via the symbol  All printers stored in Windows are also available to you. You can select this once for the output. All printers stored in Windows are also available to you. You can select this once for the output.By clicking on the symbol  you have access to the individual print settings of the selected printer, such as double-sided printing, punching, stapling. you have access to the individual print settings of the selected printer, such as double-sided printing, punching, stapling. |
| Copies | If you would like several identical copies of the printout, select the number here. |
| Min and | When printing out several copies of a multi-page document, you can set the order in which the pages are printed here. |
The options for page selection and layout of the printout are also available for other output types and are described in the sections settings page and Page format described.
E-mail, ZUGFeRD, X-invoice
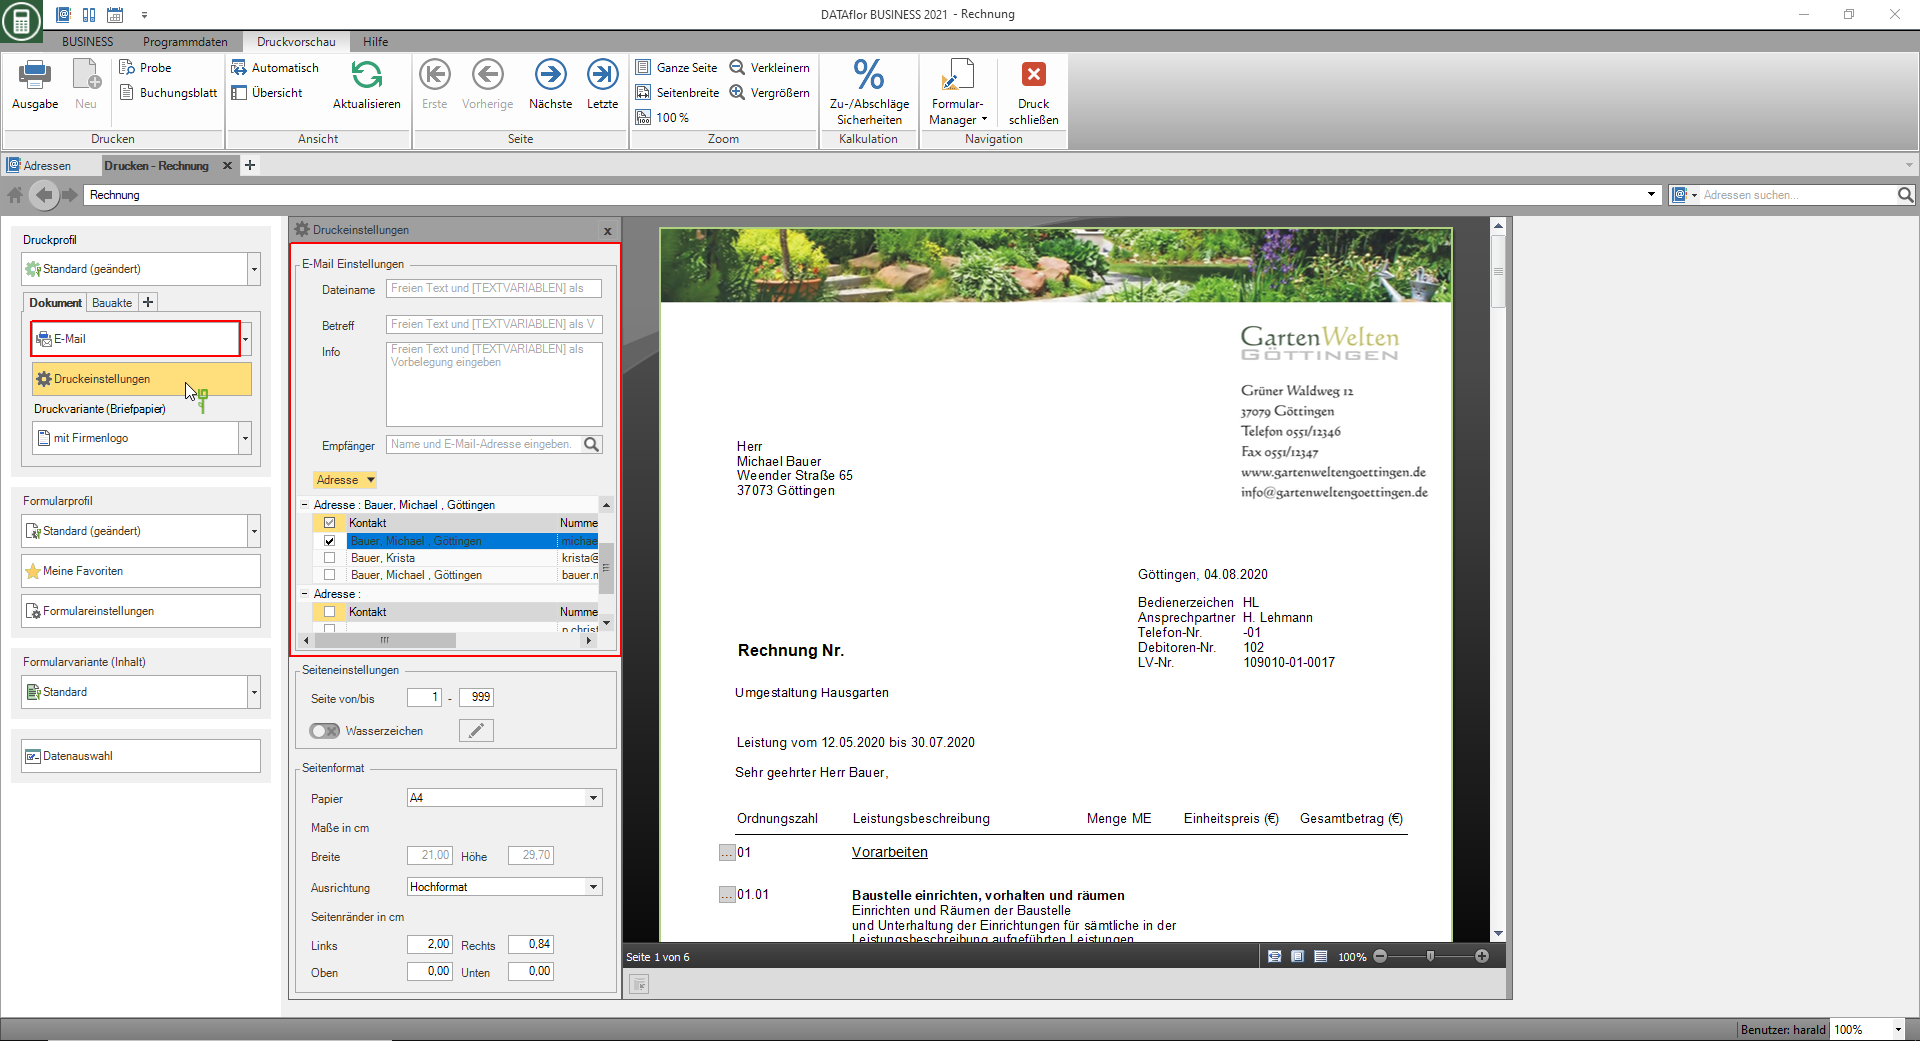
When selecting the output types e-mail, ZUGFeRD and X-invoice an e-mail is generated with the document in the file attachment. Depending on the selected output type, the document is attached as a simple PDF file (e-mail), as an XML file (X-invoice) or as a PDF file with integrated XML data (ZUGFeRD).
The following settings are available for generating the e-mail and the attached file.
| E-mail setting | Description | Tip |
|---|---|---|
| Filename | By default, the name of the file that is attached to the e-mail is made up of the form name and document number. If you want to use a different file name, enter it here. The file extension (file type) is automatically added for each output type. | In these fields you can Text variables which are automatically filled by the program. After tapping the button [ a list of the available text variables is opened for selection. The texts and text variables that are defined in the selected print profile are preset. |
| Subject | Enter the text that will be included in the subject of the email. | |
| Info | The one in the field Info The text entered is transferred to the text area of the email. | |
| Recipients | All e-mail addresses stored for the client and his contacts are displayed for selection. If the desired e-mail address is not available, you can enter it in the field Recipients enter. You can also click on  search in your address base. search in your address base. | The Text variable [EMAIL_RECEIVER] automatically enters the email address that is in the Address master data of the client. |
If you want e-mails to be opened in your standard mail program before they are sent, activate 20.10 in the program parameter Printer mappings for e-mail settings the option View email before sending.
Invoices that are sent as e-mail from batch printing are always sent immediately. Further processing in the mail program is not possible.
The options for page selection and design of the pages in the PDF file are also available for other output types and are in the sections settings page and Page format described.
File
When selecting the output type File a file is created. In the file settings you can specify the name that is used for the file in your file system.
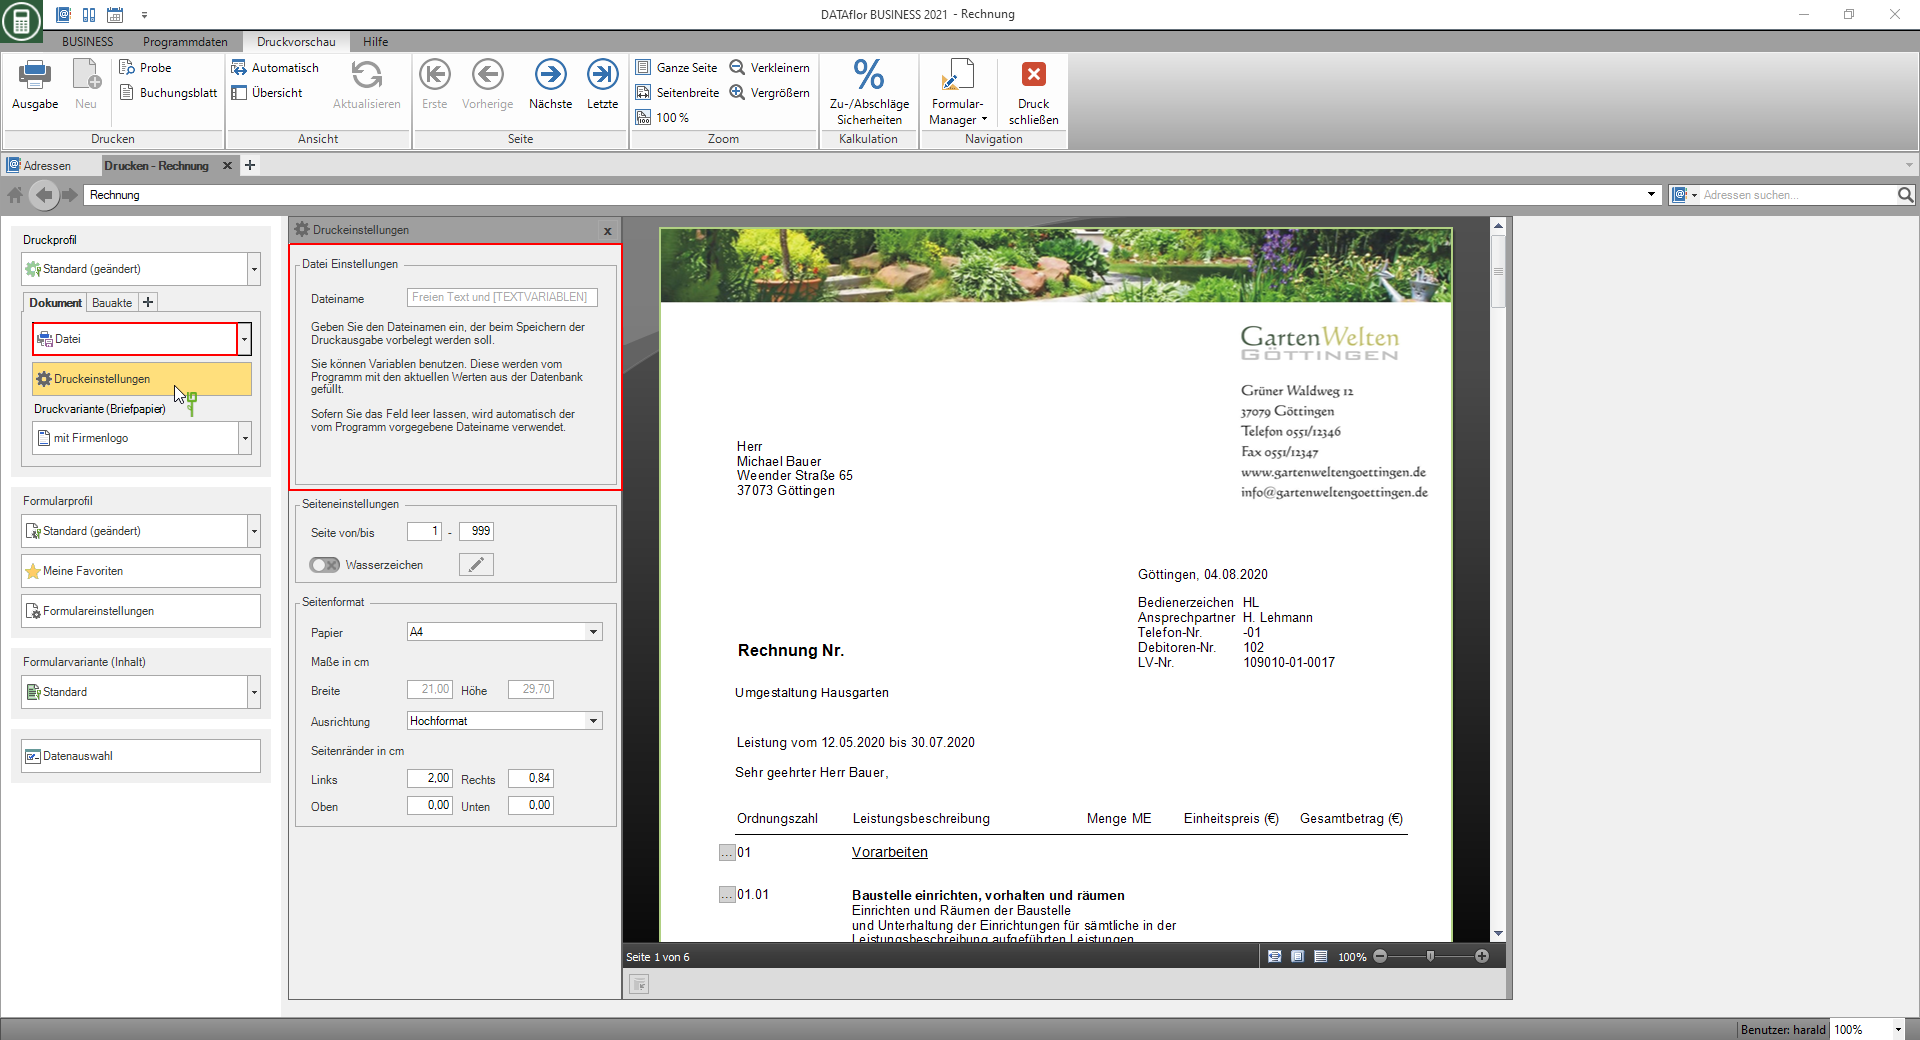
| File setting | Description |
|---|---|
| Filename | Click on output The Windows file selection dialog opens in the menu, in which you select the directory in your file system in which the file is to be saved and where you can specify the name of the file. The default file name is made up of the form name and document number. If you want to use a different file name, enter it here. You can also Text variables which are automatically filled by the program. After tapping the button [ a list of the available text variables is opened for selection. The text and text variables that are defined in the selected print profile are preset. |
After executing the function output the Windows file selection dialog opens, in which you also select the file type. The following file types are available: * .pdf, * .html, * .xml, * .docx, * .xls, * .xlsx and the report file format * .001.
The options for page selection and design of the pages in the PDF file are also available for other output types and are in the sections settings page and Page format described.
settings page
The options for page selection and use of a watermark represent the output types Print, e-mail, File and ZUGFeRD is available for storage, management and analysis.
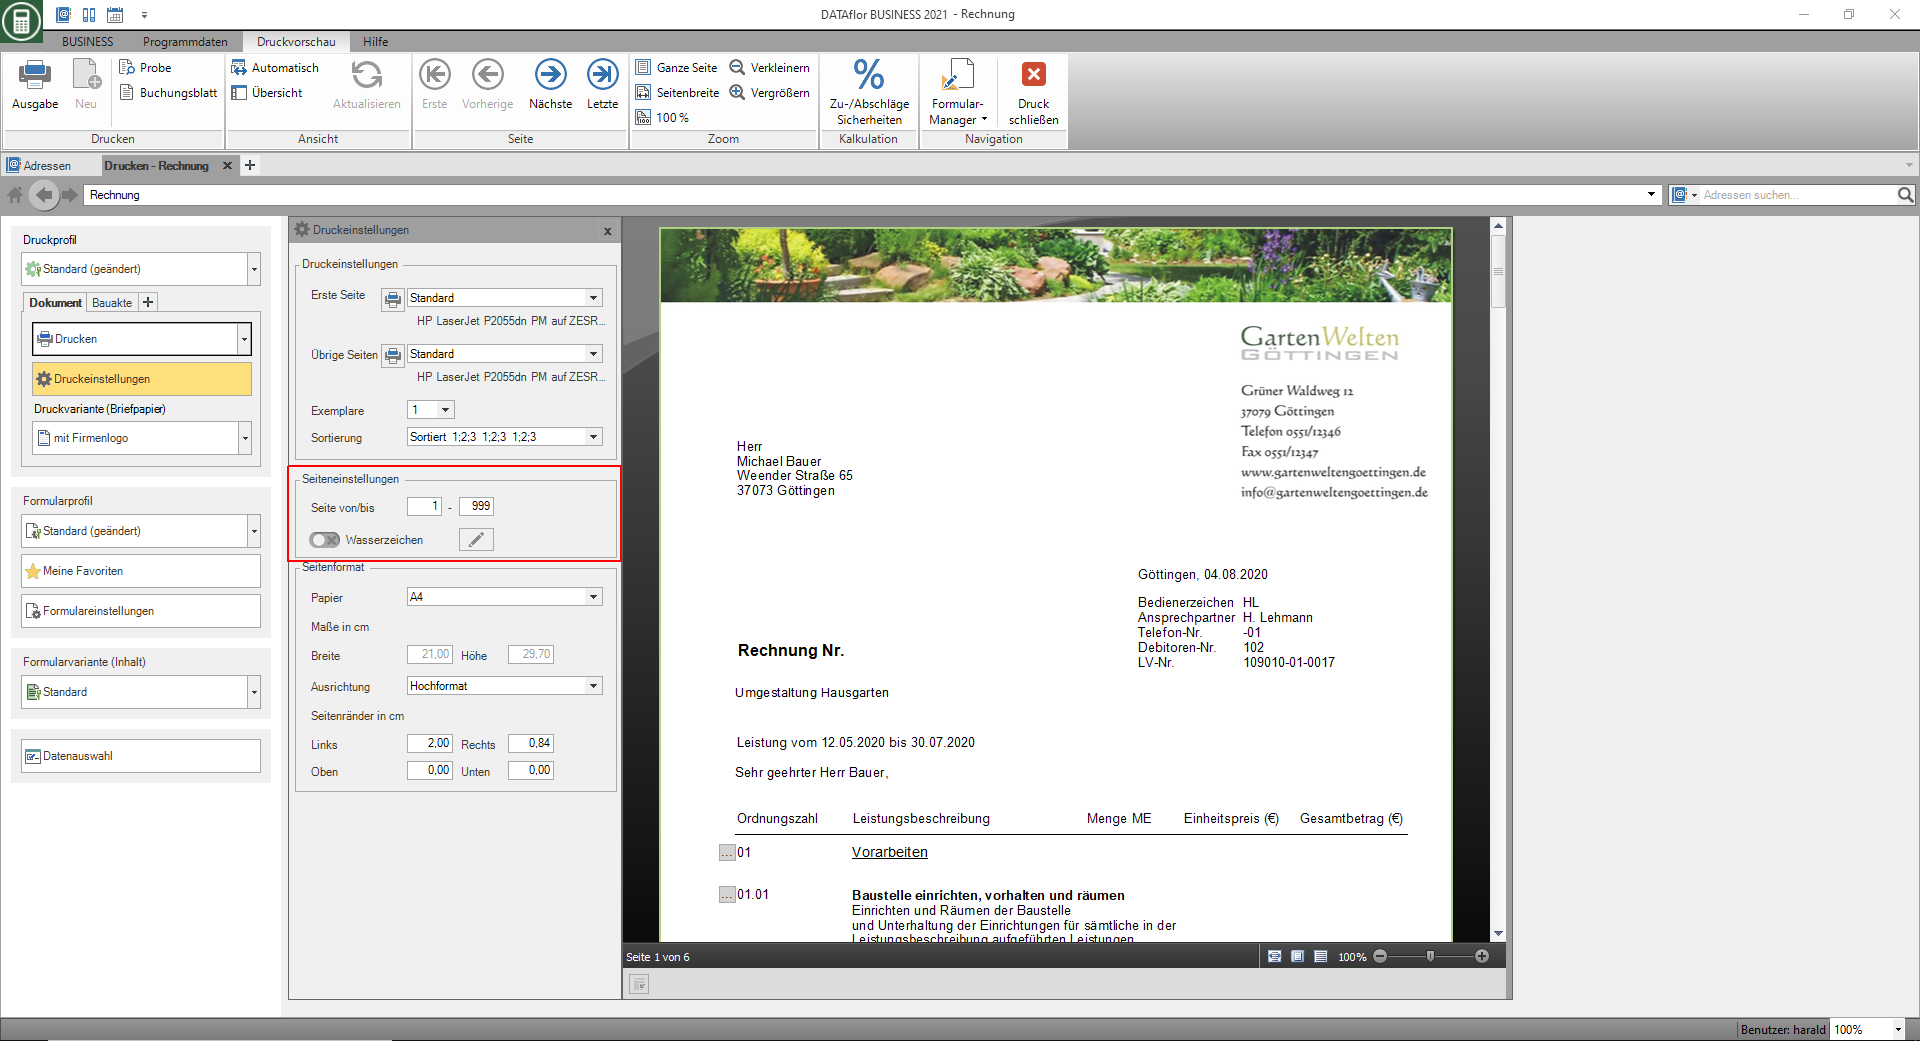
Watermark
For printing on paper and creating PDF files, you can define a watermark that is output behind / below all elements of the printout, e.g. to mark a printout as a copy.
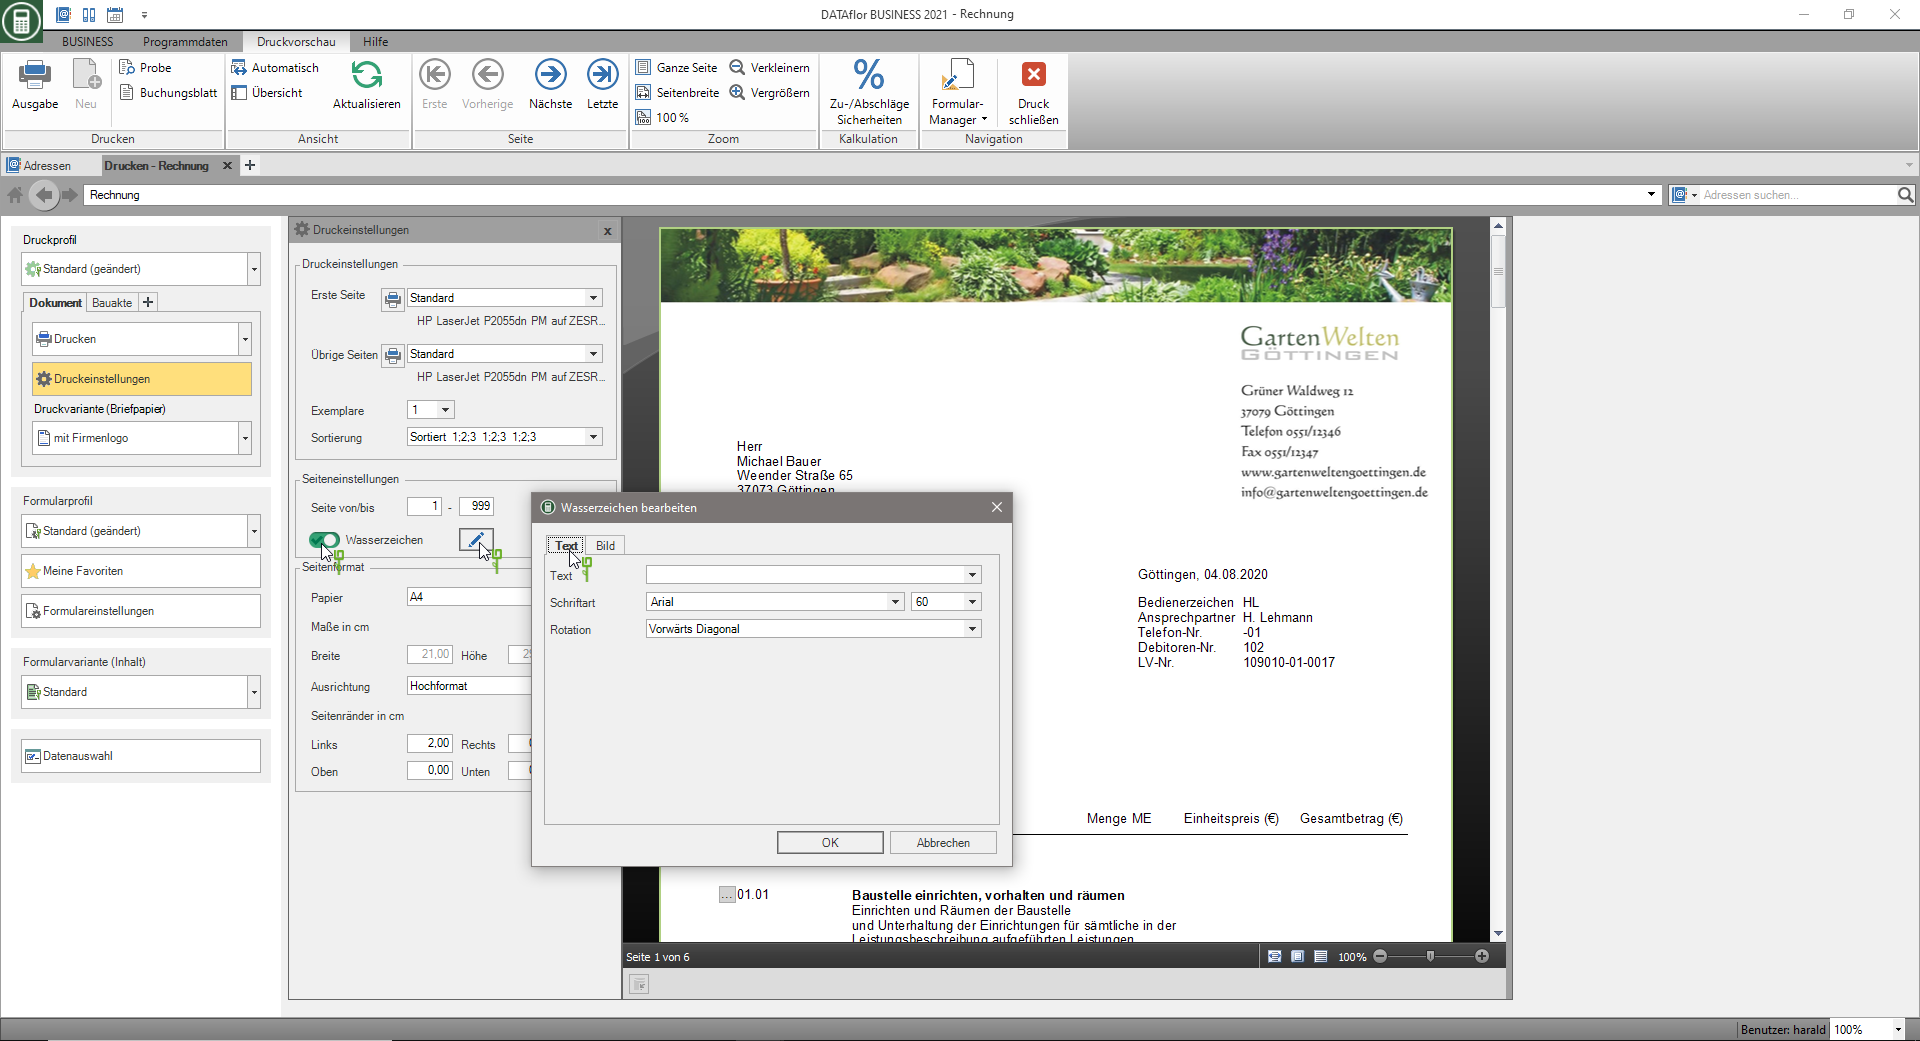
To design a watermark, open the dialog Edit watermark by clicking  in the settings page. You have the option of defining the watermark by entering a text or loading an image.
To use a text, open the tab text, enter the text and specify the font and size as well as the alignment of the text.
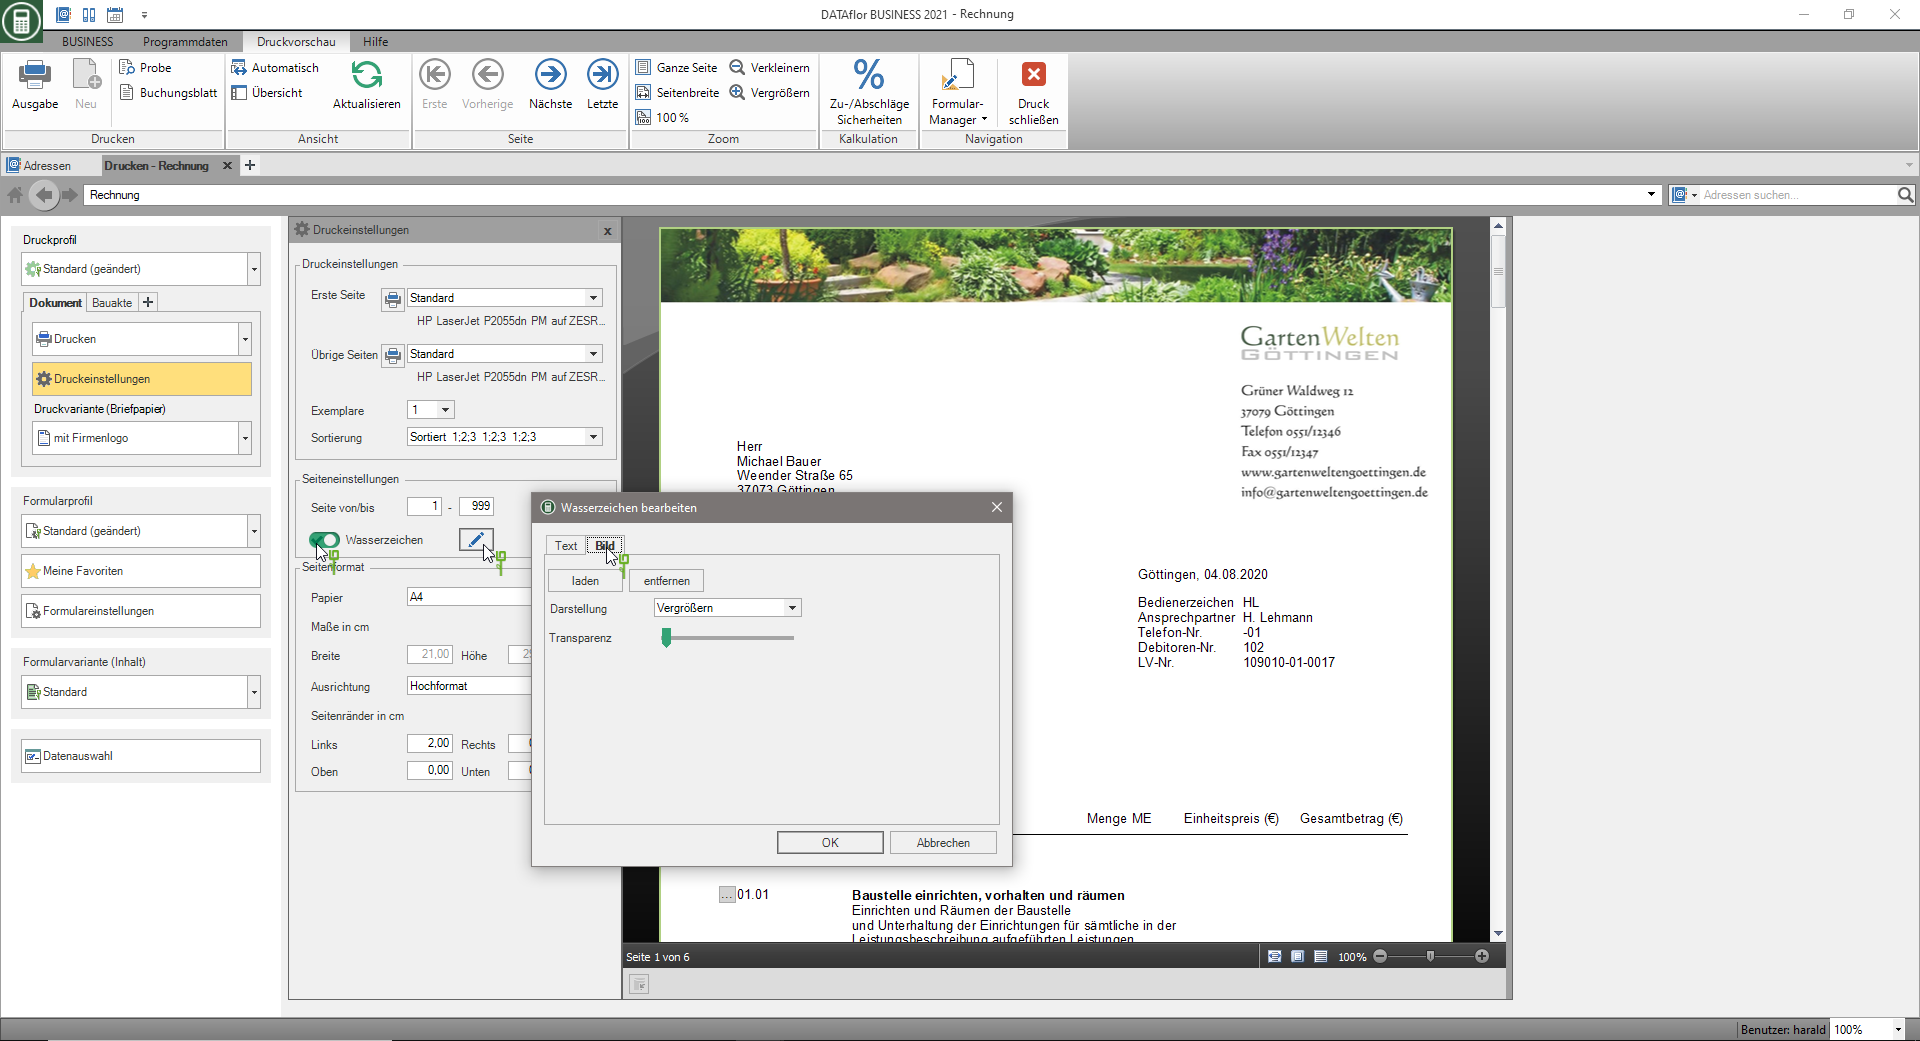
To use an image, open the tab BILD, load the image and specify the display and transparency of the image.
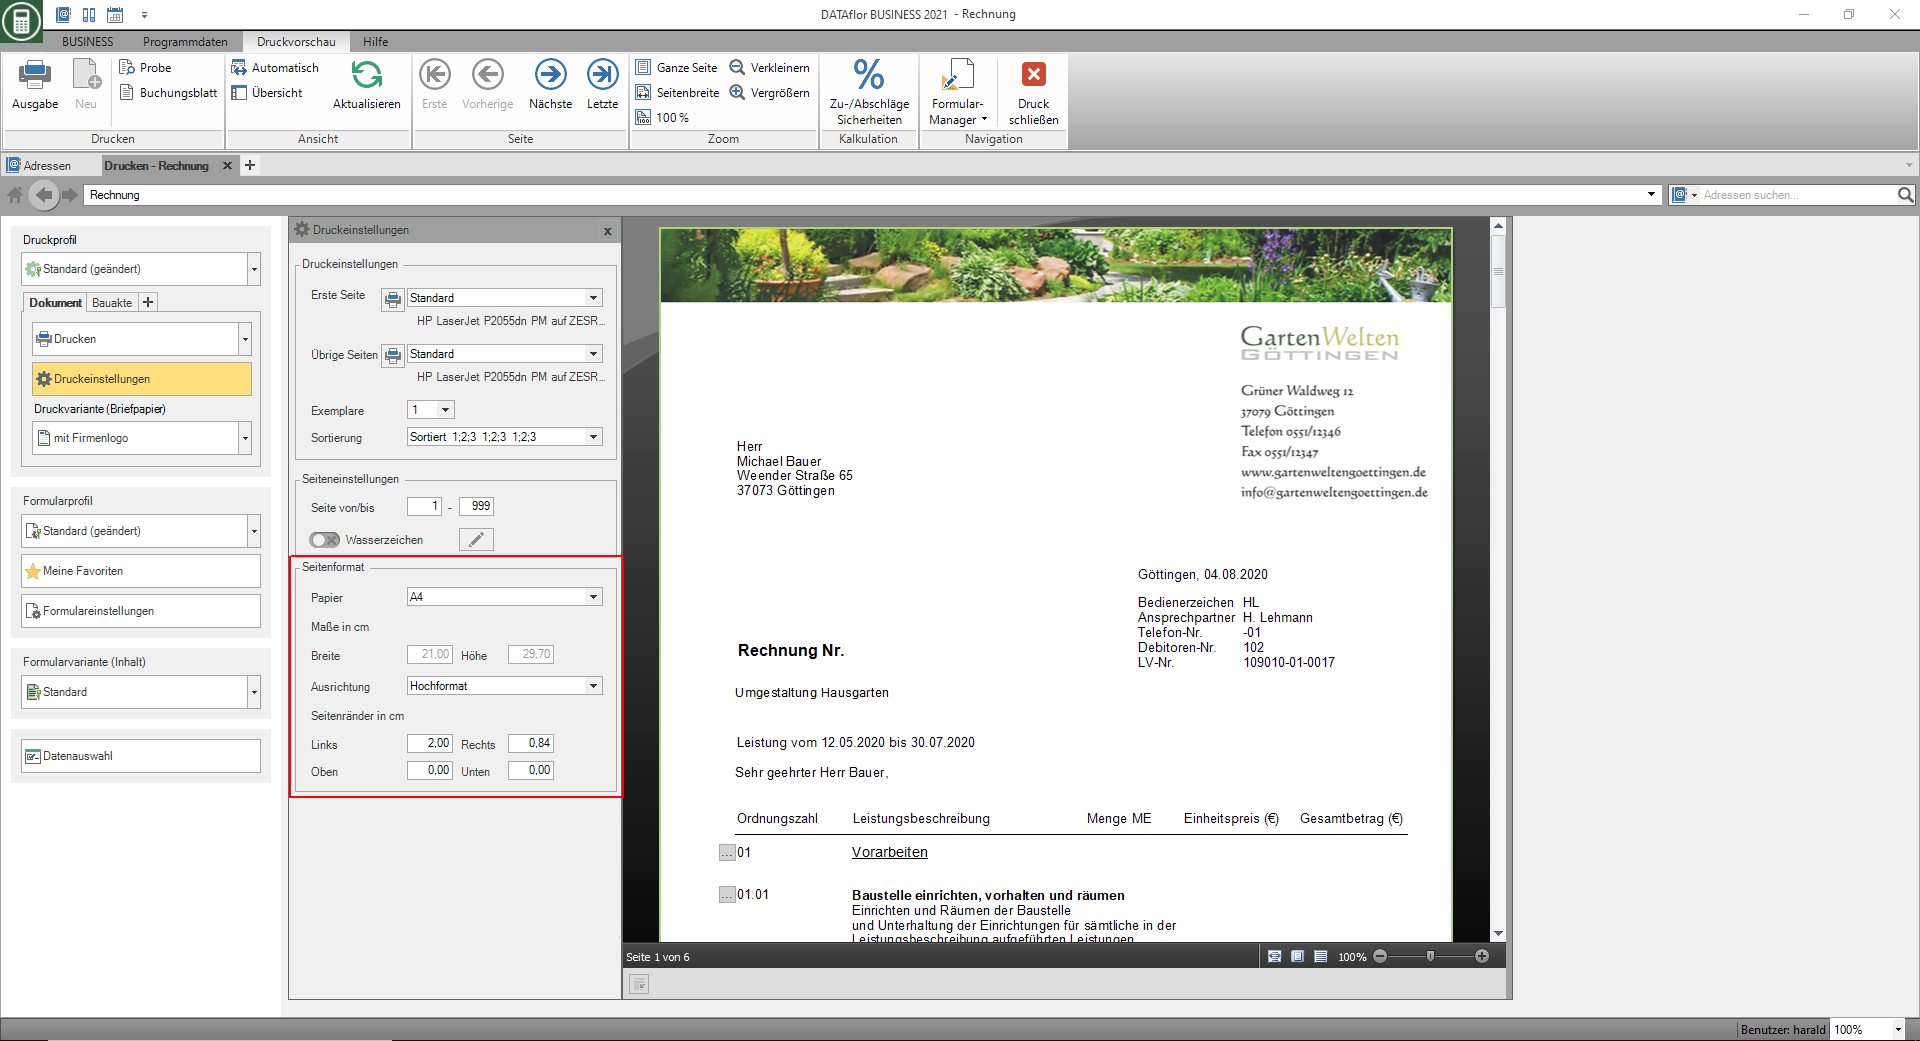
Page format
The options for the format of the printed pages or the pages in the PDF file represent the output types Print, e-mail, File and ZUGFeRD is available for storage, management and analysis.
