Table of Contents
Apply plant label
Description
To create a new label, mark the entry in the directory tree with the mouse pointer own label and then click  . The following dialog opens. Select the entry New label and confirm with [OK].
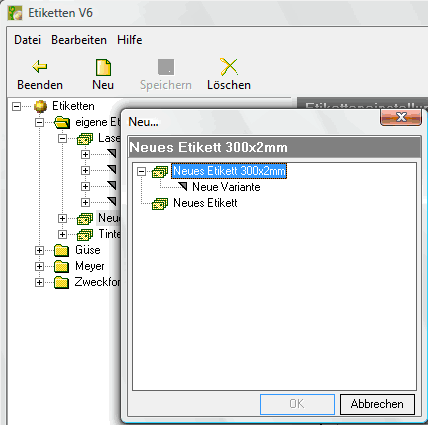
On the right-hand side you make the layout settings for the new label.
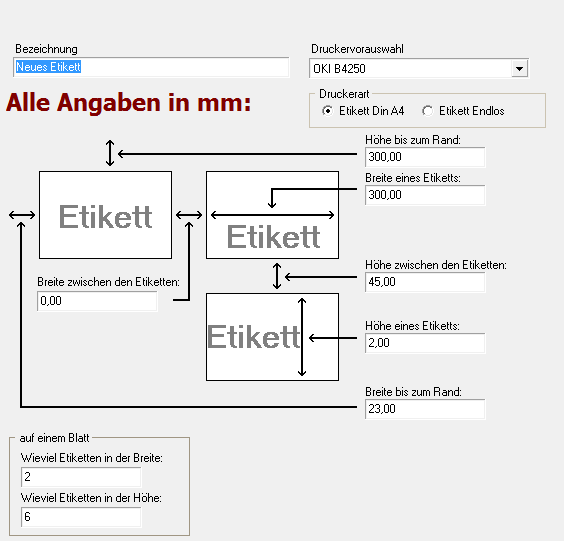
Take a moment to understand the illustration. Three labels are shown. The program wants you to know how big the labels are and how much margin there is around them. In the section at the bottom left, you also indicate how the individual labels are distributed on the sheet. With this information, your computer can position the printout exactly on the labels.
designation
Here you can enter the name of the label type. You can freely assign the name. In practice, it is good practice to choose the printer name and the type of paper. Because at this level you have to set these two points.
Printer preselection
Enter the printer that should be suggested as the default when printing out. You can still change the set printer when you call up the printout. Only printers that are installed on your PC can be selected.
Printing
The labels are attached to sheets of different lengths. Here you determine whether the document is a DIN A4 sheet or whether it is continuous paper.
Height to the edge
Enter the distance between the top edge of the sheet and the beginning of the first label in millimeters.
Width of a label
Enter the width of a single label in millimeters.
Height between labels
Enter the distance between two labels on top of each other in millimeters.
Width between labels
Enter the distance between two adjacent labels in millimeters.
Height of a label
Enter the height of a single label in millimeters.
Width to the edge
Enter the distance between the left edge of the sheet and the beginning of the first label in millimeters.
How many labels in width
Enter how many labels are next to each other on the sheet.
How much labels in height
Enter how many labels are on top of each other on the sheet. Please also enter a value if you are using continuous sheets.
click on  to secure your entries. You can make changes at any time by clicking in the relevant field with the mouse pointer.
By clicking  the entire data record is deleted.
Create variant
Select the label setting for which you want to make an additional variant and click on  . Mark the entry in the selection dialog New variant and confirm with [OK].
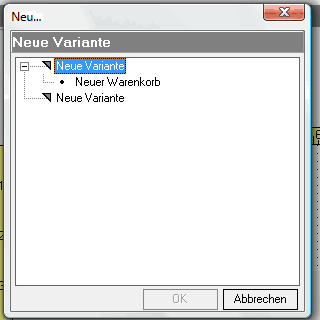
The following display appears on the right-hand screen:
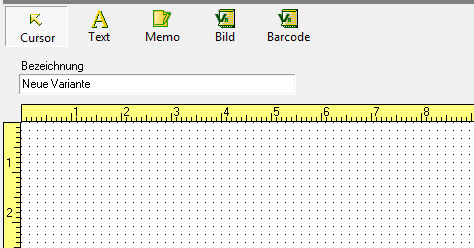
This is where the design of your label is determined. Here you determine how and where the individual information and data should appear on the label. Let your imagination and creativity run wild. The dotted area is your field of work. Its size corresponds to the specifications that you made under Label presetting. The point grid is used for better orientation in the design. It does not appear in the printout.
Sometimes it makes sense not to use the entire area. Important information could be covered by the fastening etc. With stick-in labels, half of it disappears into the ground.
designation
Assign a unique name for your different variants. You are of course completely free to choose a name. The labels could be divided into private customers, dealers, construction sites, etc.
Edit elements
First activate the function Cursor in the toolbar and then mark the element in the work area whose position you want to change. Only one element can be selected at a time. You can easily recognize it by the corner points. With this function you can move, rotate and resize the selected element. If you move the mouse over the marked element, the mouse pointer takes on different shapes. You can edit the element depending on the appearance of the mouse pointer.
Insert text
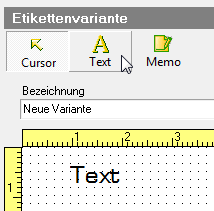
Click on in the toolbar textto create a text field. With a mouse click in the work field you define the position at which the text field is inserted. "Text" appears.
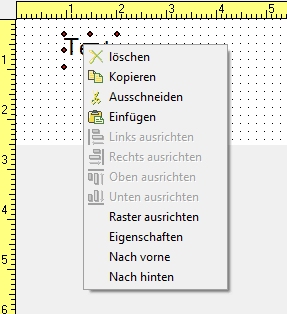
You can define the following properties of the text fields individually. Select the text element, right-click to open the context menu and select the entry Features.
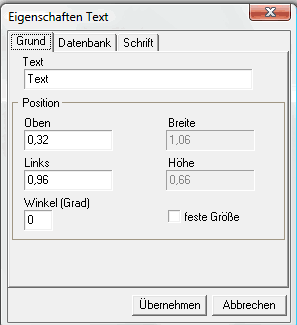
The following dialog opens. On the tab Plot you will find the following setting options:
| Option | Description |
|---|---|
| text | Enter your text to be printed here. |
| Fixed size | By default, the object frame in the working area is adapted to the font size. If you activate this field, the object frame remains fixed at the current size. |
| Shop | You have the option to rotate the text field around its central axis. The larger the value, the more the object is rotated counterclockwise. At 90 degrees the field is vertical and at 180 degrees the text is upside down. |
| Right-justified / Left-justified | Depending on which option is activated, the text is aligned left or right in the object frame. |
On the tab font set the properties of the font. This includes the font, font size, color and other attributes. What the individual options do should be known from common word processing programs. Changes are immediately adopted in the sample and can therefore be quickly understood.
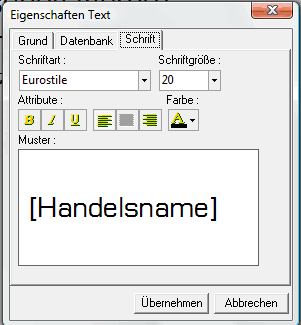
With [Take over] your changes are entered in the text field. With [Abort] close the dialog without accepting changes.
Insert variables
Much information about the plants is already available in your database. This includes name, prices, quality and much more. With the register Database put a variable on the label. This variable is temporarily acting as a placeholder. When printing, the real value is taken from the database. In this example, instead of “Price with VAT (EUR)”, “39,00 EUR” or something similar appears on the label. If this information is not available in the database, this field remains empty when printing.
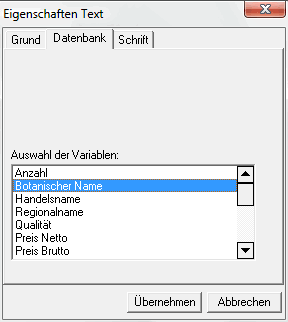
Selection of variables
Choose the variable you want to use.
Make sure you double-click the variable with the left mouse button. It is not enough to mark the variable and click on it [Takeover] to click. The variable name must be in the individual line. With  you can delete the variable again.
After double-clicking on the variable you will be asked whether the variable should be accepted as text. Confirm with [Yes], the variable name is displayed under Text in the register Plot accepted. At [No] becomes the one in the register Plot entered text of the variable name for this function. \\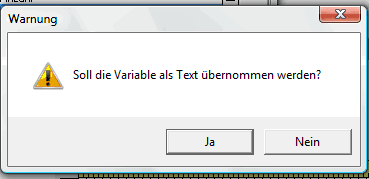
For example: Add trade name Add a text element to the label as usual and double-click the text label to open the database assignment. Select the tab there Database and the entry trade name double-click and confirm the transfer query with [Yes]. If necessary, adjust the text on the tab Plot in The Field text so that only the variable (proportion in square brackets) remains if you do not want to have any further text in front of the trade name.

For example: Accept / edit plant texts
Analogous to the insertion of the new field trade name, you can now also access the stored plant texts. You can also edit and change the texts for the plant label printout.
To do this, add a field on the label Memorandum and enlarge it according to your space requirements for text output information. Double-click the memo field and hit the tab as usual Database the selection of the field Memorandum by double-clicking. Confirm the transfer query.
Each newly added plant is now output with the texts stored in the master data. Adjust the text output by clicking on the selection field Memorandum an inserted plant.

The memo field opens with plant texts for editing.
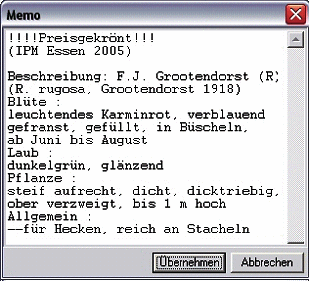
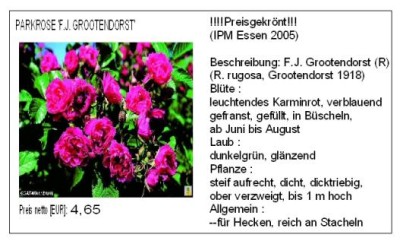
Edit the texts according to your wishes and adapt the texts according to the layout sizes you have chosen on the label. Check your entries in the label print preview.
insert Picture
click on BILD in the toolbar to create a graphic object. You can place it in the work area with a click of the mouse. A graphic will appear there.
To edit the object, you must first activate the graphic field again with the left mouse button. Move the mouse pointer over the object and press the right mouse button. Select from the list that now appears Features, or with a double click on the field.
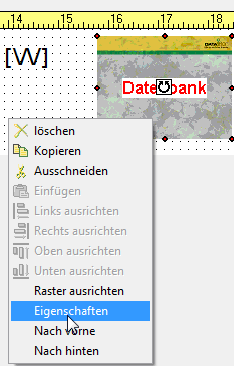
The following dialog in which you can define the properties of the graphic opens.
On the tab Plot you will find the following setting options:
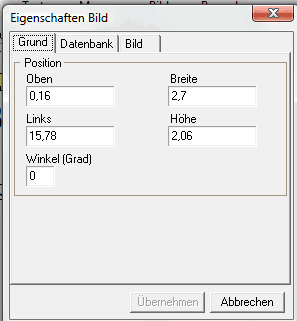
Adjust the size and position of the image using coordinates.
On the tab BILD you will find the following setting options:

click on [Load]to load your own graphic file. You can only import graphics that are in the bitmap (* .bmp) format. Enter the path as you are used to from Microsoft Windows. When the graphic is loaded, click on [Take over]. The graphic appears in the work area.
On the tab Database you have the option of setting a variable. The variable serves as a placeholder for the graphic from your database. The placeholder still appears in the working field, but when it is printed it is replaced by the graphic from the database if a plant image is available. If there is no image in the database, the printout remains free at that point.
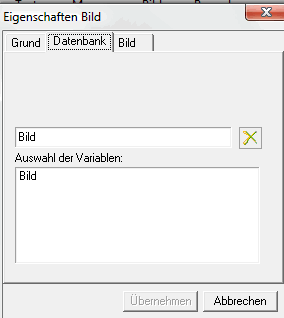
Make a selection by double-clicking the mouse button under Selection Variables. The variable name appears in the single-line field. With  you can remove the selection again.
It is not enough to simply mark the variable with a single mouse click and click on [Accept]. The variable name must be in the top single-line field.
With [Take over] your settings are entered in the object. With [Abort] close the window without applying any changes.
Click on in the menu bar  to secure your entries. You can make changes at any time and by selecting
  remove all content.
new shopping cart
In the directory tree on the left, mark the label setting for which you want to make an additional variant and click on  . In the selection dialog choose New shopping cart and confirm with [OK].
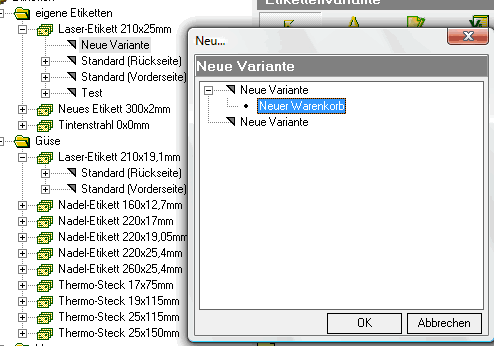
The mask for your shopping cart appears in the right field.

| Option | Description |
|---|---|
| designation | Enter a unique name. Choose a name with which you can quickly find the plant collection in the shopping cart. |
| Sort by | You can sort the contents of the shopping cart in alphabetical order. You can arrange the plants either by the German or botanical name. The labels are also printed according to this arrangement. |
Add plant
Click in the menu Pfl-New a new, empty line is added to the shopping cart. There you can manually enter the relevant information in the fields.
From BRUNS
About Pfl Bruns in the menu open the Plant search. Find the plant in question and click on [Take over].\
If you are in BUSINESS in the program parameter BRUNS price scale entered a zero, the following dialog opens. Otherwise, the price category set there is automatically adopted by the computer.
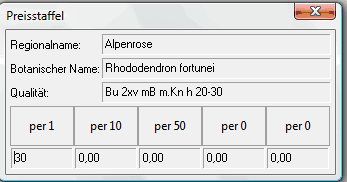
By clicking on the field via XXX accept the associated price. If the price is not correct, you can still change it manually in the shopping cart. As you can now see in the shopping cart, you have created a new plant that has taken over all the relevant information from the database.
Since the plant images from the BRUNS catalog are protected by copyright, they will not be adopted.
Plant list
click on Pfl list in the menu, your program accesses your project management from BUSINESS .
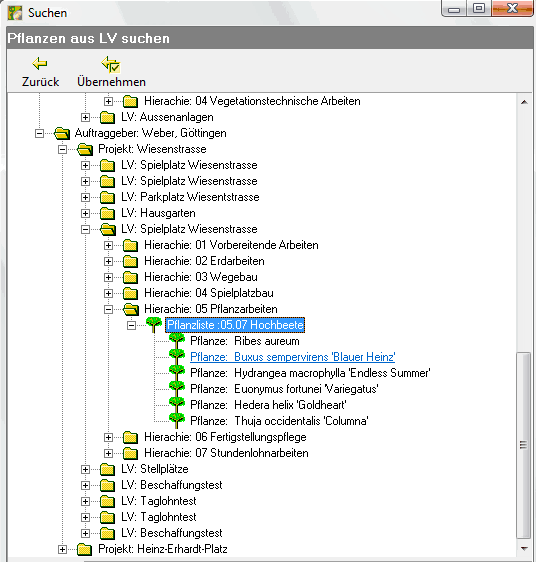
Select the plants concerned in the directory tree and click on [Take over]. All required data is entered in the inbox.
Delete plant
click on  , the marked plant is completely deleted. You cannot delete individual fields in the shopping cart with this function.
Copy plant
Use the function Pfl copywhen you have plants that differ only in little things. Clicking on it will add a new line to the shopping cart that contains all the data for the currently selected plant. You can then change the individual fields by hand.
Checkout
All plants that you have selected for labeling are listed in the shopping cart.

The column entries should be self-explanatory. Still a few small comments.
In the first column is the Quantity of the labels to be printed.
Is the tick in the column Package is set, only a single label is printed out, regardless of the number in the field in front of it. This is useful when labeling plant baskets. The value in the Number field can be adopted as a variable (e.g. "This basket contains NUMBER of plants")
Double-click in a field in the column BILD, you can save your own picture for this plant.
Change the in a field Price, all other affected prices will be corrected automatically by the program.
You can drag additional data into the image using the scroll bar below.
Save your changes by clicking on  .
.
