Table of Contents
Settings
Description
In the upper section of the directory tree in the plan costs, you make the basic settings for this planning.
Each of the settings can be changed at any time, e.g. to be able to compare the effects of different scenarios.
Basisdaten
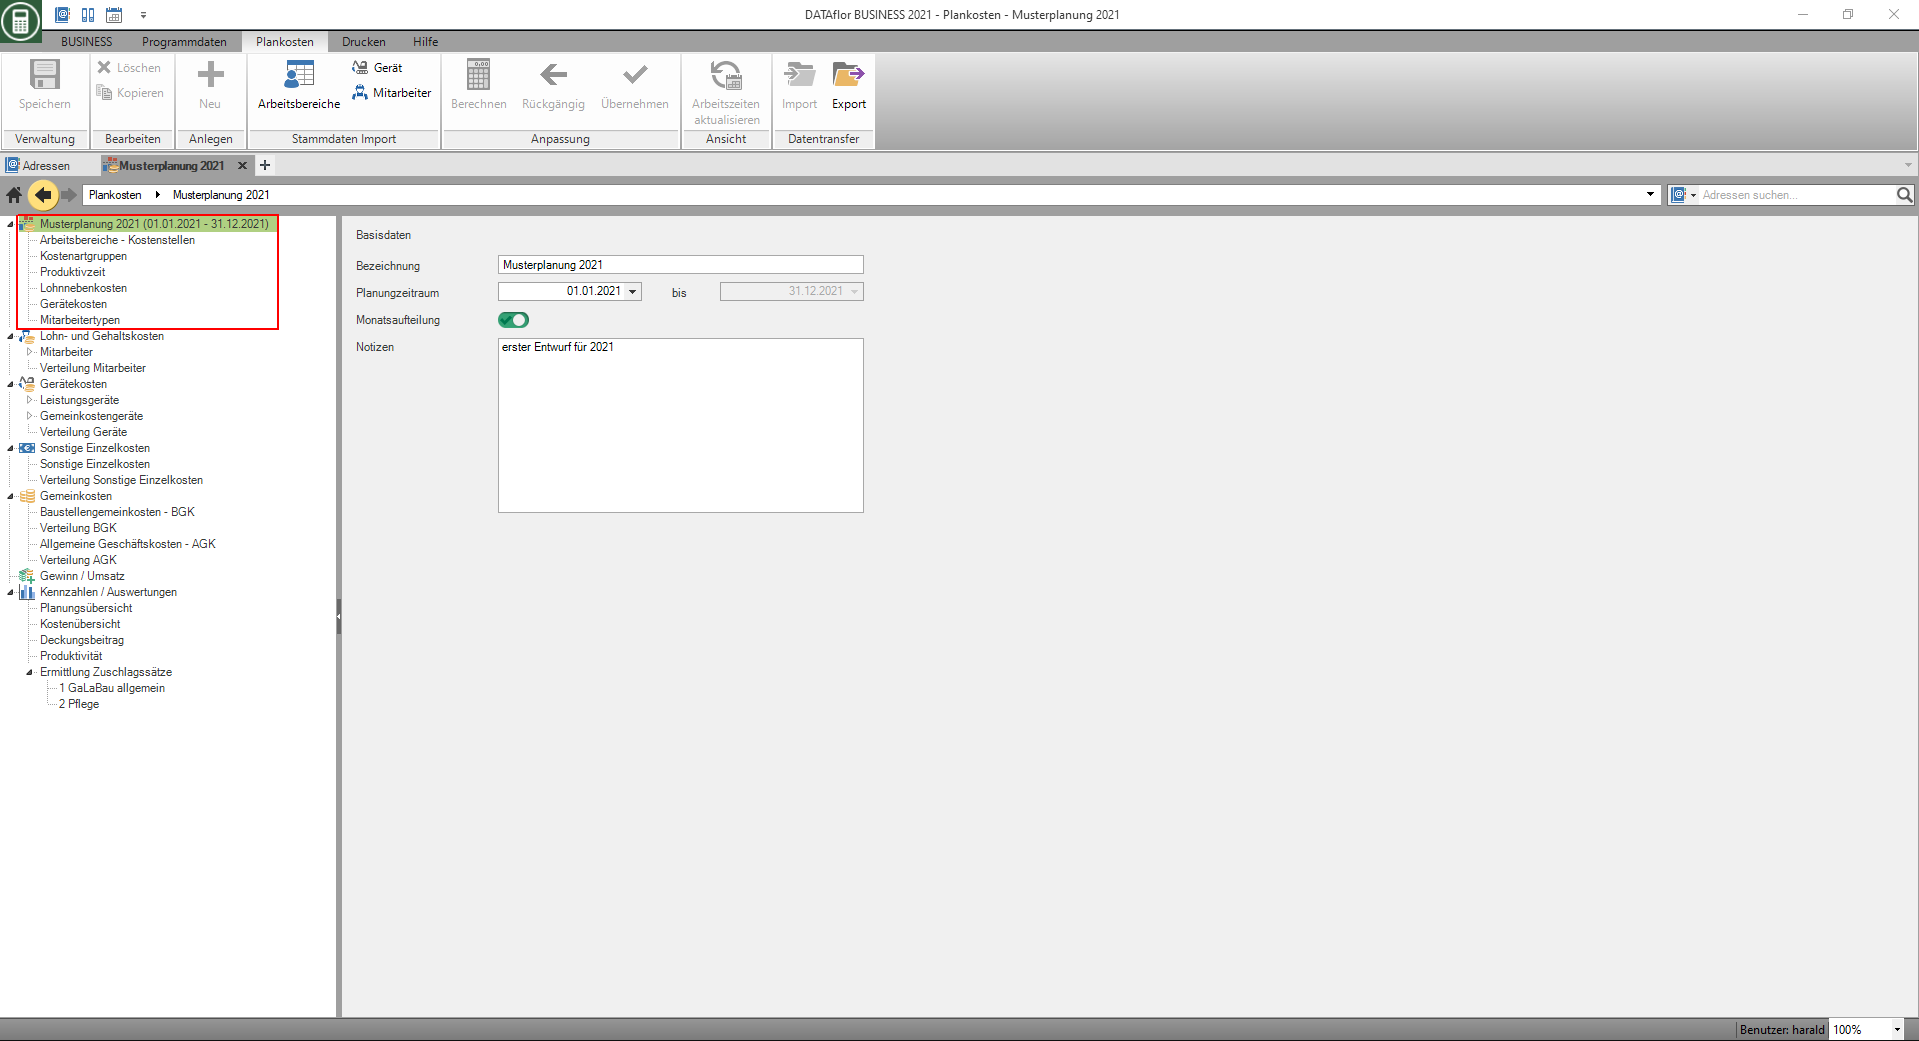
Select the top entry in the directory tree.
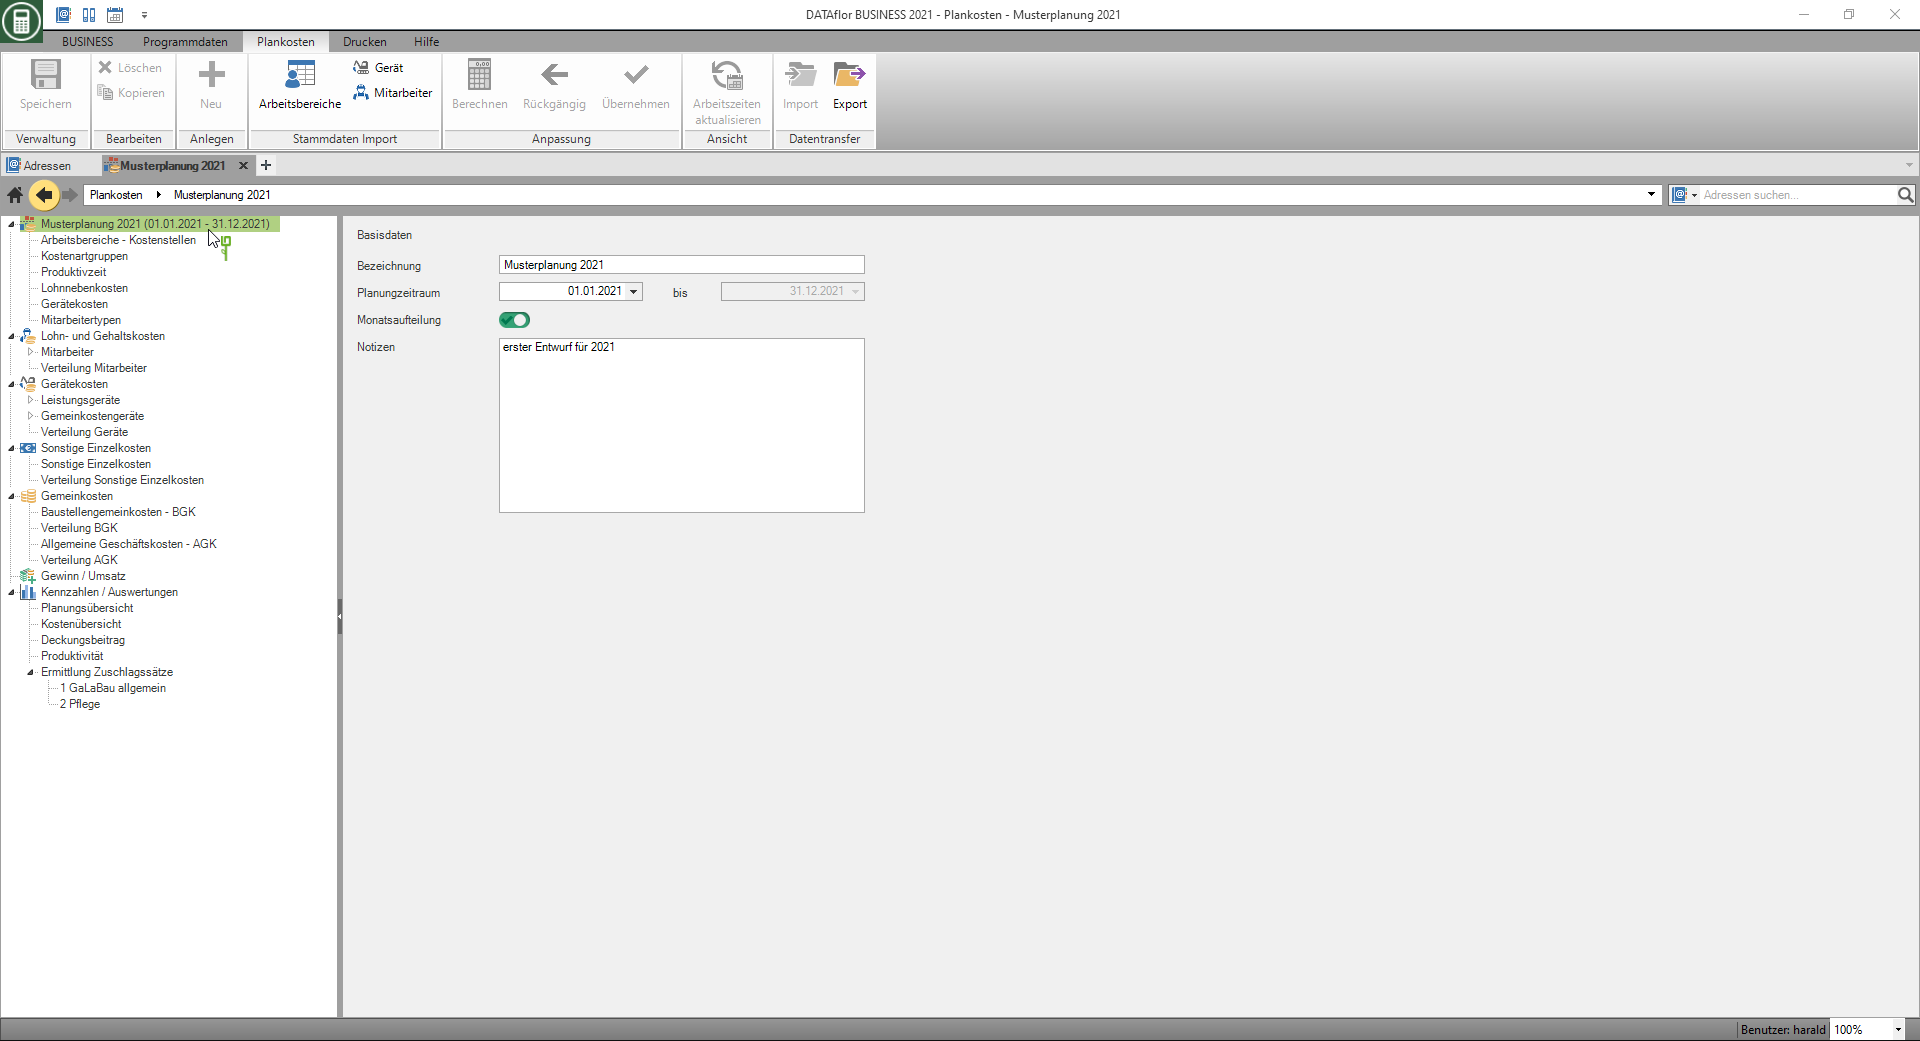
The following fields for entering the basic data of this planning are displayed on the right-hand side of the screen:
| Feld | Description |
|---|---|
| designation | Give the planning a name that is unique to you. |
| Planning period | Choose where to start your planning. The 1st of the selected month is always used automatically. A planning period always comprises 12 full months. |
| Monthly breakdown | Activate the option to be able to distribute your company costs individually over the individual months of the planning period (this function is license-dependent). |
| notes | If necessary, store a comment on the planning, e.g. to be able to distinguish between several plans with similar scenarios immediately. |
Description, planning period and notes are saved in the Home screen displayed in the tiles of the existing plans.
Work areas - cost centers
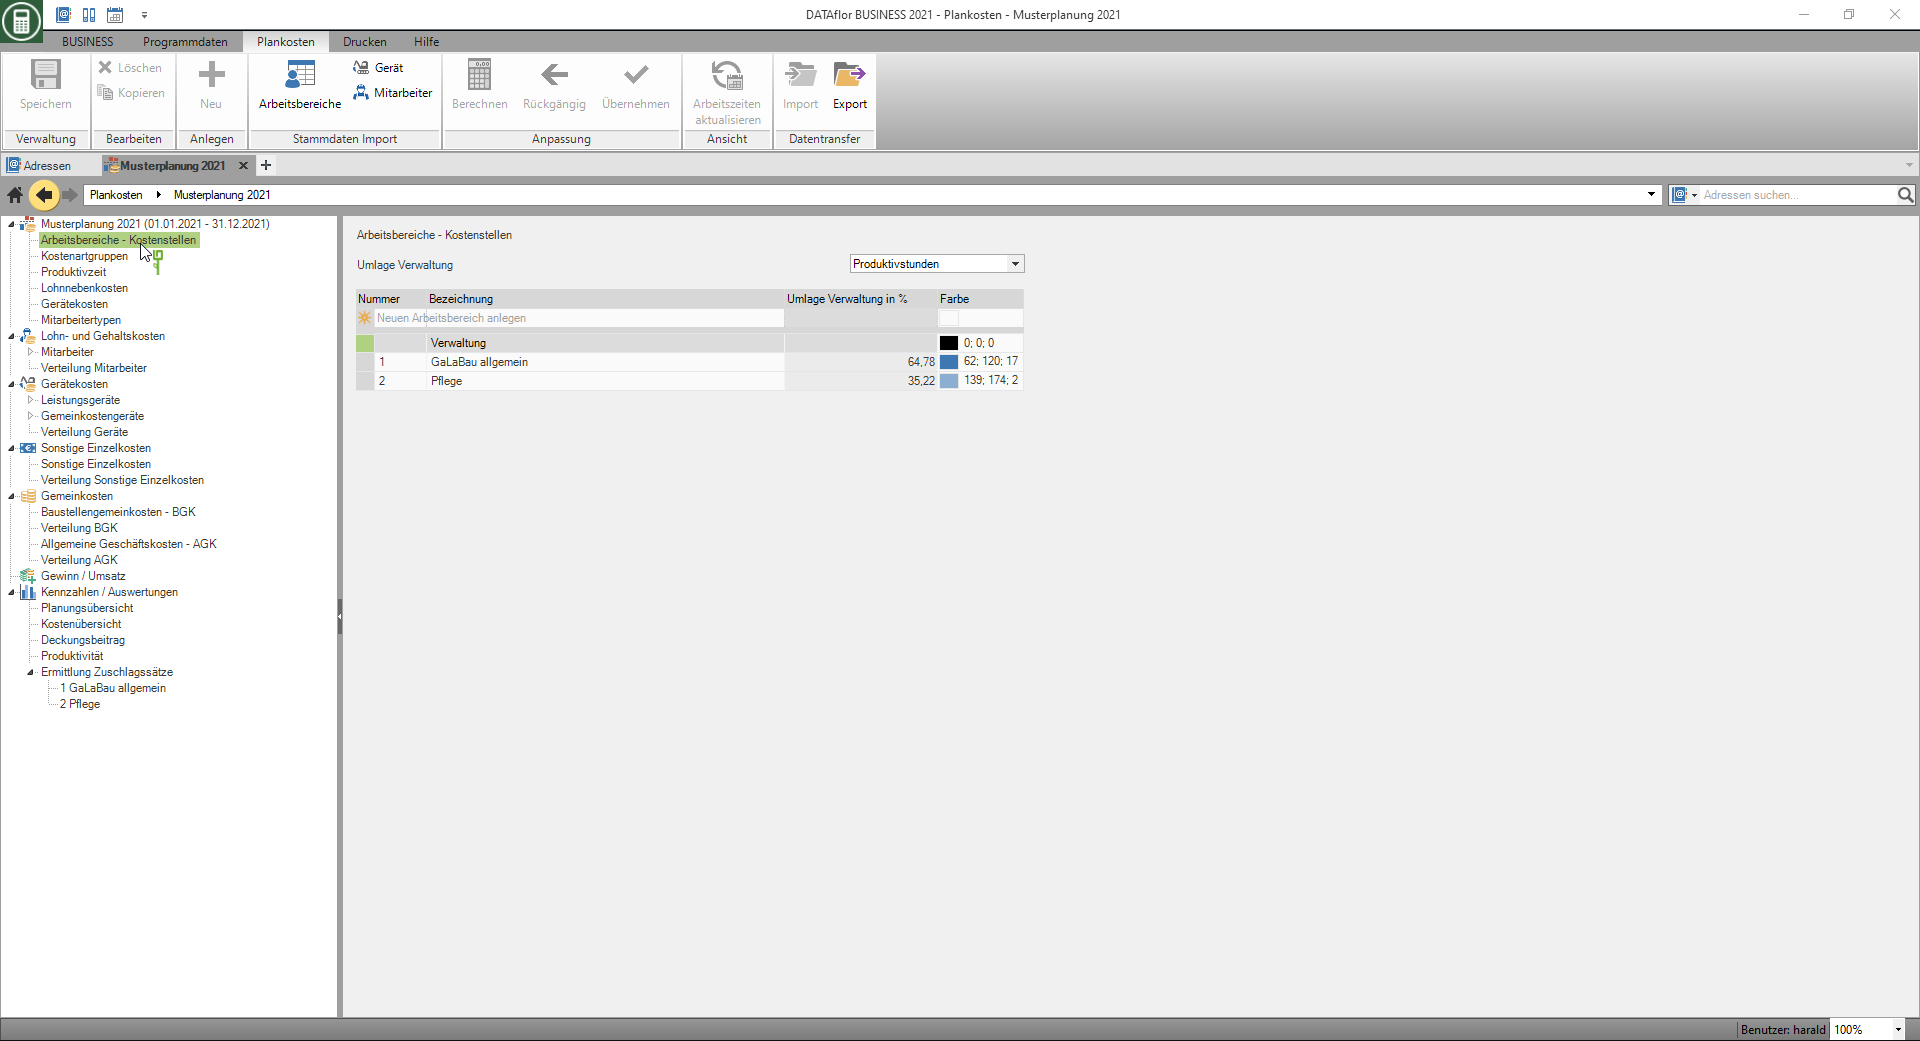
Select the entry in the upper section of the directory tree Work areas - cost centers , the work areas considered for this planning are displayed on the right-hand side of the screen.
Take over master data
The workspaces that you can find in the program area working area have already entered and use them for your quotation calculation, you can transfer them to your planning. To do this, click in the menu Planned costs in the group Master data import on  .
.

The number and designation of the work areas are included in the table, complete the following information if necessary:
| Feld | Description |
|---|---|
| Administration contribution in% | Use several work areas for your quotation calculation and have for the Levy administration selected according to percentage, then enter the distribution key here as a percentage, with which the administrative costs are then distributed to the various work areas. |
| Color | In the section Key figures / evaluations different diagrams are available to compare the work areas. Here you assign the color for the work area with which it is displayed in the diagrams for evaluation. |
create a new work area
Click in the top line of the table  .
.

Enter the following information about the work area:
| Feld | Description |
|---|---|
| Number | Enter a unique number for the work area. |
| designation | Assign a unique name to the work area. |
| Administration contribution in% | Use several work areas for your quotation calculation and have for the Levy administration selected according to percentage, then enter the distribution key here as a percentage, with which the administrative costs are then distributed to the various work areas. |
| Color | In the section Key figures / evaluations different diagrams are available to compare the work areas. Here you assign the color for the work area with which it is displayed in the diagrams for evaluation. |
Levy administration
If you use several work areas for your quotation calculation, select by clicking on  whether your administrative costs are distributed to the individual work areas according to the percentages you set or according to the proportion of productive hours.

Cost element groups
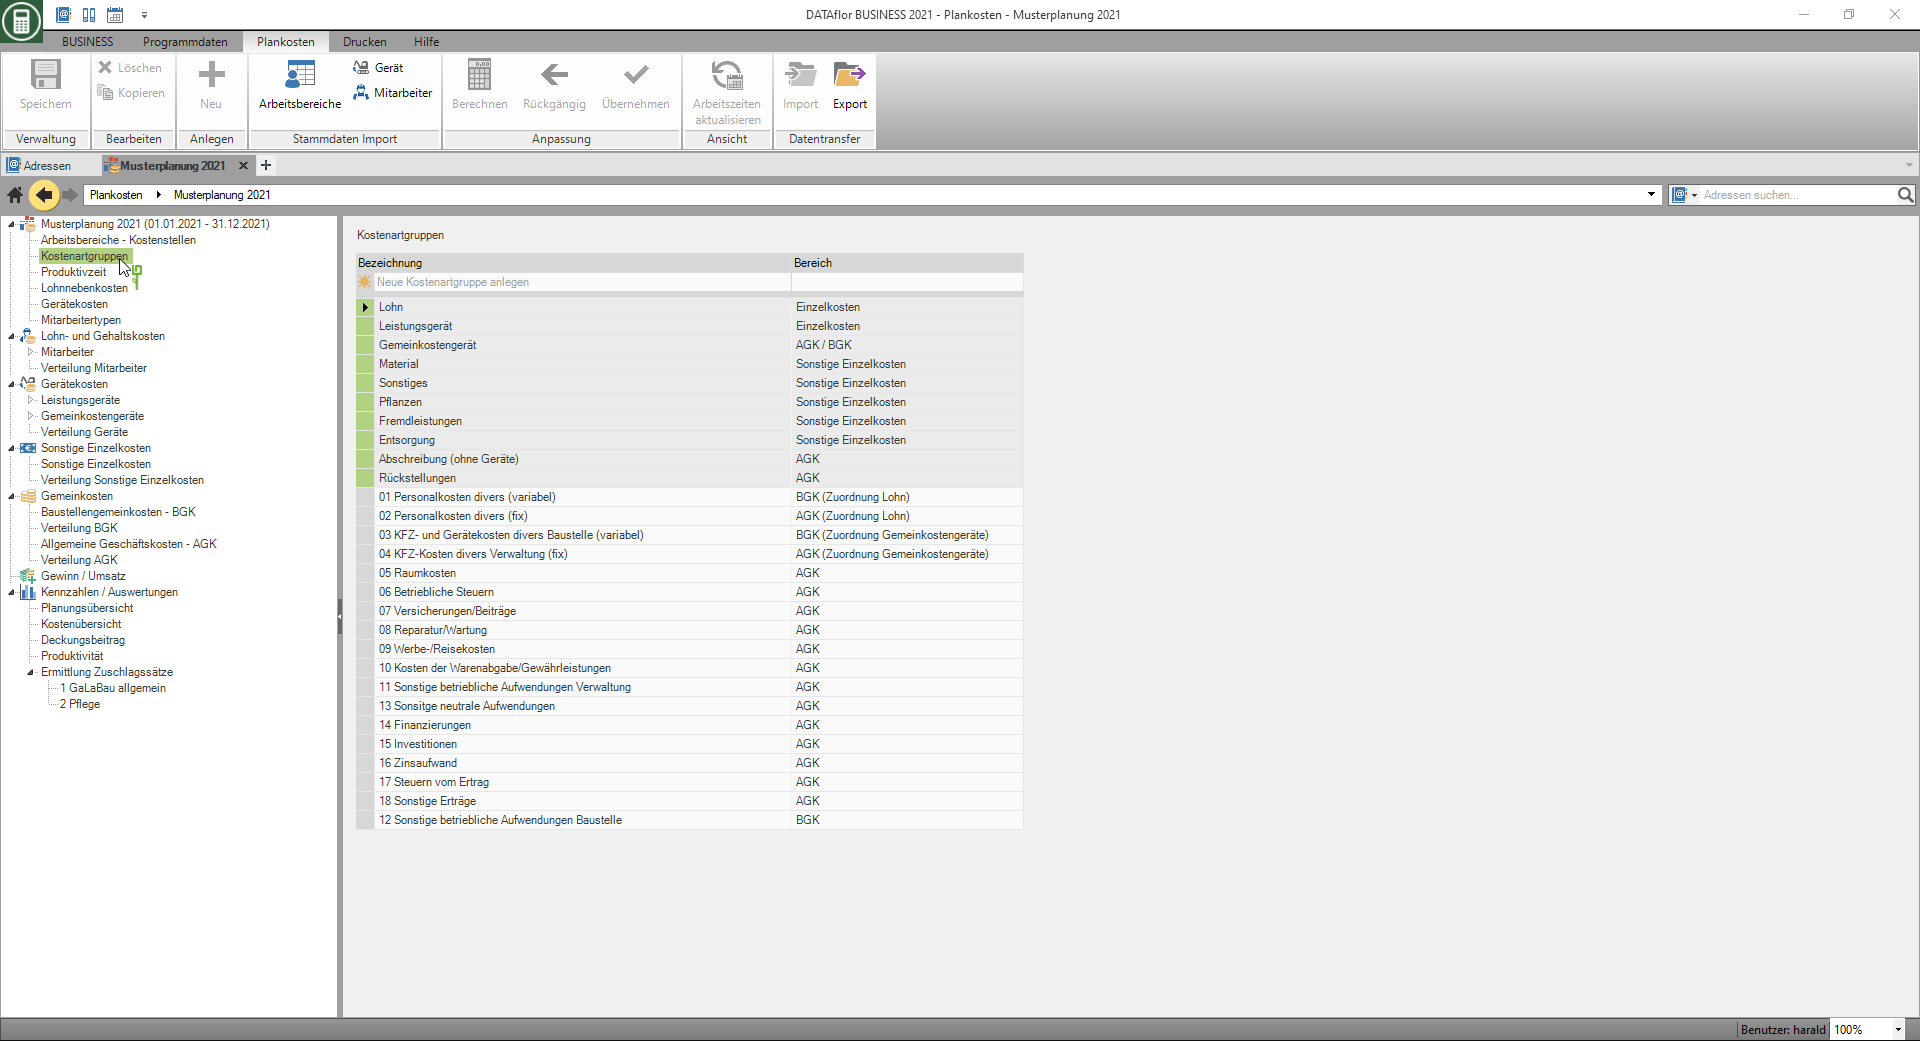
Cost element groups are used to group your costs in the overviews and reports. Select whether a cost type group should be recorded in the AGK or BGK and displayed there in the overviews. In addition, you can specify whether the costs of a cost element group should be added to wage or equipment costs and displayed in the overhead costs overview.
Select the entry in the directory tree Cost element groups , the cost element groups with the allocation of the cost area are displayed on the right-hand side of the screen.
- You can create additional cost element groups for general business costs and construction site overheads.
- Confirm your entry with Enter.
You cannot delete or change the cost element groups with a gray background, as they are always required by the program.
Productive time
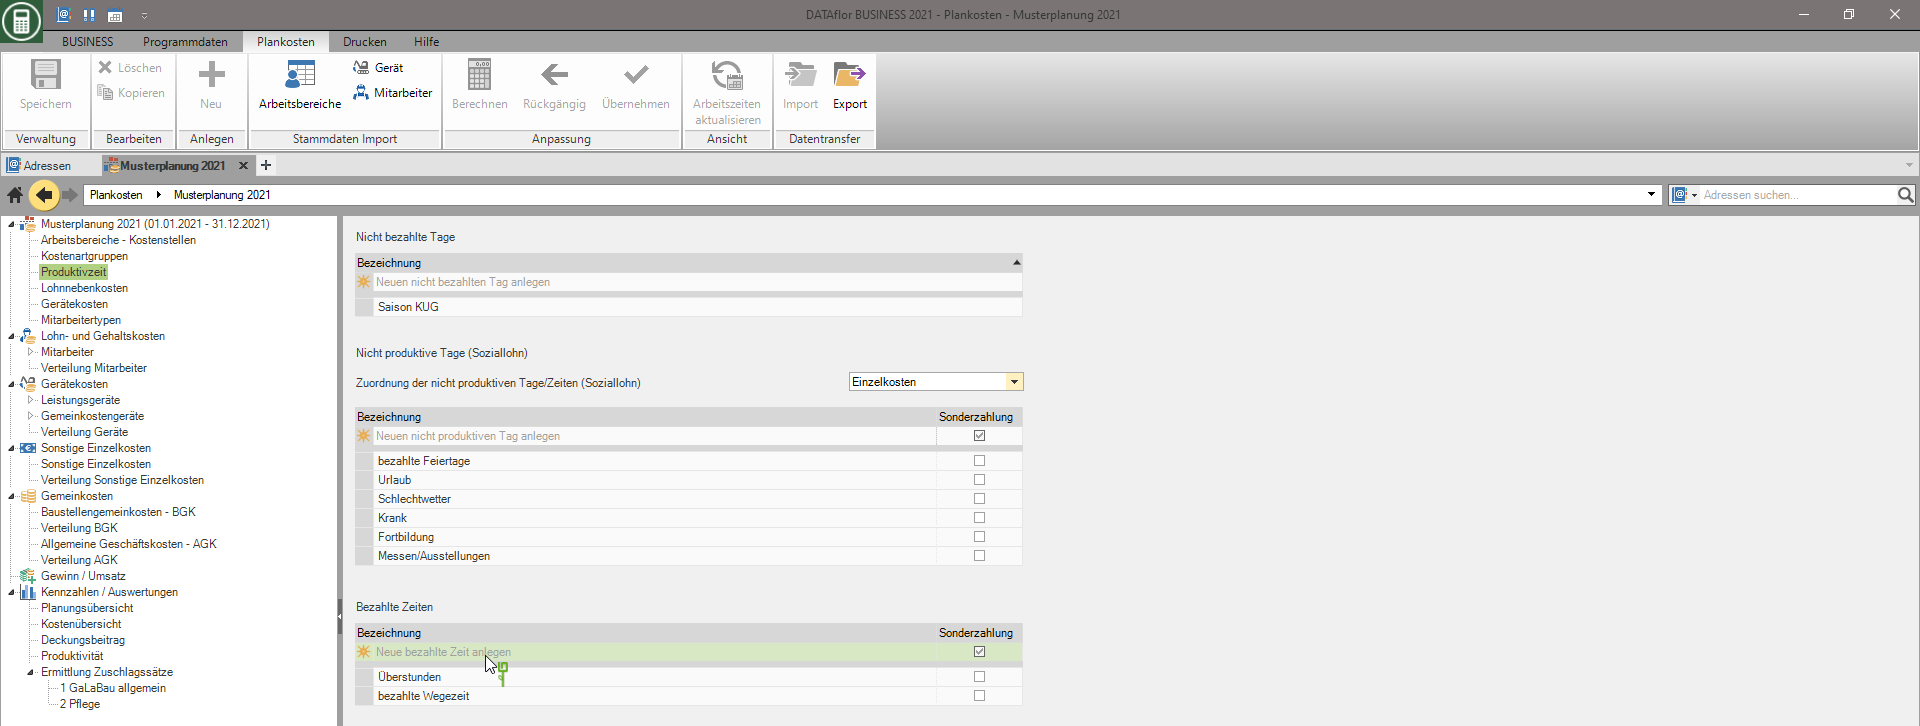
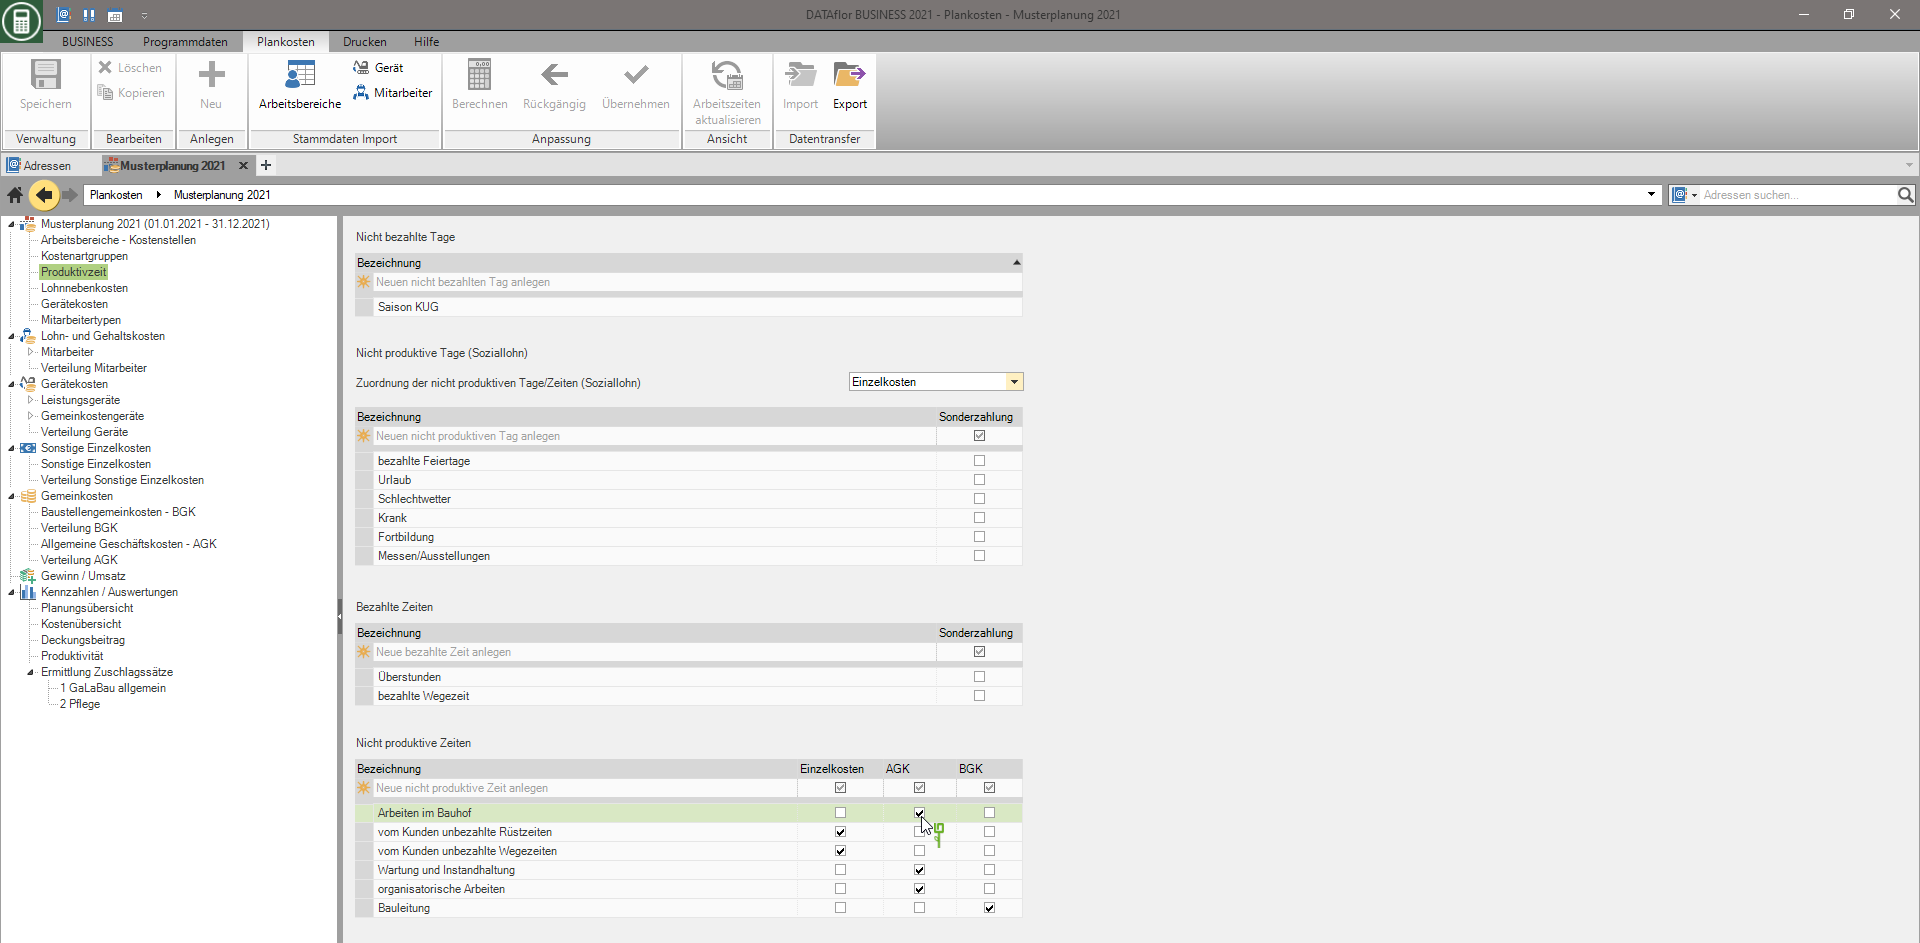
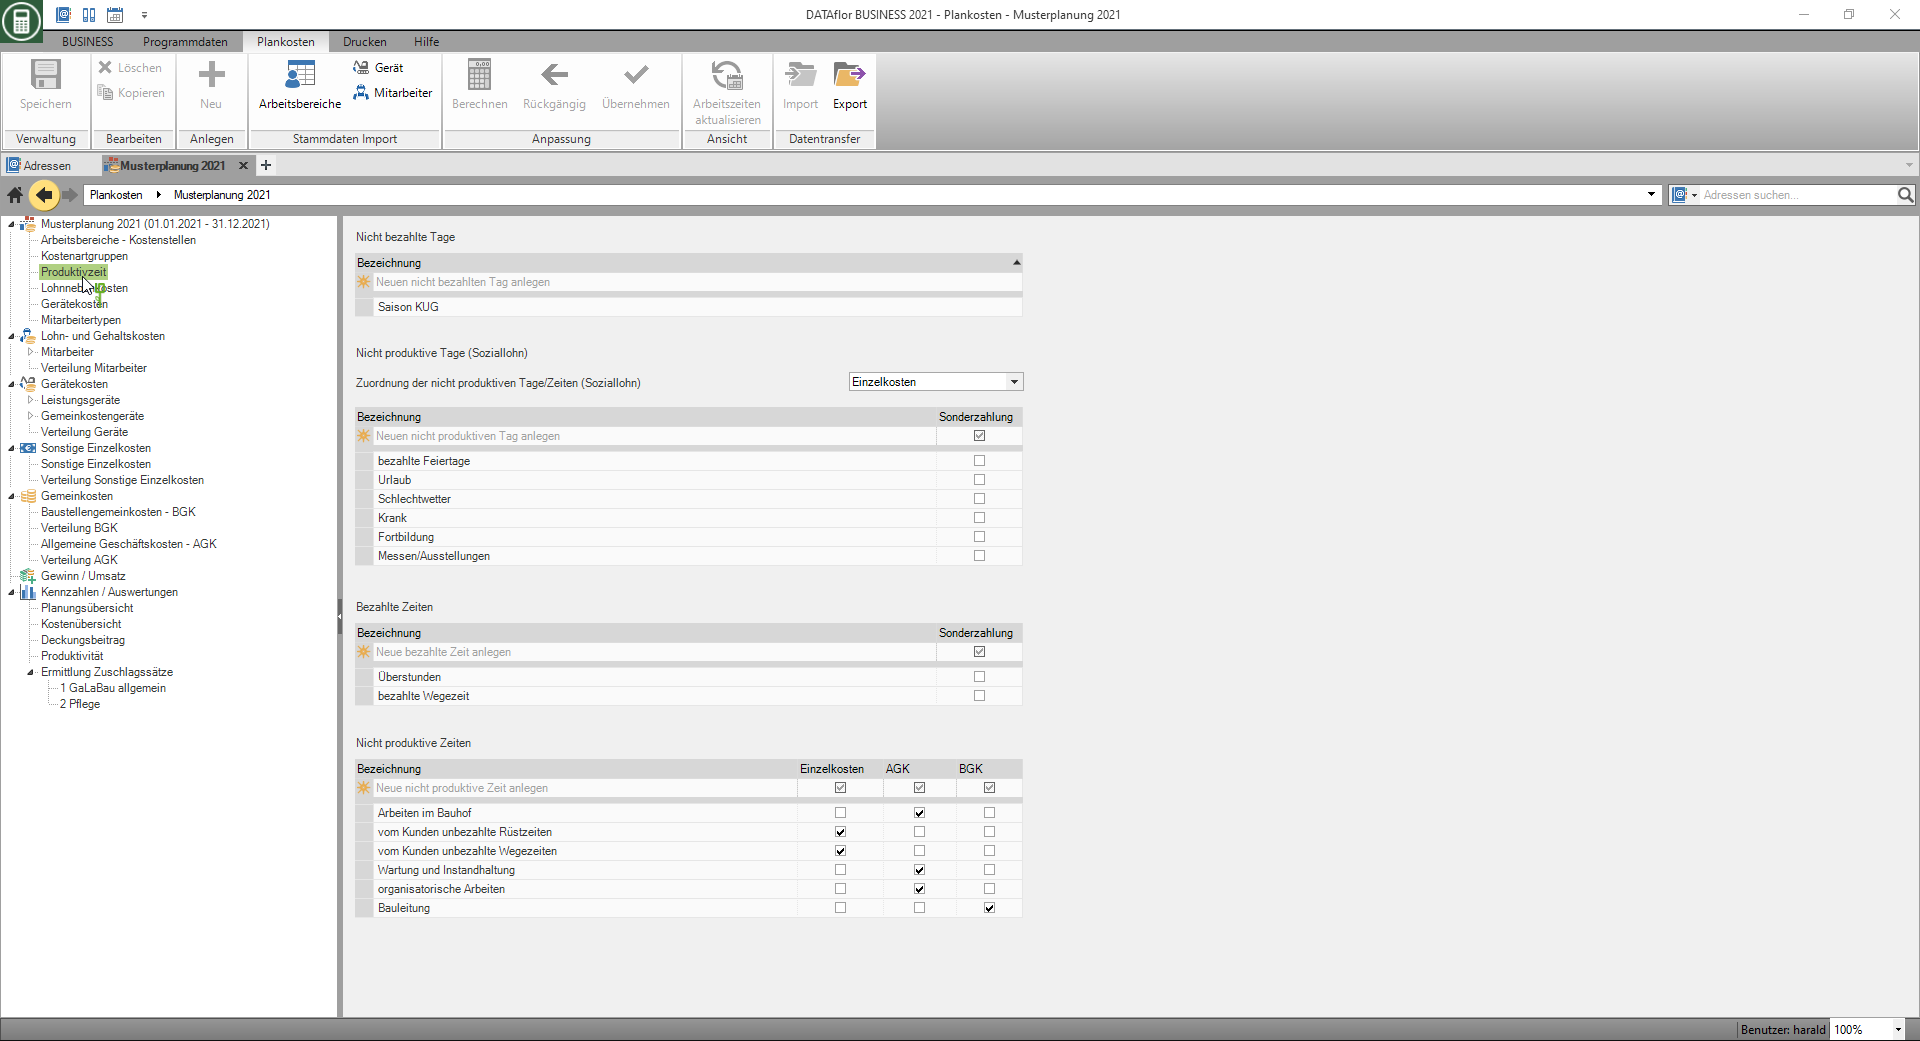
Select the entry in the directory tree Productive time, the tables on the right side of the screen Unpaid days, Non-productive days (social wages), Paid times and Not productive times displayed. The entries are listed that are then used to plan the productive working hours of employees on the Productive time tab available.
Unpaid days
The days not paid are used to calculate the number of paid days, that is, the number of days that the employee is paid by the company possible working days deducted.
Non-productive days (social wages)
The not productive days are used to calculate the number of productive days, ie the days when the employee is present in the company, on the number of paid days deducted.
Paid times
The time paid is recorded in the personal data. You have a field there Working time / day is available for storage, management and analysis.
Here you have the option of creating additional working hours that have been agreed with your employees and that increase the daily working hours (working hours / day).
Not productive times
The not productive times are used to calculate the productive time / day, ie the time that the employee is productively active on the construction site paid time / day deducted.
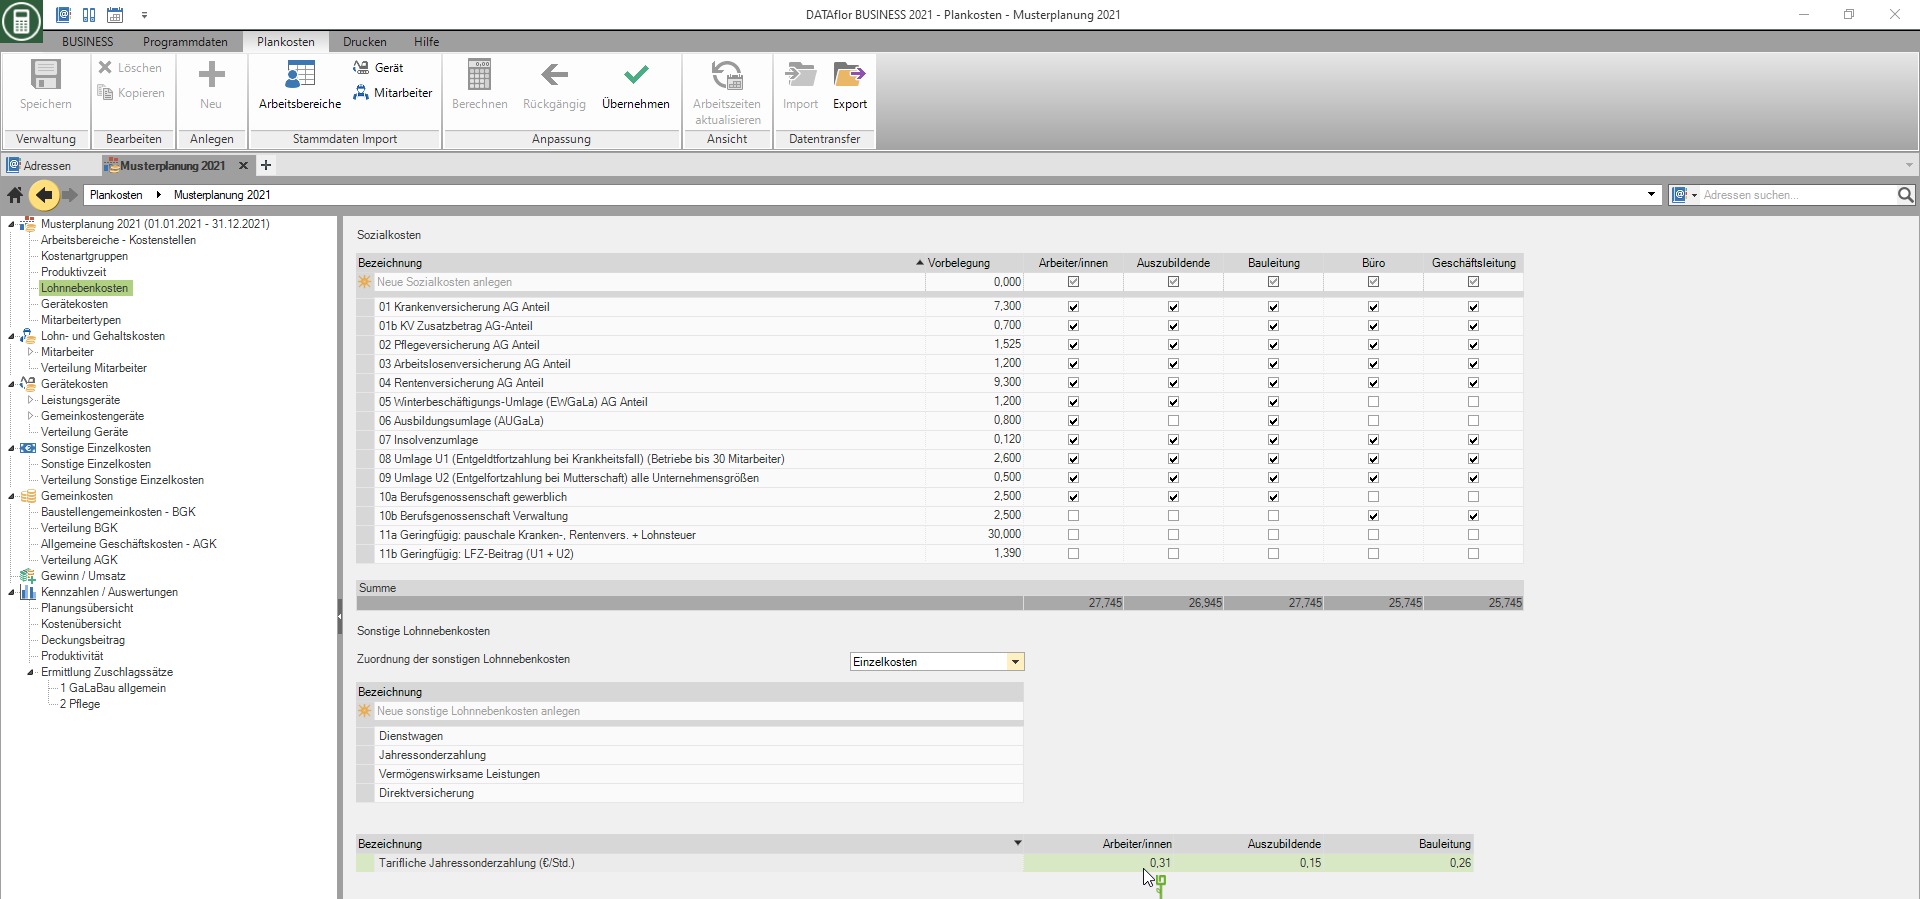
Non-wage costs
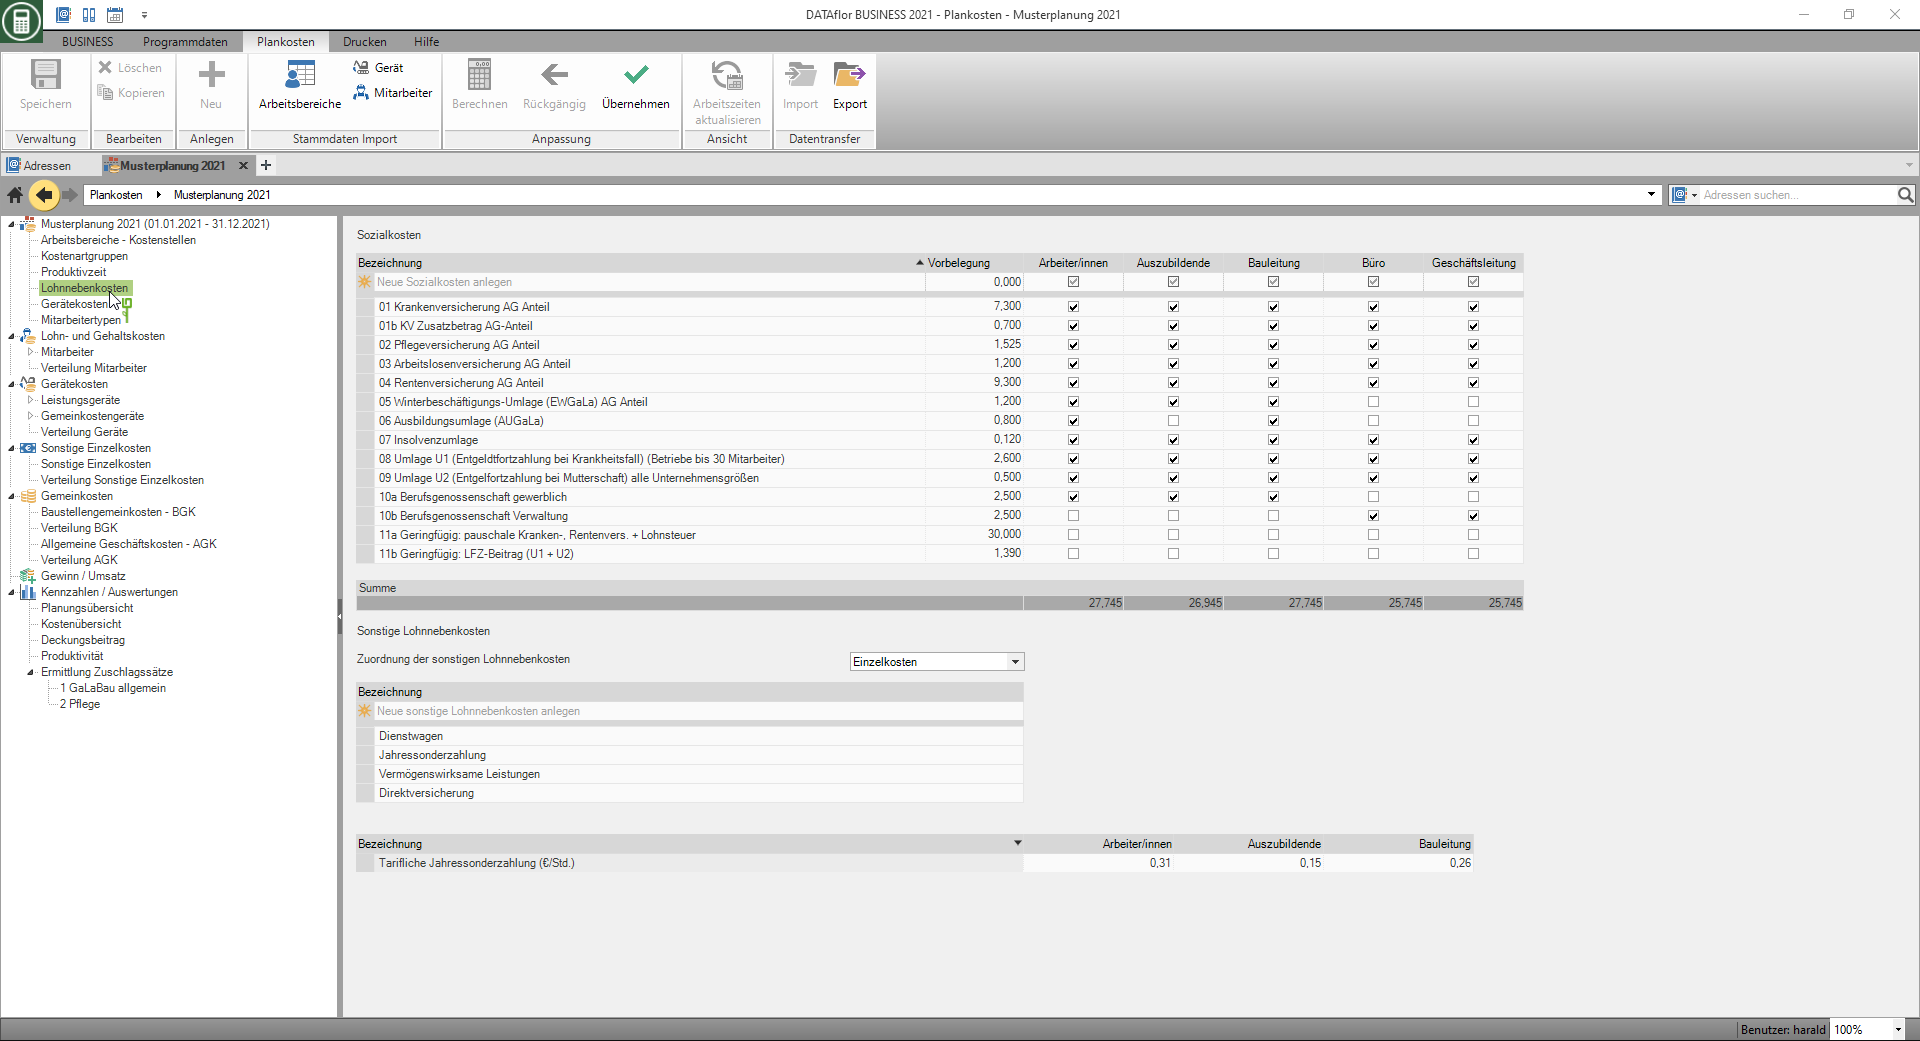
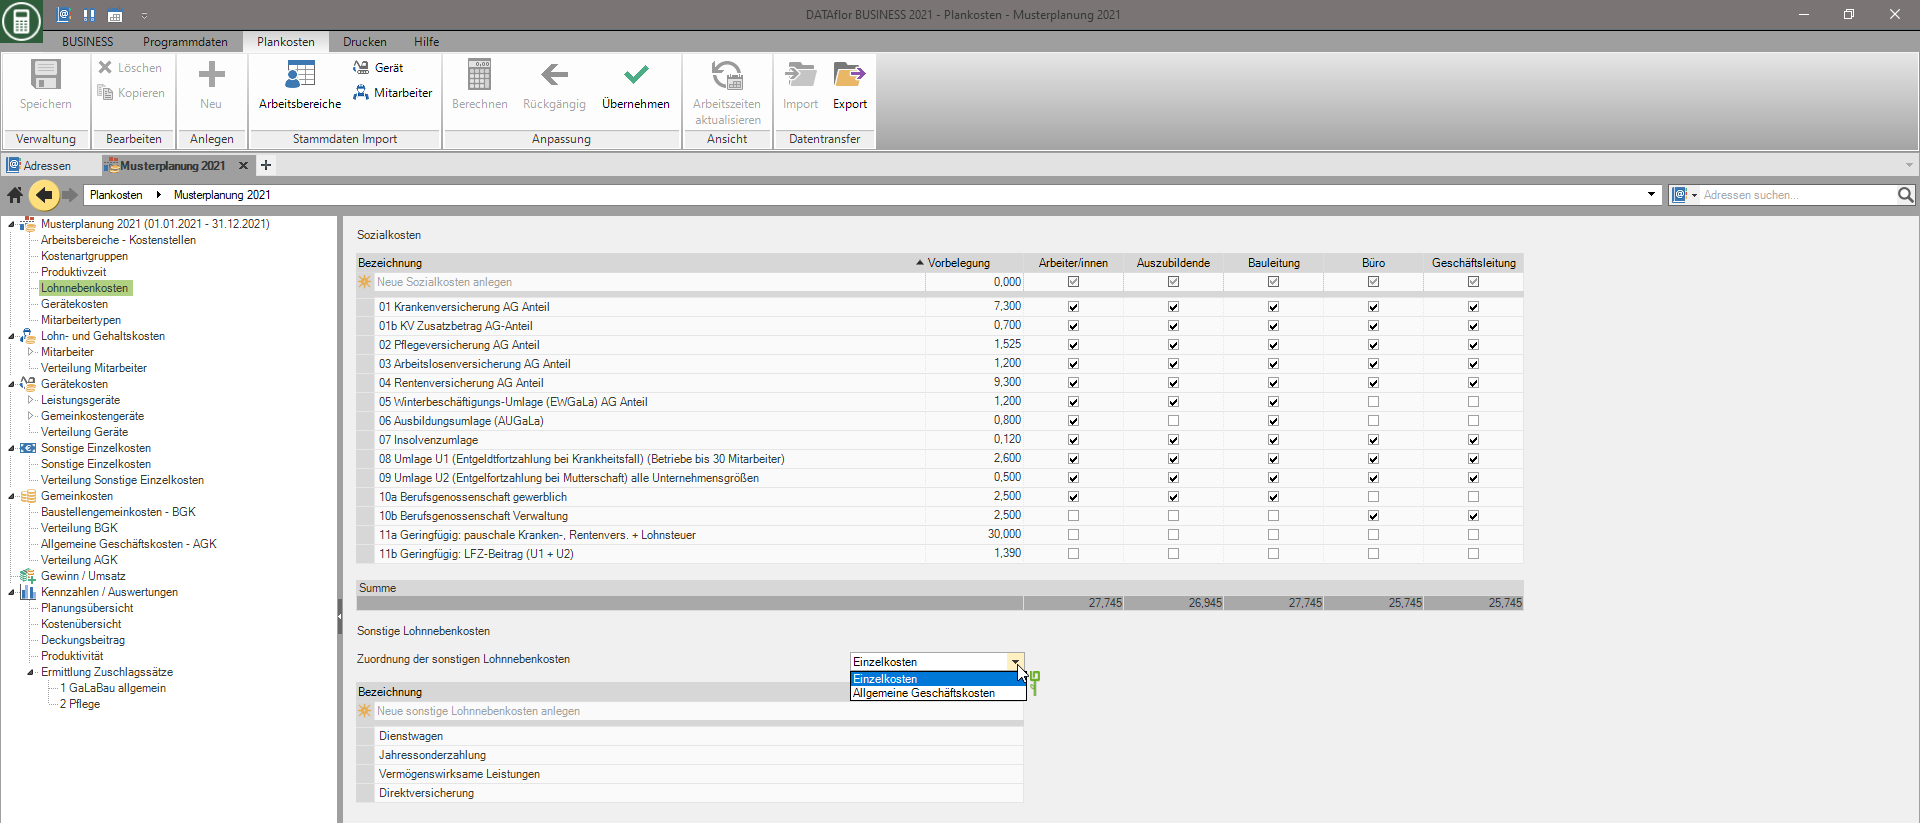
Select the entry in the directory tree Non-wage costs, the tables are on the right-hand side of the screen Social costs and Other non-wage costs displayed. The entries are listed that are then used to plan the wage costs of employees on the Social costs tab and on the Labor costs tab available.
Social costs
In the table Social costs the entries are listed with percentages that were created when new employees were created or transferred from the master data on the Social costs tab can be preset.
Transfer changed social costs to existing employees
You can also apply changed percentages of social costs to all or selected employees at a later date.
To do this, open the context menu with the right mouse button and select the entry Apply or click in the menu  .
.
- Open the context menu in the column designation, all values are adopted according to the assignment to employee types.
- If you open the context menu in the column for an employee type, only the values in this column are adopted for the employees selected afterwards.

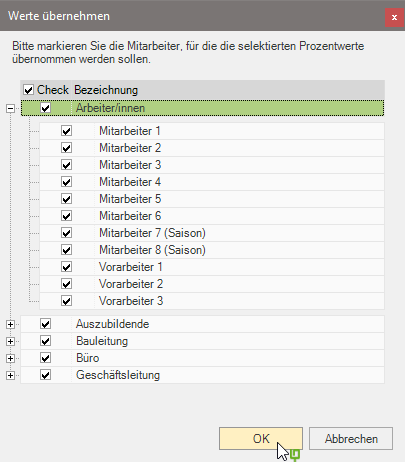
The dialogue take values will be opened. Select the employees for whom the social costs are to be paid and confirm with [OK].
Other non-wage costs
Other non-wage costs are charged to the Labor costs tab added to the commercial wage or gross salary.
Tariff special payment (€ / hour)
For the productive employee types, enter the amount in EUR per hour that you will pay each employee as a special payment for each productive hour. The calculated annual total is added to the employees on the Labor costs tab displayed.
Device costs
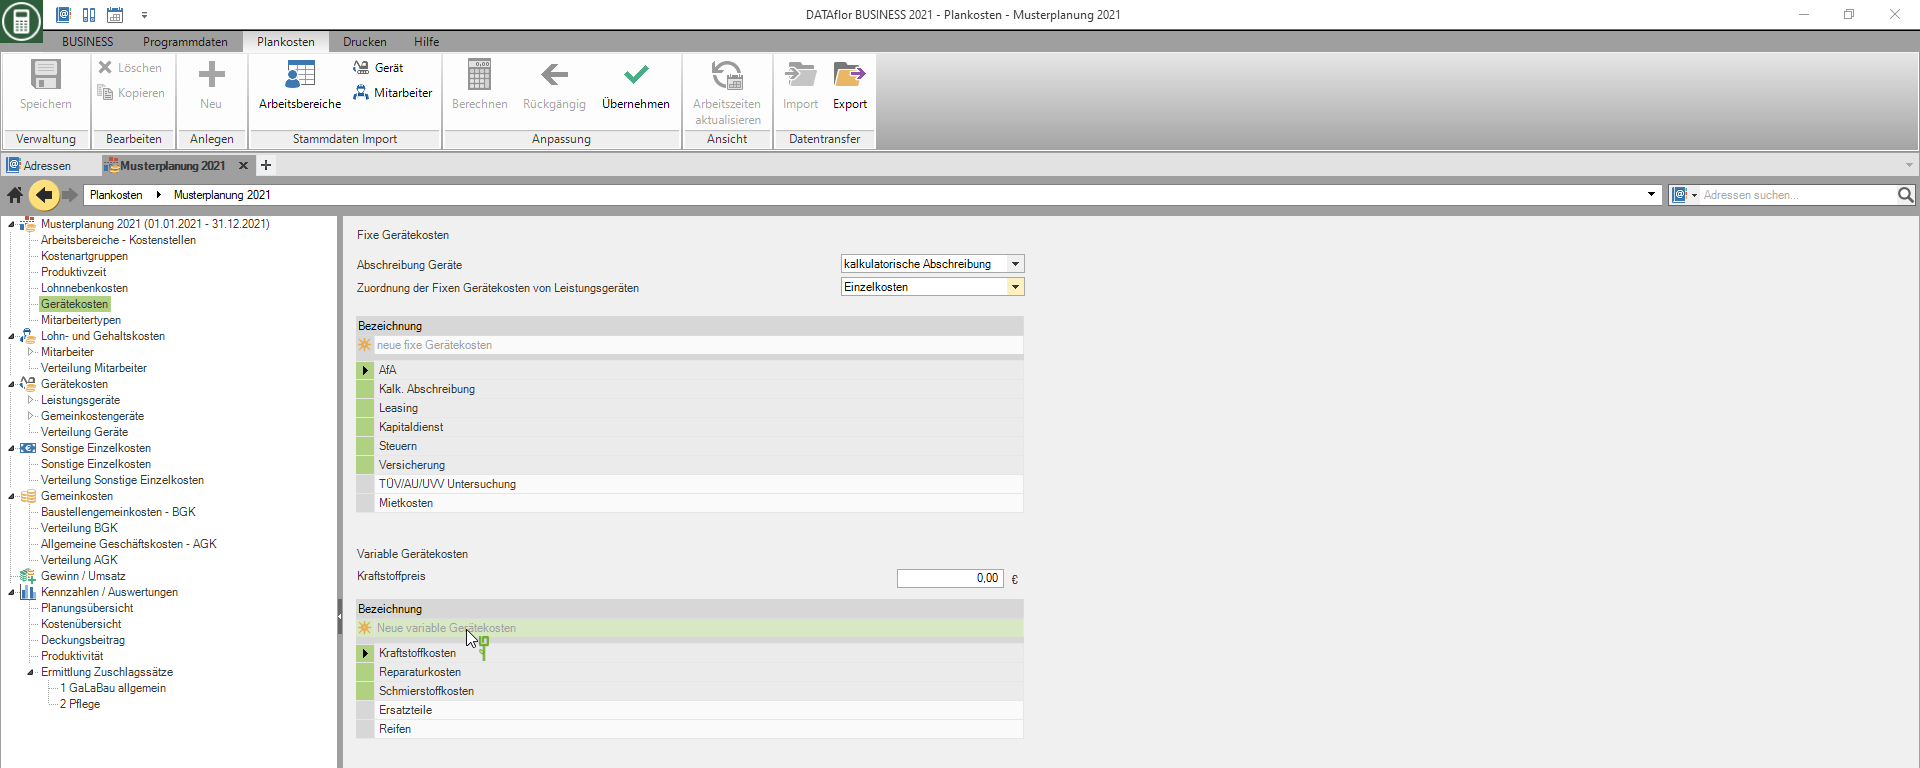
Select the entry in the upper area of the directory tree Device costs, the tables on the right side of the screen Fixed device costs and Variable device costs displayed. The entries are listed that you can then use to plan your Device costs available.
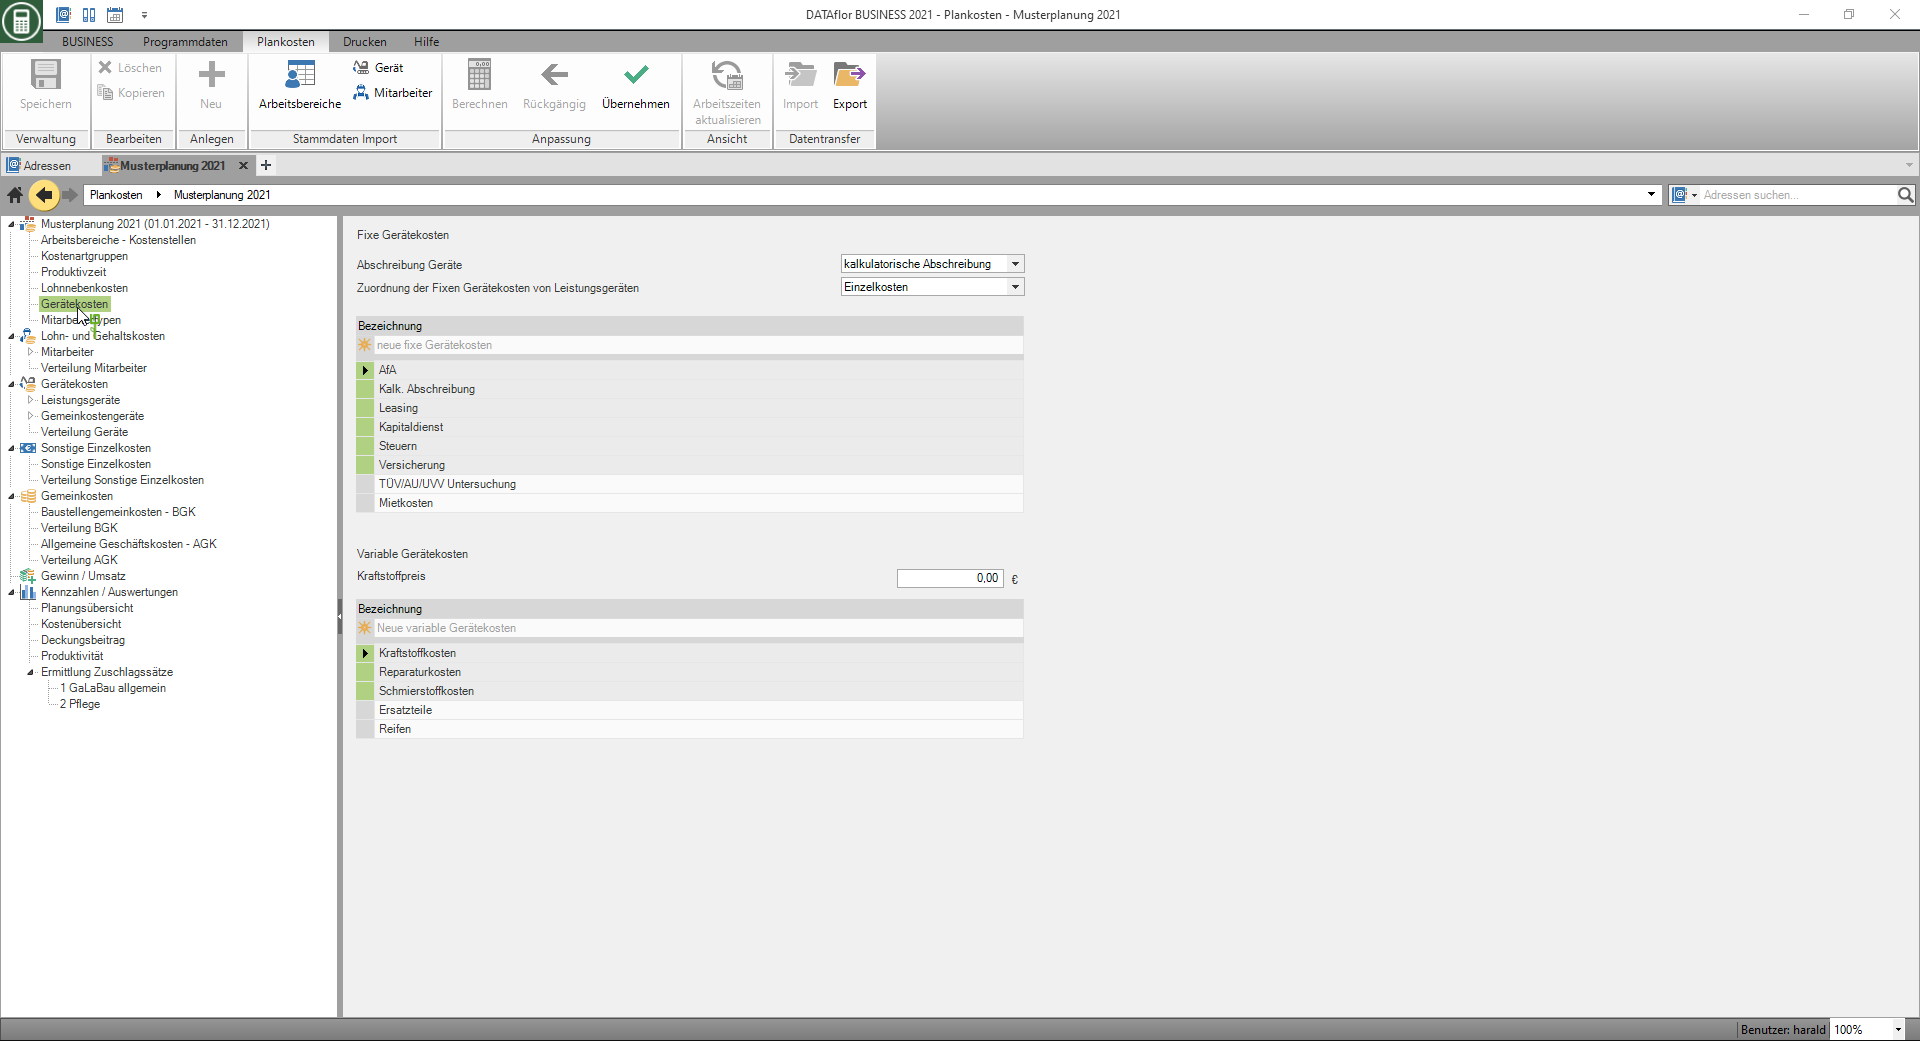
Fixed device costs
The fixed device costs are the costs of a device that arise regardless of whether and how often the device is used.
Variable device costs
The variable device costs are the costs of a device that arise when using the device.
- The amount you have in the box Fuel price is entered when new devices are created or transferred from the master data to the Variable device costs pre-assigned.
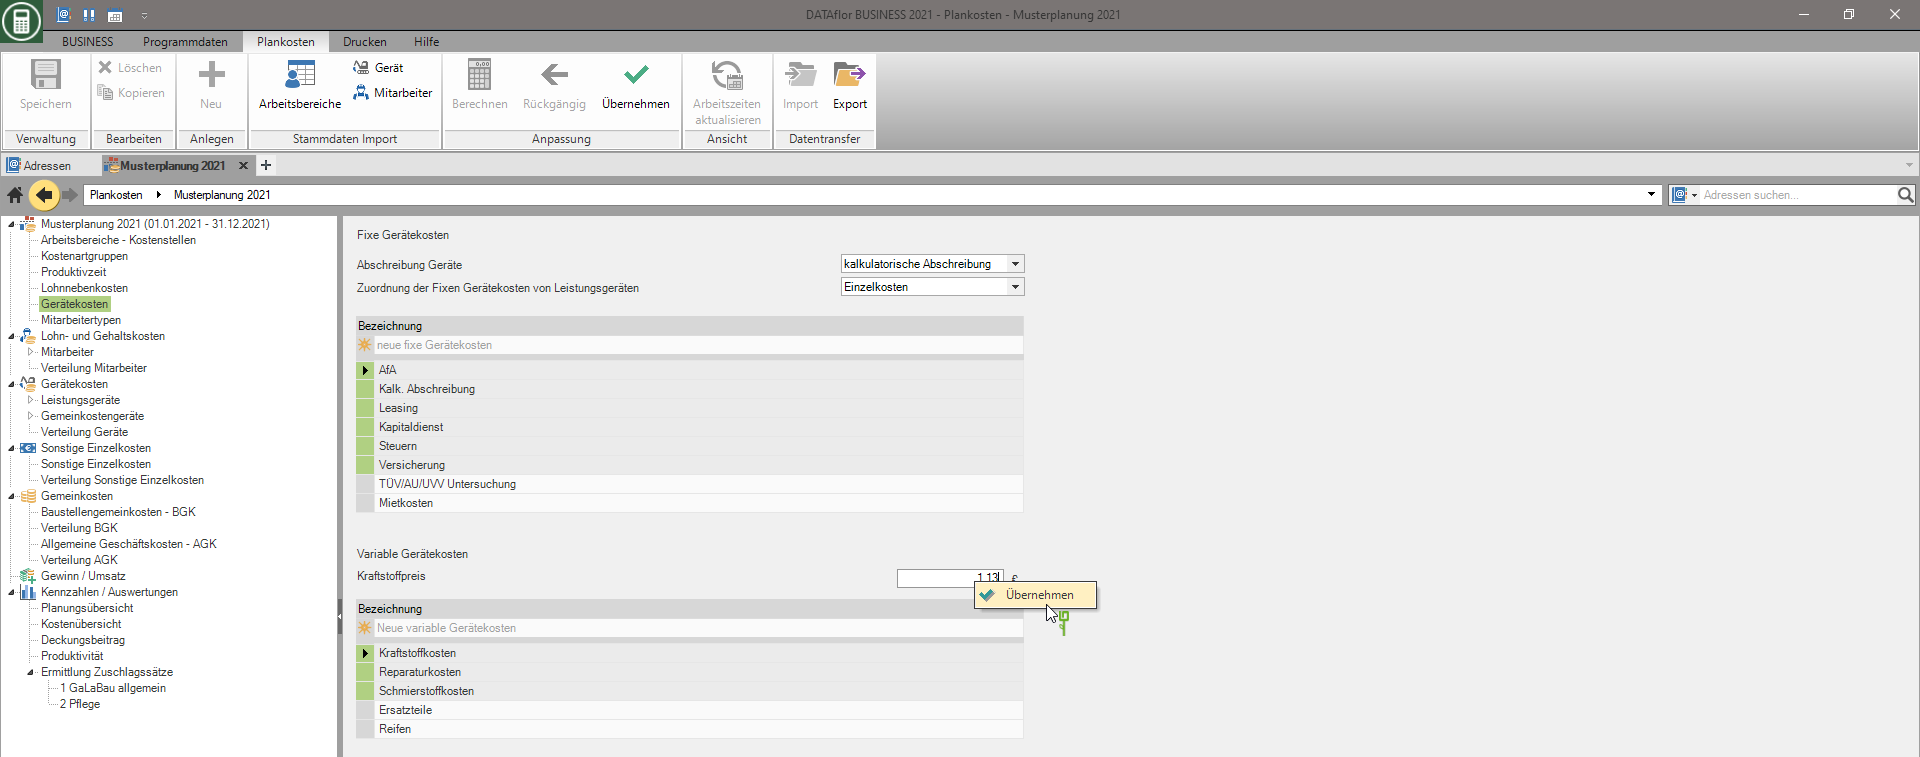
Apply changed fuel prices to existing devices
In addition, you can subsequently apply the change in the fuel price to all or selected devices.
To do this, open the field Fuel price the context menu with the right mouse button and select the entry Apply or click in the menu  .
.
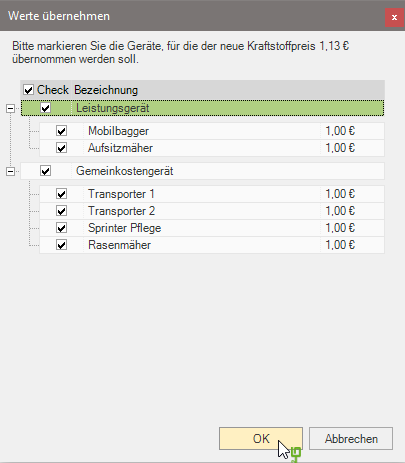
The dialogue take values will be opened. Select the devices for which the new fuel price is to be adopted and confirm with [OK].
Employee types
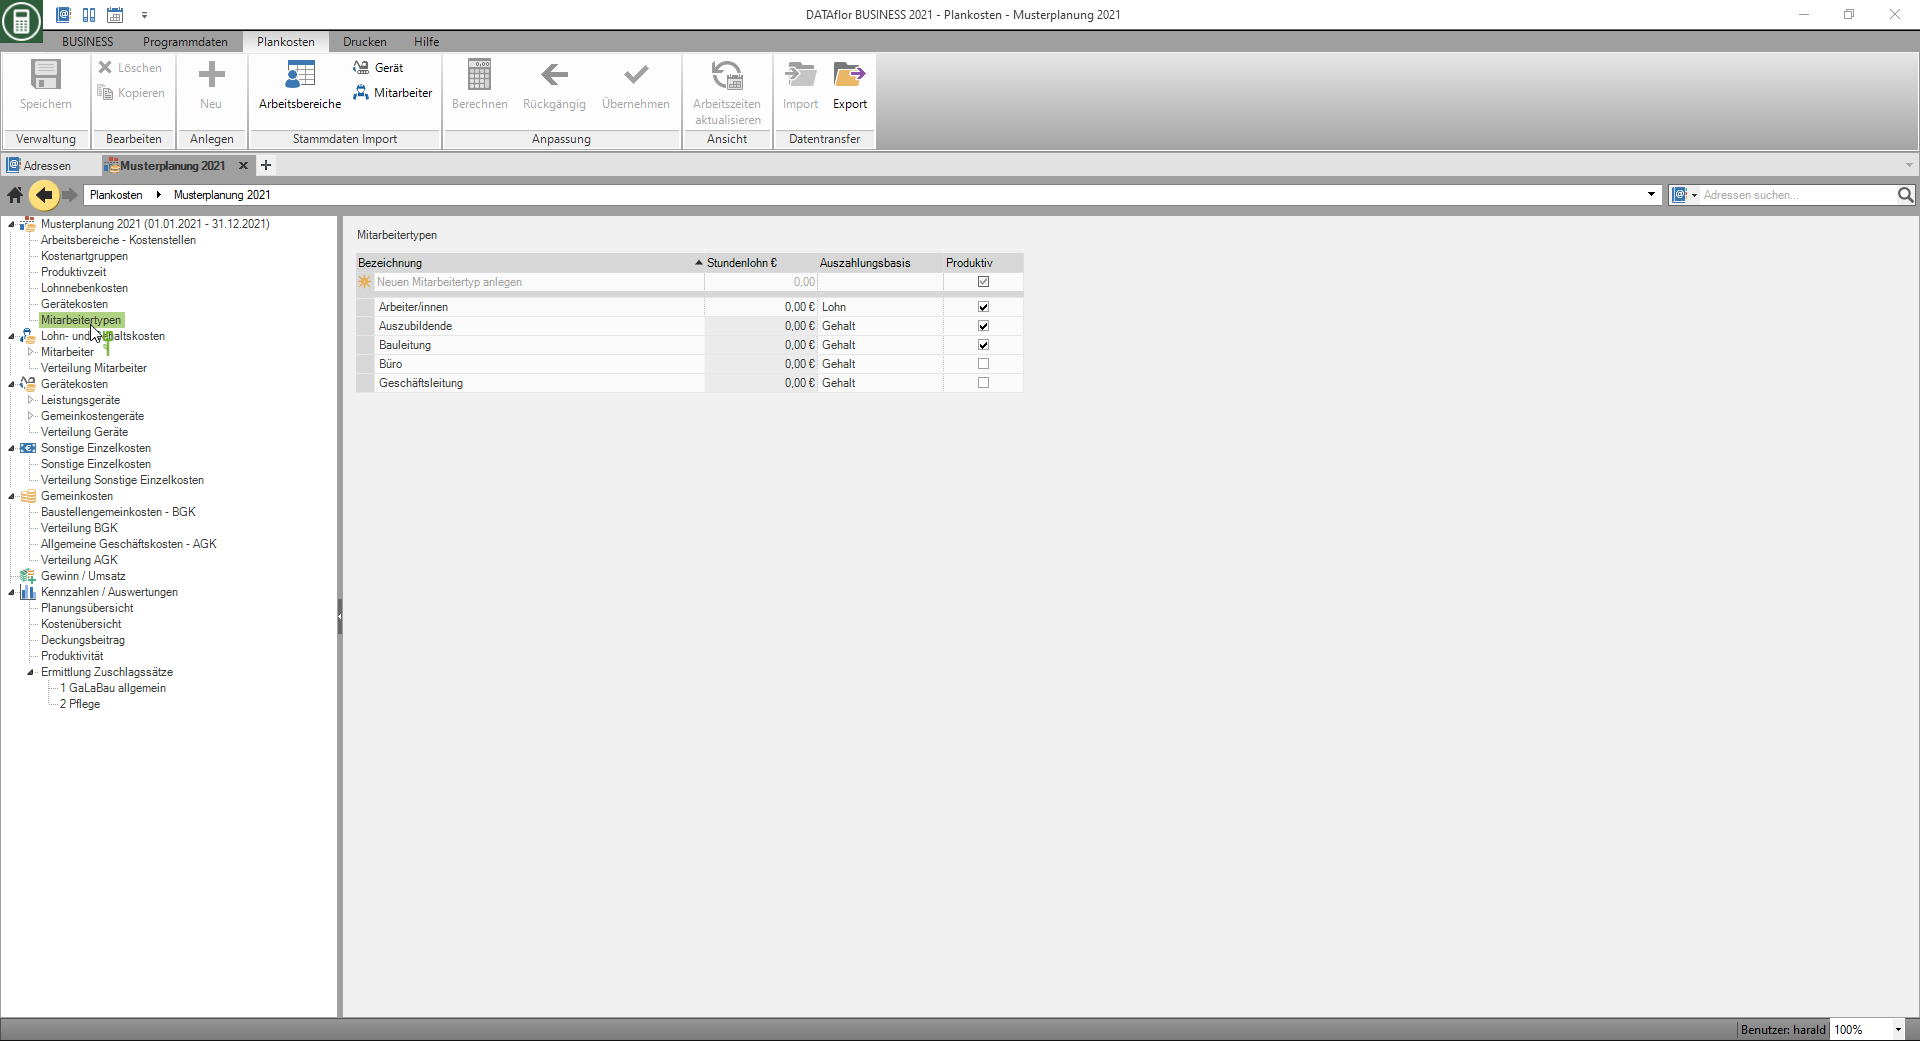
To determine the Wage and salary costs assign each employee to an employee type. The employee type controls the following functions:
- Differentiation between wage and salary earners
- Differentiation between productive and non-productive workers
Select the entry in the directory tree Employee types, on the right side of the screen is the table Employee types displayed. To create additional entries, click in the top line  in the table and make the following settings for the new employee type. Confirm your entries with Enter.
| Feld | Description |
|---|---|
| designation | Enter a unique name for the new employee type. |
| Payout base | By clicking  choose whether the assigned employees are paid by salary or hourly. Depending on the selection, the Labor costs tab the fields Hourly wages and Commercial wages or salary and Gross salary displayed. choose whether the assigned employees are paid by salary or hourly. Depending on the selection, the Labor costs tab the fields Hourly wages and Commercial wages or salary and Gross salary displayed. |
| Hourly wages | Is the payment basis for the employee type Hourly wages chosen, enter the hourly wage that contributes Create a new employee is preset. |
| Productive | Enable  The option when the assigned employees are productively deployed on the construction site. The option when the assigned employees are productively deployed on the construction site. |

