Table of Contents
Settlement dates
Description
Billing dates are the days on which you would like to create invoices for maintenance specifications.
- You define the billing dates in the LV for each item.
- The Batch printing invoices automatically creates individual invoices for all LV for which one or more billing dates are stored in a selected period.
Pre-assignment for new positions
When creating a new course, the Course basic data open. Open the tabs here Date and accounting. In the lower part of the tab accounting you can set billing dates that are automatically preset for newly created items.
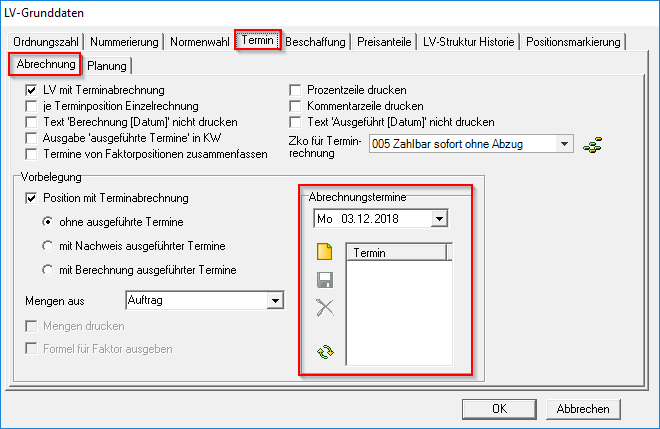
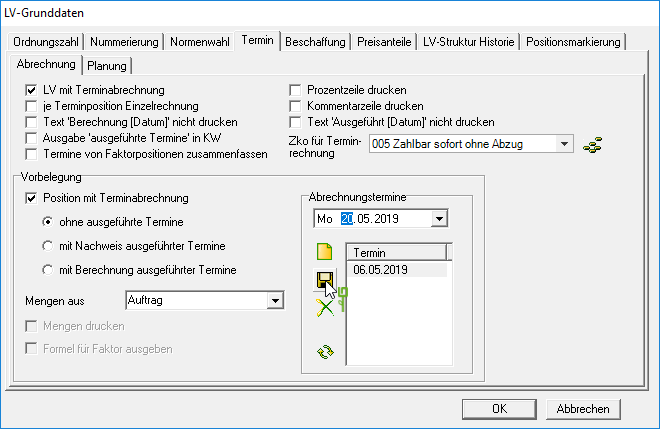
By clicking  , Enter the appointment or select the appointment with
  and confirm with
  define one or more new billing dates.
You can use regularly recurring billing appointments  set a series of appointments.
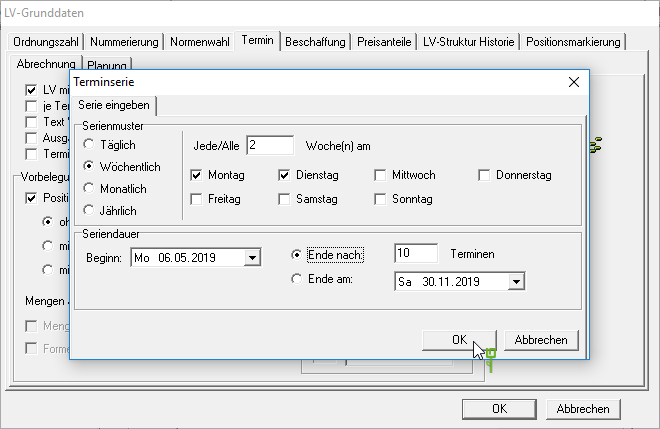
The selected billing dates are automatically preset for newly created items in the LV.
Adjustment per position
You can define separate settlement dates for each item within item processing.
Mark the position in the position tree and open the tab on the right side of the screen accounting.
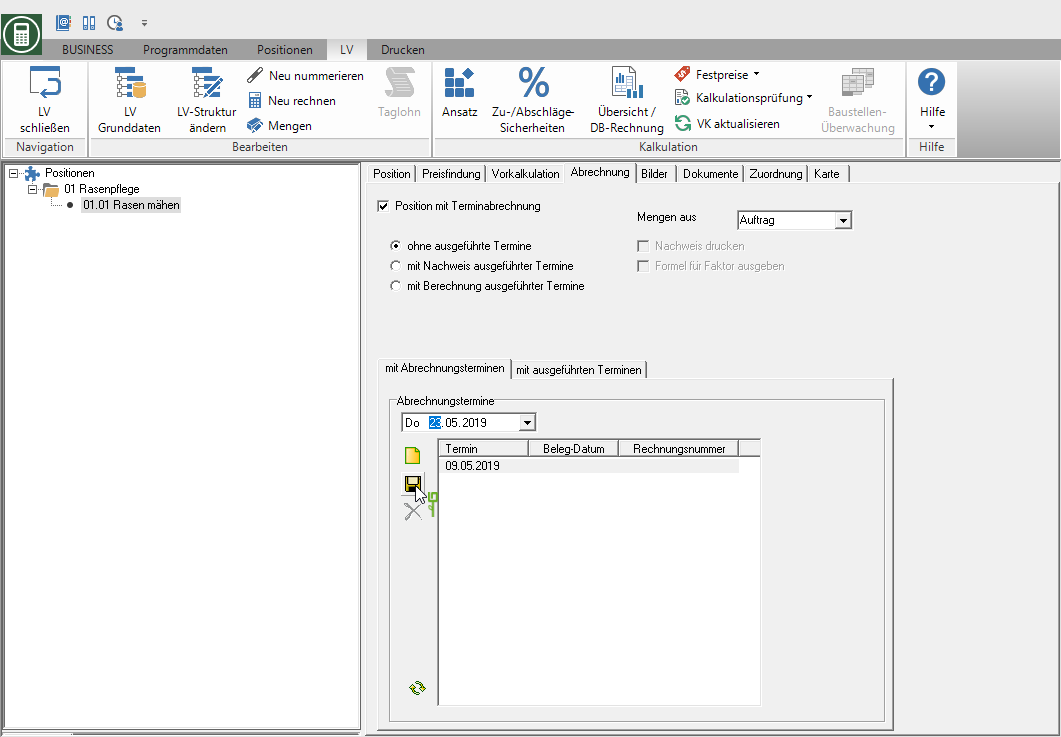
Select the billing dates in the same way as Pre-assignment for new positions. Creating a recurring appointment via  is also at your disposal.
Batch allocation
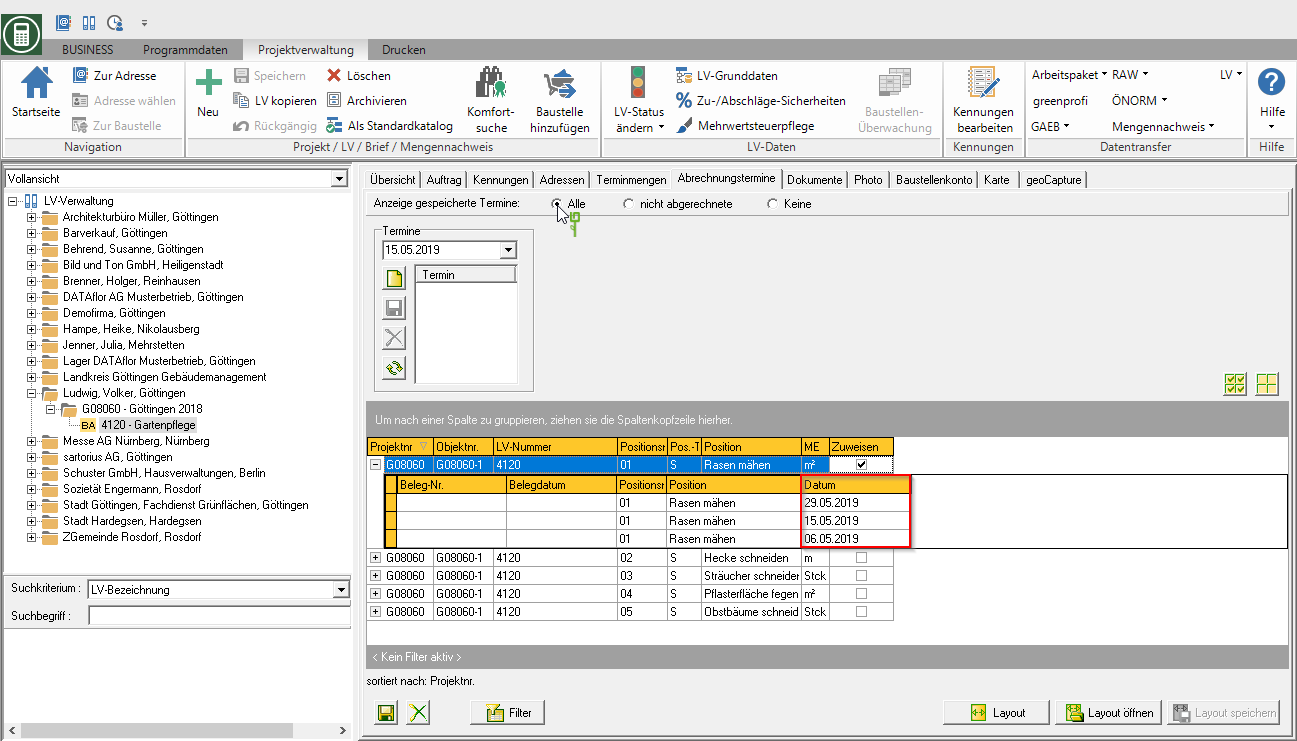
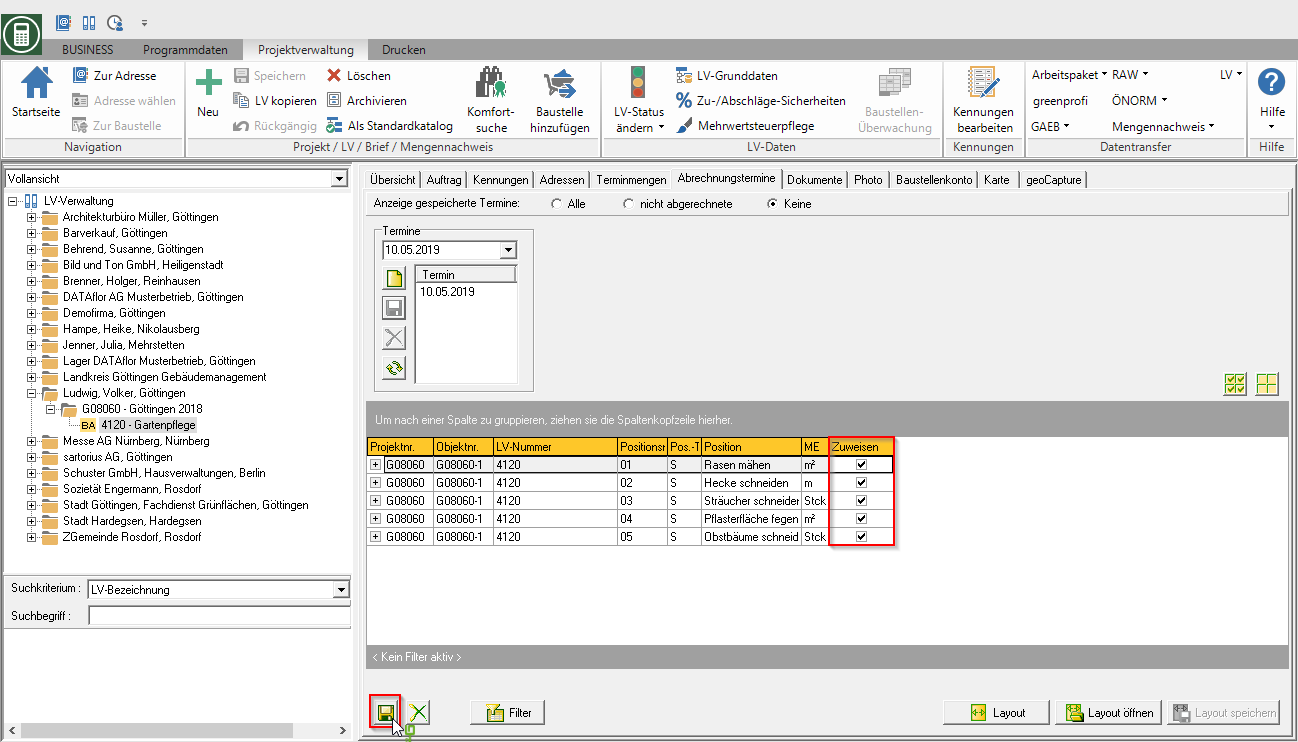
In order to save further billing dates for several items at the same time, mark the LV in the project tree of Project management and open the tab on the right side of the screen Settlement dates.
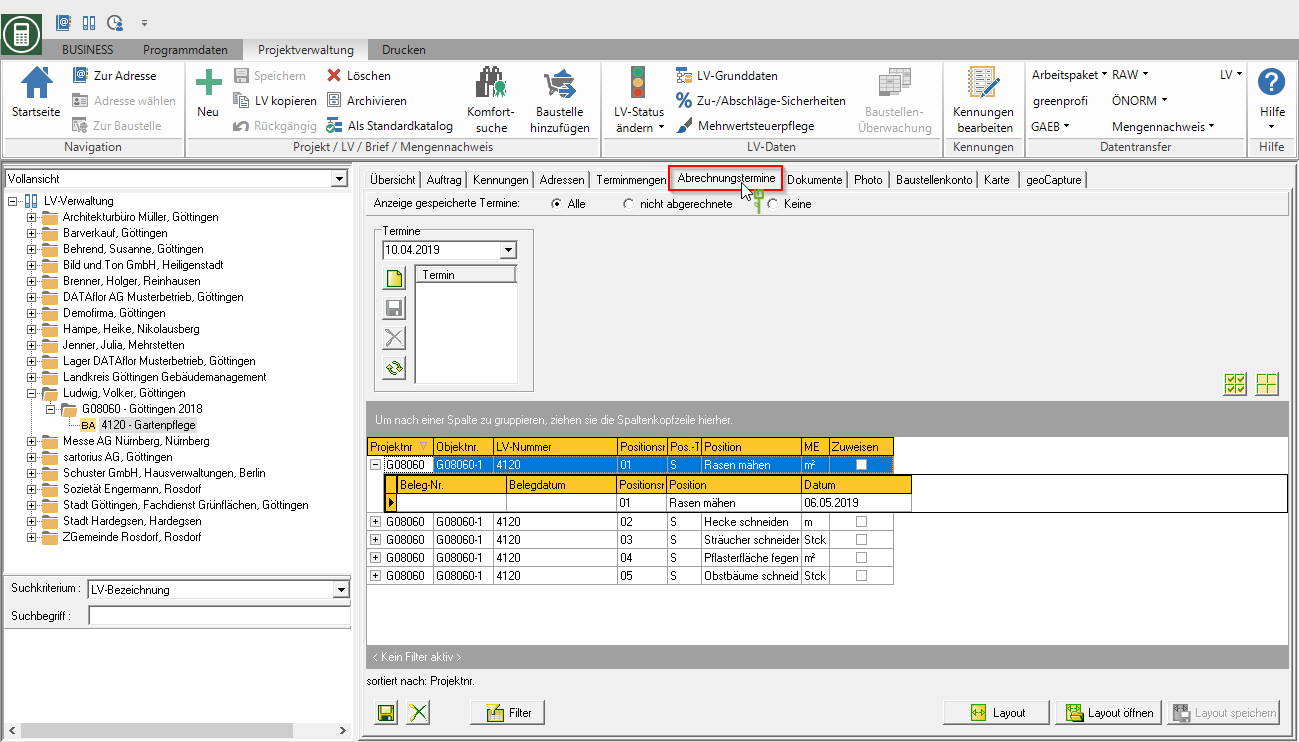
- In the table are all positions that are in the Settings per position are activated for nursing billing.


