Table of Contents
Hours list
Description
The Hours list is an instrument of control for you. It can be important for you in the following areas:
- Checking whether all the hours accrued for the employees have been recorded
- Template for payroll accounting for entering the wage hours incurred
- Checking the hours worked per day for a construction site
This evaluation contains sensitive employee data and is only available to users who have the user right Access to employee reports have.
Application
Open within the Post calculation the menu Print and select the entry Hours list.

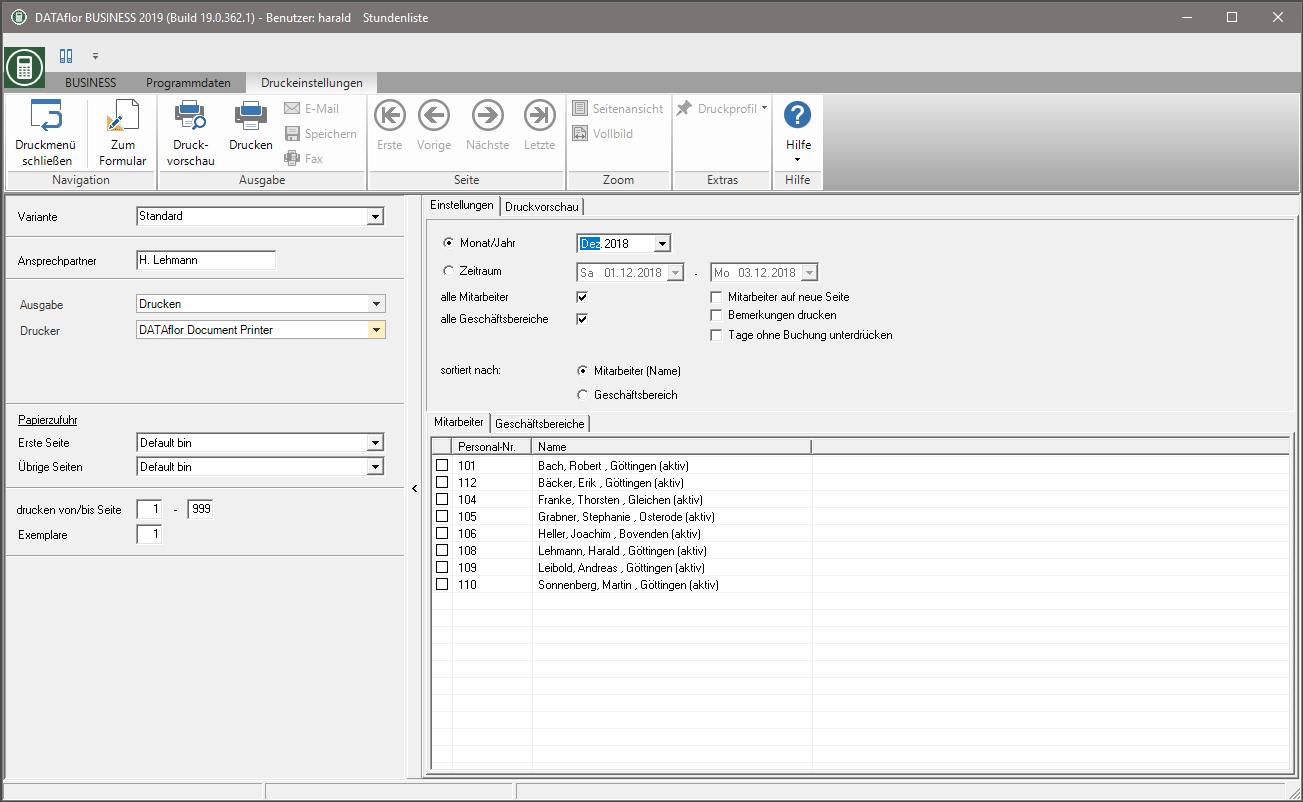
The following print menu opens.

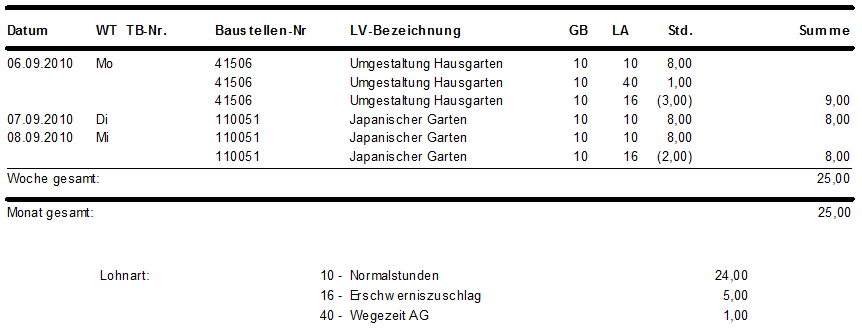
When issuing the Hours list will Wage hours included in the totals, those in the master data / wage types not as a Bonus wage type are defined. This is independent of the settings for "productive hour" or "cost wage type" of the wage types, so that hour control is guaranteed regardless of the cost burden on construction sites. In addition, the hours of the "bonus wage types" are listed in the wage type listing, which do not represent additional working hours, but rather represent "bonuses" for hours worked / recorded.
In the master data of the wage types, you define whether the recorded hours are included in the daily total of the hours list. Is that in the master data  consider In daily total, hourly list is not set, the hours are shown in brackets so that you and your employees can check the hours booked.

In this example, the bonus wage type is Hardship allowance defined as the bonus wage type and the option take into account in the list of hours disabled.
| Hours: | Actual hours = booked time from the post calculation data |
| SZ: | Target time = Specification from the assigned time calendar for the employee |
| , | = Difference between actual hours and target hours Positive hours are shown without a sign, negative hours with a corresponding minus sign |
If there are no postings in the post-calculation for a day, the fields construction site number, LV designation, GB and LA not issued.
The actual number of hours is valued at 0,00 so that the difference sum (+/-) can be calculated accordingly.
The difference sum then corresponds to the negative target time value.
Print settings
Make the following settings:
Variant
For each form you can use the designer to create different Print variants shape. By clicking  select the variant that you want to use for the printout.
Contact Person
The name of the logged in user is preset, which you can enter in Address manager in the user data.
output
By clicking  choose whether to print or save the list as a Fax or e-mail want to send.
printer
By clicking  choose the printer you want to use for printing. Only printers installed under Windows are available for selection.
Paper feed
If your printer offers several paper trays, select by clicking on  the slot from which the paper is used for printing.
print from / to page
Here you can specify the pages to be printed out. If you want to print the entire list, please do not make any changes in this field.
Copies
If you need several copies of the list, enter the desired number here.
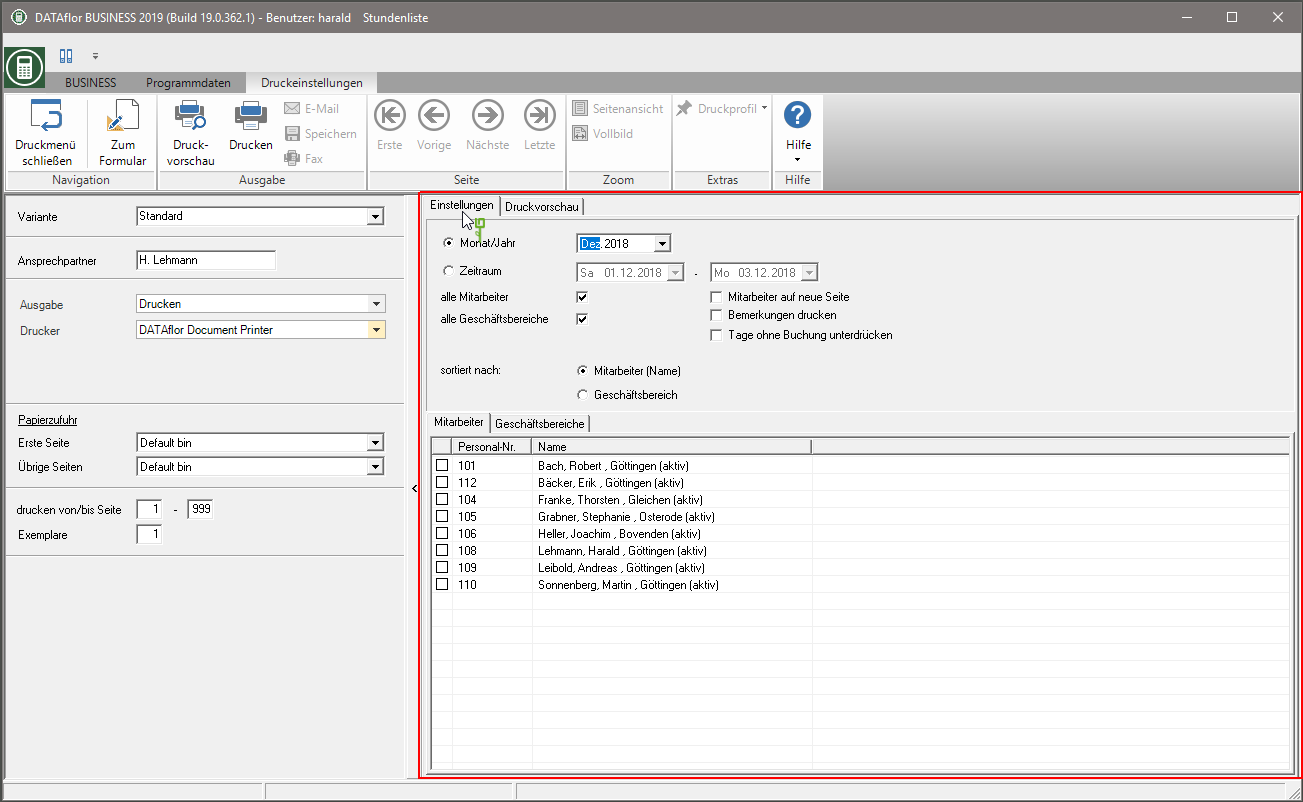
Settings tab
Activate the respective option by ticking the box  .
.

Month year
Select by clicking on  the month to be printed.
Period
Select by clicking on  the period to be printed.
All employees, all business areas
All employees and all business areas are taken into account. However, if you want to limit the selection, call up the corresponding tab and mark with  which employees and business areas you want to consider.
Only those employees are displayed for whom the Address manager the option in the employee master data Provide in employee selection lists is set.
Employees on a new page
The list of hours is printed on a separate page for each employee.
Print remarks
Your comments stored in the daily report will be printed out.
Suppress days without booking
The daily target times and the deviations are also printed in the hourly list. By setting the  you can set that days without bookings are not printed.
Sort by
You have the option of sorting the printout according to business areas or employees.
Print preview and printing
After you have entered all the necessary information for your printout, click in the menu Print settings on  to see a print preview. Send the printout to the printer by clicking on
  or alternatively use the key combination Ctrl + P.
