Table of Contents
Screen layout of the digital inbox
Description
The digital inbox screen is divided into the following areas:
- the task overview
- the file view
- the data mapping / entry
- the feed
- and the functions in the menu
A detailed description of the individual areas can be found in the following sections.

Task overview
A task is automatically created for each file imported into the digital inbox. In the task view, the tasks assigned to the logged in user are displayed in a table.
If there is more than one task in the task overview, you can switch between tasks using the following methods:
- In the task overview, open the task that you want to edit with a click of the mouse.
- The functions are in the menu First, Previous, Next and Last available to switch between tasks.
- You can also use the arrow keys on your keyboard to switch to the previous or next task.
The tasks can be assigned to a user in different ways:
- A file is created via the Directory monitoring imported. The task created for this is assigned to the user or users of the user group who are in the Workflow definition in the processing step Reception is fixed.
- The tasks for the files that the user himself has to do with the File import, to Drag and drop or by digitizing a paper document via the Scan interface in the digital inbox.
- The user is in the Workflow definition assigned to a processing step or belongs to a user group assigned to a processing step. The user is shown the tasks that were forwarded to this processing step.
- A task can be delegated to another user for processing and is displayed to him in the task view.
In the table, the following information is displayed for each task, which will help you to process the task:
- Column Workflow: indicates which workflow the task is assigned to
- Column Processing step: indicates the processing step of the workflow in which the task is in order to identify what should be done for the task
- Column Input source: shows how the file was imported into the digital inbox
- imported by the user himself via file import, drag & drop or scanning → it's the word User appropriate
- The file was imported via directory monitoring → the source name of the directory from which the file was imported is displayed (you define the source name of the monitored directories in the settings
- Task displayed in bold: marks a task as "unread"
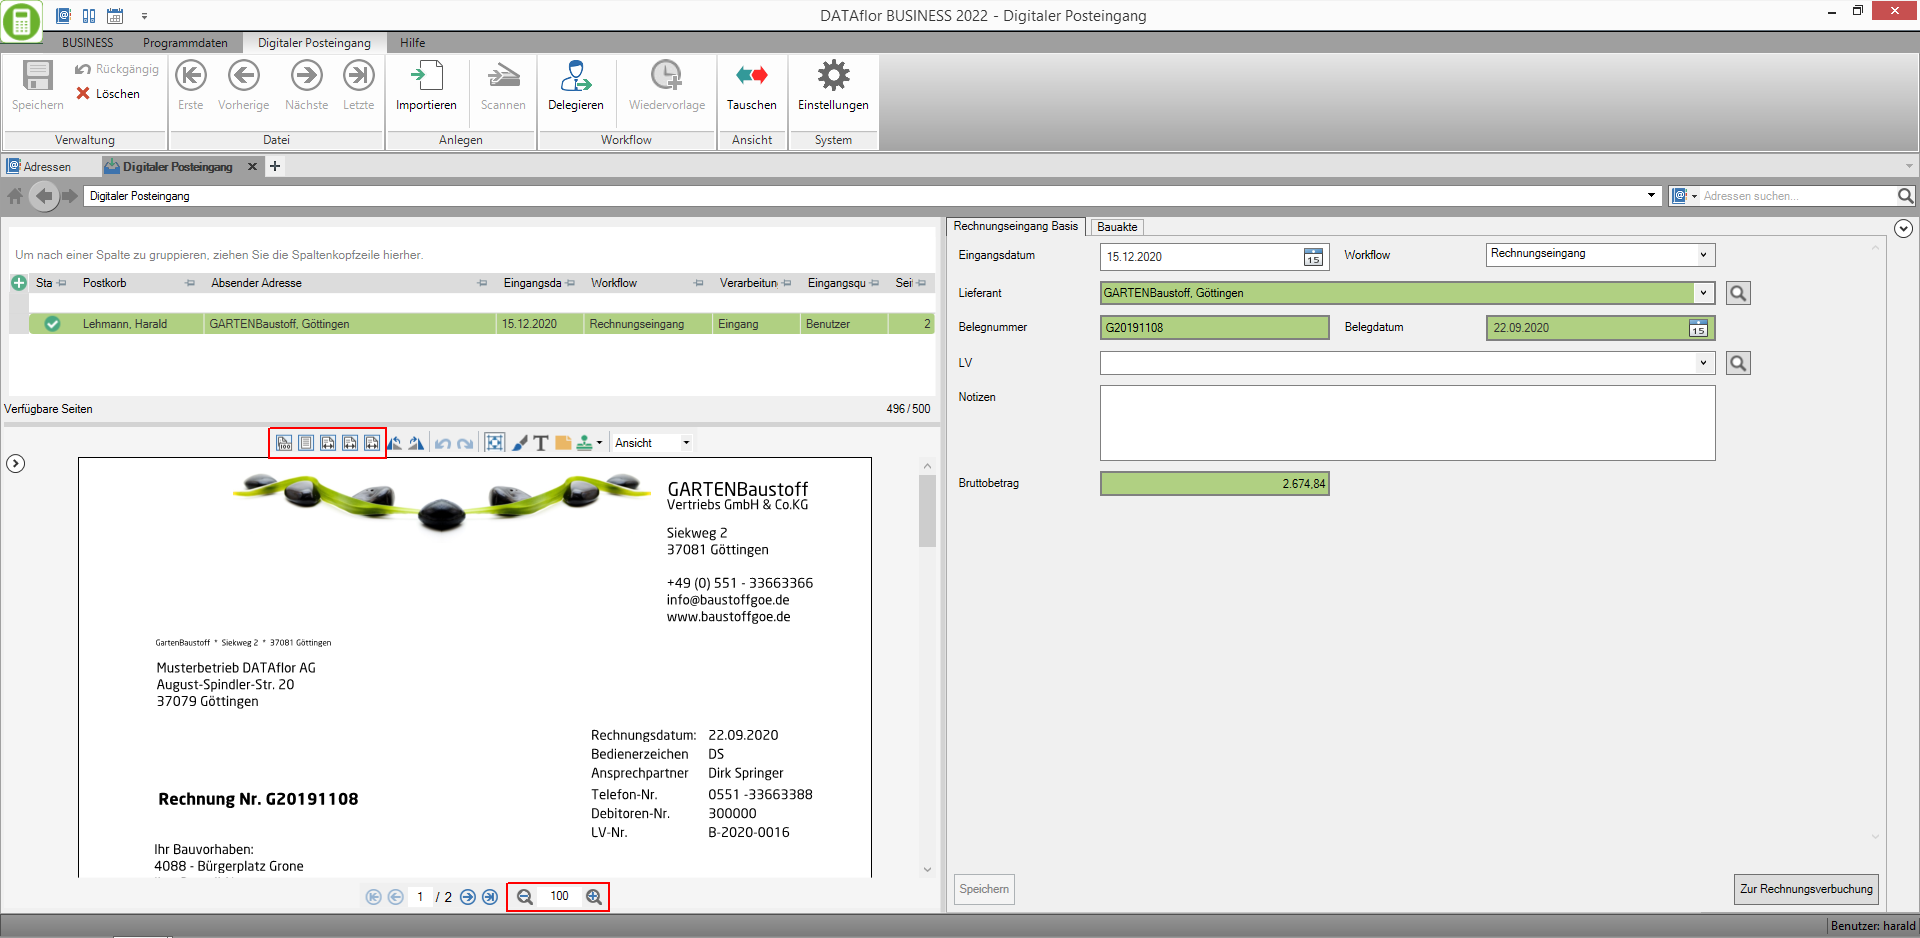
File view
In the file view, the PDF file belonging to the task is displayed for viewing and editing. Functions for setting the view are available in the toolbar of the file view. You can also add comments to the PDF file and the areas File view and Field assignment / entry exchange.
View functions
The following functions are available for displaying the file view:
- Change the displayed size of the file
- Functions in the toolbar above the file view: view original size, view whole page, adjust view to width, adjust view to height, adjust view to visible area
- Functions in the toolbar below the file view: Zoom using the magnifying glass symbols and by entering the percentage
- Rotate view: rotate current page to the left, rotate current page to the right

- Change the displayed page
- Navigation in the thumbnail view: By clicking on
 you can open a thumbnail of all pages in the PDF file.
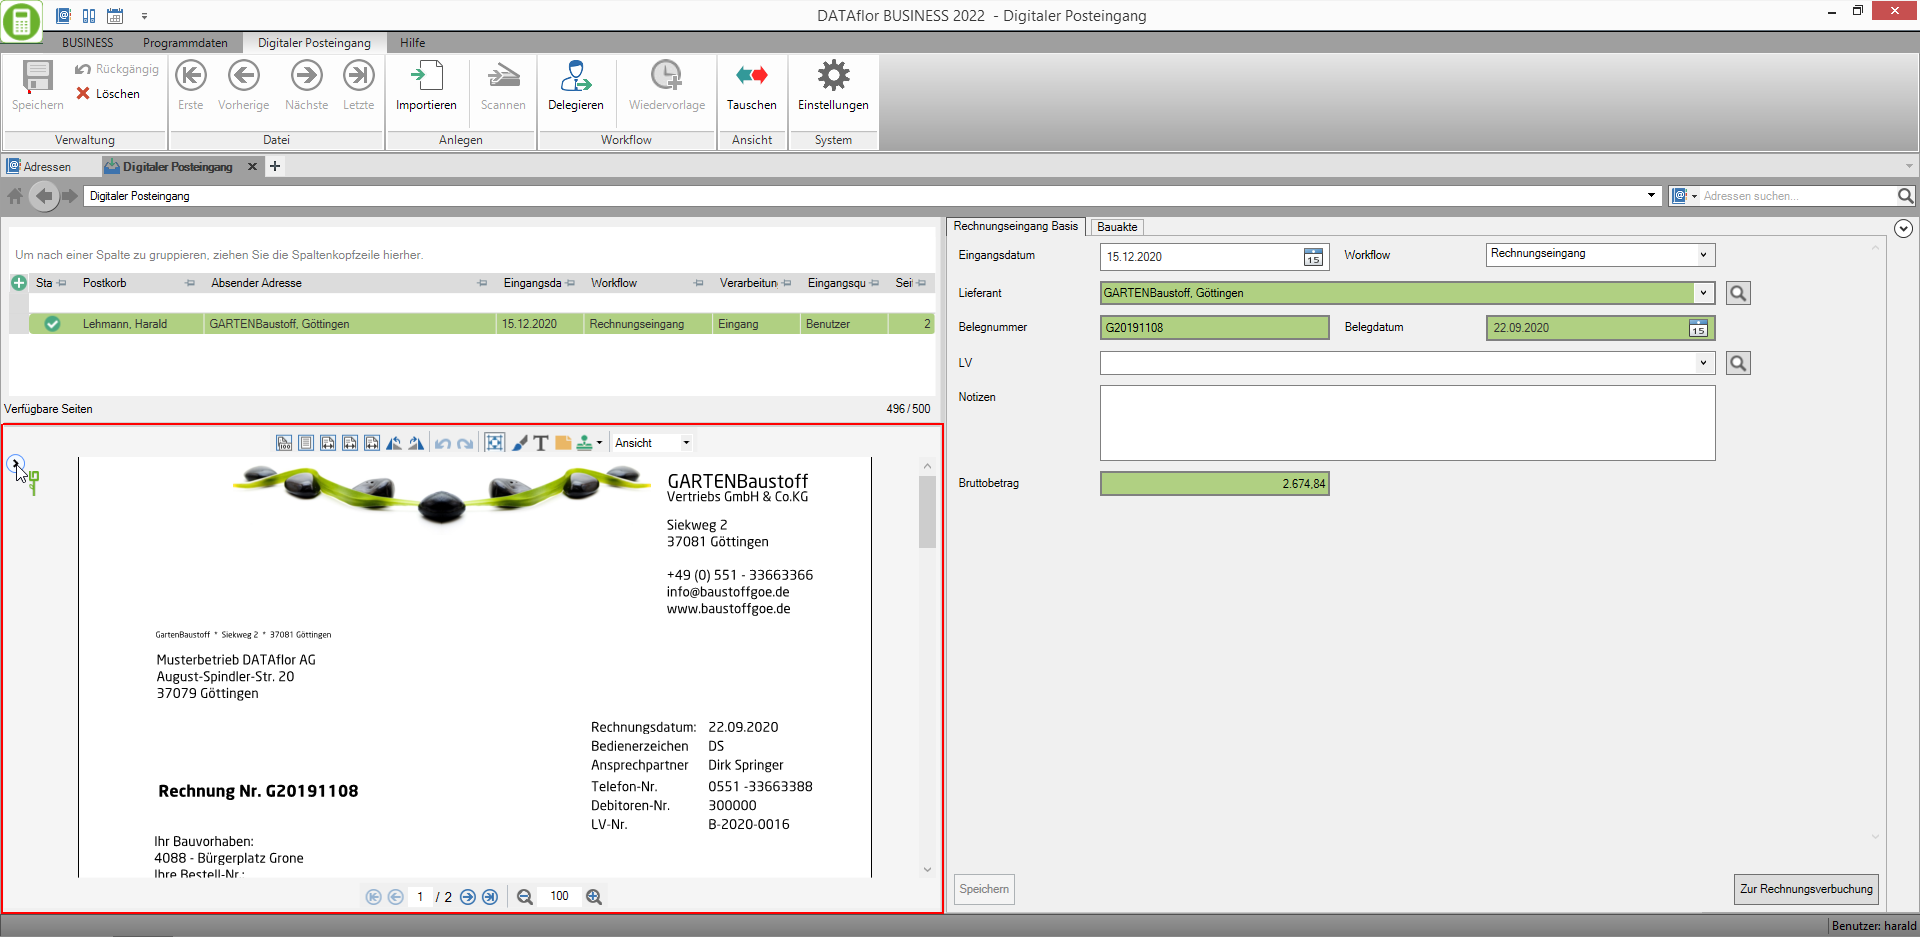
If you click on a page in the thumbnail view, it is displayed in the file view.

Click on you can close the thumbnail again.
 - Scroll from page to page forwards and backwards as well as to the first or last page of the file or open the page directly by entering the page number


Add comments
You can add various comments to the PDF file displayed in the view:
 - Mark the text in color
 - Add text field: the default settings are available, which are in the program parameter 180.10.30 Text comments are defined
 - "Stick on" the digital Post-it
 - Apply digital stamp: the digital stamps are available that are set in program parameter 180.10.20 Digital stamp are defined
By clicking  select the desired stamp or the desired preset for the text field. Which stamp or which text preset was last used is saved so that you can click on
 ![]() or
or ![]() be able to set the same stamp or several text fields with the same properties several times in succession.
be able to set the same stamp or several text fields with the same properties several times in succession.

Remove and edit comments
- Before you forward the task to the next processing step, you can add comments with Del remove as well as changes via
 undo and redo.
- If a task is forwarded to the next processing step with text marking, text field and / or digital stamp, these comments can be made by the next processor not removed or changed. They are permanently saved in the PDF file. In your DATAflor Construction file, the PDF file with the comments is saved as a version of the document.
- Affixed digital post-its can be removed and edited by the processor in the next processing step.
Swap view
Click on ![]() in the menu you can view the areas File view and Field assignment / entry To deceive. The next time you open the digital inbox, the last view selected will be used.
in the menu you can view the areas File view and Field assignment / entry To deceive. The next time you open the digital inbox, the last view selected will be used.
View 1:

View 2:

Data mapping / entry
The fields displayed in the data mapping / entry depend on the workflow to which the task is assigned. in The Field Workflow you can assign the task to another workflow.
For the workflow invoice there are two different forms: Incoming Invoice Basis and Incoming Invoice Details. You specify which form is displayed to the user in the settings in the Workflow definition firmly.
With the formular Incoming invoice basis the user can assign the basic data such as supplier, document number, document date and LV to a task.

At the formular Incoming invoice details the fields that have to be filled in order to post an incoming invoice, e.g. invoice amount, tax rate, status, payment condition, etc.

The tab Construction file is displayed for each task. The fields are preset with the data that you have entered in the settings for Pre-assignment building file have established. All data can be changed individually for each task.

Assign and enter data
The following options are available for assigning and entering data:
- To take over data from the file view, first mark the field that you want to fill, then move the mouse over the value you want to take over in the file view (the value is displayed in the tool tip) and click on the value. In the fields Document number, notes and designation (of the document for the building file) can be done in this way while holding down CtrlKey to accept several values one after the other.
- About the function
 In the toolbar of the file view, you can select the value you want to transfer to the field by drawing a rectangle.
 - Of course, you can also type the desired value into the field using your keyboard.
For example: LV number from the file view by clicking in the field LV take

The fields in the data assignment / entry can be marked with the following:
- Green background: The field was filled by the program's automatic field recognition.
- Bold gray border: The field is mandatory and must be filled out by the user in order to be able to forward the task to the next processing step.
- highlighted in red: The entered value is not permitted. If you hover over the field with the mouse, the tool tip shows which error is present.
- bold blue border: This field is active. Data entries / selections are made in this field.
Automatic field recognition
The automatic field recognition of the digital inbox reads the data from the PDF file of the task and automatically enters the recognized data in the associated data fields. The automatically filled data fields are displayed with a green background. Data such as address, document number, document date, invoice amount, etc. can be recognized.
For example, how is the address automatically recognized?
The field recognition searches the PDF file to see if an IBAN is recognized. If no IBAN is recognized, a tax number is searched for, then for VAT ID and if none of this data is recognized, the customer number is searched for. As soon as a value has been recognized, the program checks in which of your recorded addresses this value is stored. If an address is found, it is automatically entered in the digital inbox.
uneditable fields
Is in the workflow invoice after the processing step Booking Another processing step is defined, for example, to inform an employee about incoming invoices that have been entered, the data can no longer be changed after the invoice has been posted, as it has already been used to save and post the invoice. Only in the field notes you can make changes and additions to the associated document in the construction file.
Feed
Messages for the next editor can be entered in the feed for each task. In addition, each time the processing step changes, it is automatically logged which user forwarded the task to the next processing step.
Open the feed by clicking ![]() on the right edge of the screen.
on the right edge of the screen.

Enter your message in the field at the bottom of the feed and confirm with Enter or by clicking ![]() .
.

By clicking ![]() you can close the feed again.
you can close the feed again.
The feed history is in the DATAflor Construction file saved to the document belonging to the task and in the document information on the Feed tab displayed.
Features
in the menu Digital inbox the following functions are available:
| feature | Description |
|---|---|
| Save | Saves field assignments / entries made for the open task and comments added in the file view. |
| Undone | Cancels field assignments / entries made and comments added in the file view. |
| Delete | Deletes the open task from the inbox including all data. In addition, the associated document, including all versions, is deleted from the construction file. If the task was generated automatically from a file in the inbox via directory monitoring, the file is not available for a new import into the digital inbox. |
| First / Previous / Next / Last | Navigates between the tasks in the task view. |
| Import | Opens the Windows file selection dialog to import a file into the digital inbox. |
| Scan | Open the scan dialog to scan a paper document and import the generated PDF file directly into the digital inbox. |
| Delegate | Opens the dialog for selecting the user to whom you want to delegate the task. The task remains in the same processing step. |
| resubmission | For the document belonging to the task in your DATAflor Build a follow-up file. |
| Swap | Swap areas File view and Field assignment / entry in view. |
| Settings | Opens the dialog Settings um basic settings for your digital inbox. |