Table of Contents
Create construction sites
The starting point for your planning is the Project management recorded LVs, which you can create in various ways as construction sites in the construction site manager.
Deposited for LV Work packages are automatically taken into account in the system.
Construction sites are created in the construction site manager according to the following logic.
| Underlying course | Investment logic |
|---|---|
| LV without appointments and work packages | Construction site begins with the current date and ends after seven days |
| LV planned with the start of construction | Construction site starts with the date Start of construction planned and ends after seven days |
| LV planned with the start of construction and completion by | Construction site starts with the date Start of construction planned and ends with the date Completion by |
| LV with work package | Construction site begins with the date of the work package and ends after two days |
| Representation of the construction sites in the program | Description |
|---|---|
 | Construction sites are shown as green bars. Via the program parameters 160.20 Construction site bar lettering you can also specify how the bars should be labeled. You can use the Text variables [LV-NR], [LV-DESCRIPTION], [PERIOD] and [CLIENT] are available. |
 | |
 | Work packages stored for the course are displayed as blue bars |
Plant in the construction site manager
Activate in the Construction site view in the menu Construction site manager the entry Select course. A table with all current courses opens on the left. In the table, mark the courses that you want to include in your planning as construction sites and then select the entry in the menu Add.
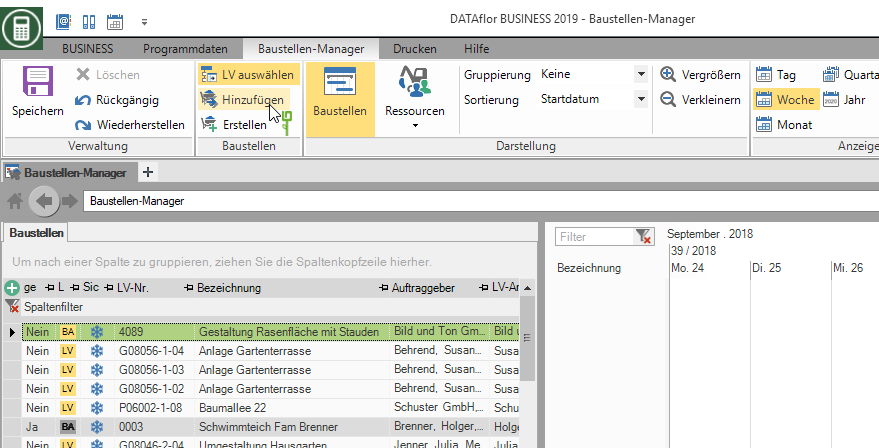
LVs that have already been created in the construction site manager are grayed out in the table.
After you have added all the desired courses to your planning, hide by clicking on the entry again Select course the LV table again.
The course table only contains courses that have been processed since the beginning of the previous year.
To select the displayed data and columns as well as the order, sorting and grouping, the functions for editing the are available within the LV table Table layouts is available for storage, management and analysis.
Plant from project management
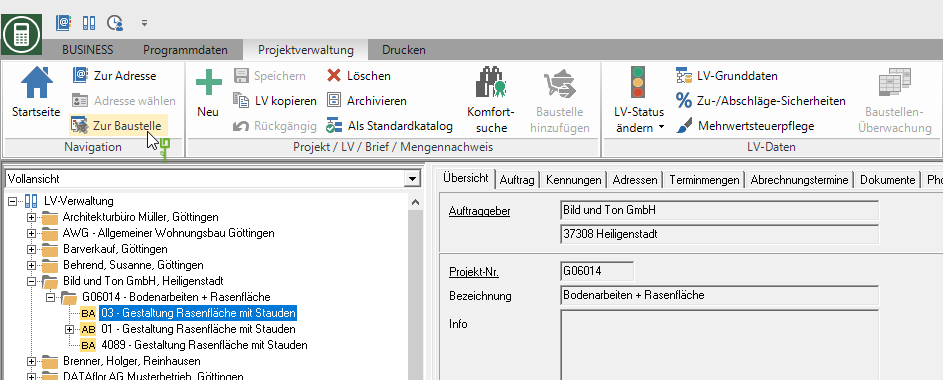
Select the in the project tree Project management the desired course and then click in the menu Project management on the entry Add construction site.

After you have transferred a course to the construction site manager, the menu Project management the entry To the building site active. Click on this entry to switch to the construction site in the construction site manager.
About the function Copy LV In the project management you can also copy your LVs with plans if necessary. In the construction site manager, a plan is automatically created for the LV you copied.
Attachment from LV search
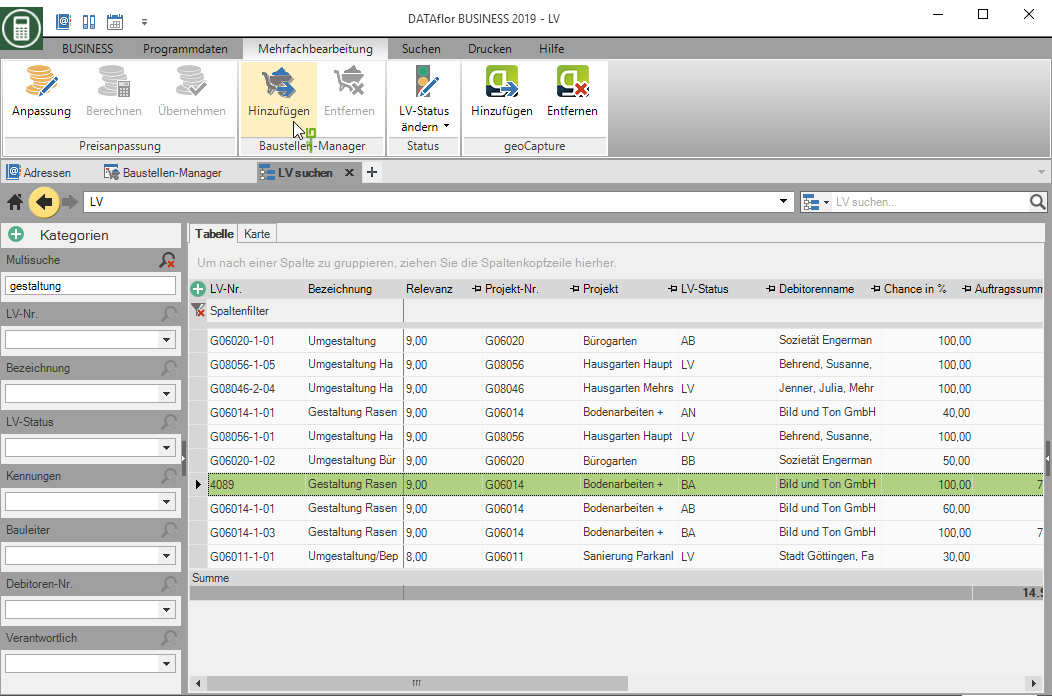
In the search result, select the Course search the course or with Ctrl or Shift several courses that you want to transfer to the construction site manager and then click in the menu Multiple machining on the entry Add.
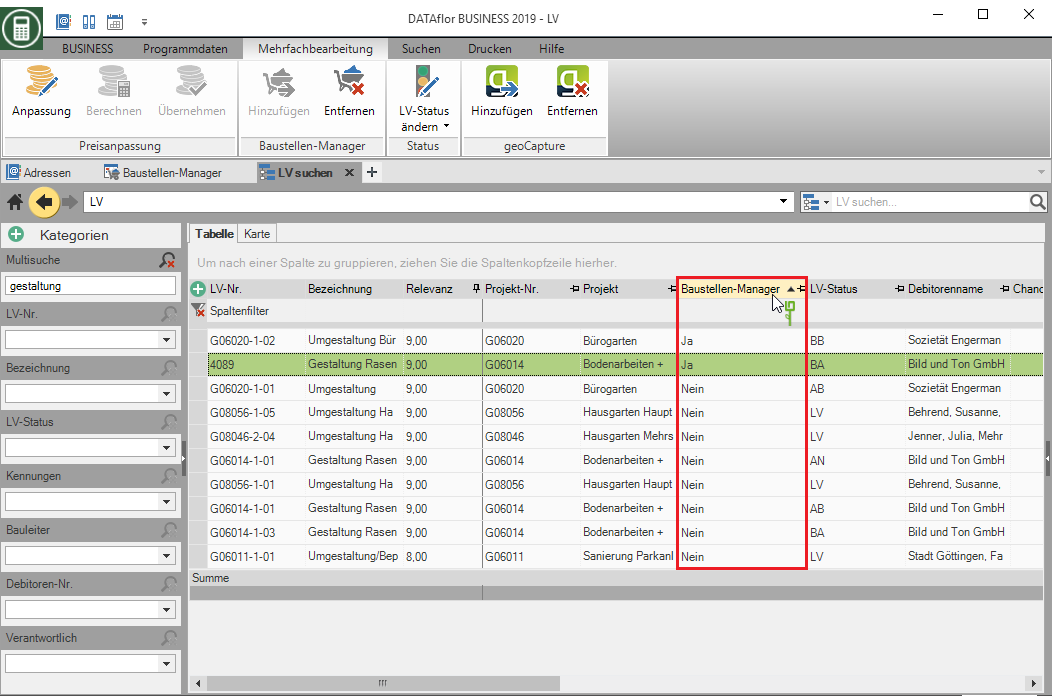
From the Course search you can comfortably switch to your construction sites in the construction site manager via the context menu with the right mouse button. To do this, mark the desired course and select the entry in the list To the building site .
Creation of construction sites without LV
In addition, the construction site manager offers you the option of creating construction sites without a LV.
To do this, switch back to the construction site manager.
Do you click in the menu Construction site manager on the entry Create.

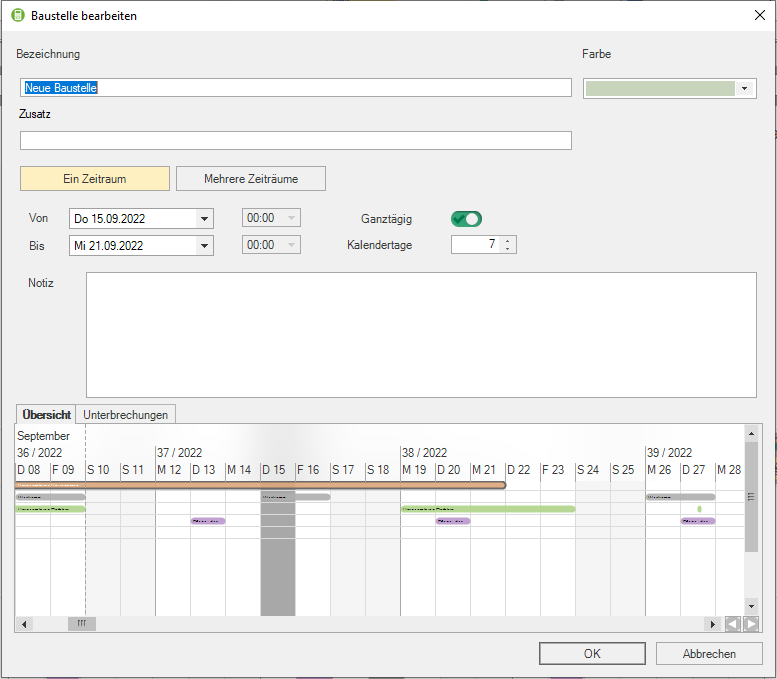
The dialogue Edit construction site will be opened. Give your construction site a unique name and make further settings if necessary.
Edit construction sites
After you have created your construction sites, you can edit them further using a variety of functions.
Set time periods
The fastest way to set the planned time periods for your construction sites is by Drag and drop firmly.
To lengthen or shorten the construction site period, move the mouse over the left or right edge of the construction site beam and drag it to the desired start or end date while holding down the left mouse button.

To move the entire construction site, click with the mouse on the construction site bar and drag it to the desired period with the left mouse button pressed.
The ones created for your construction sites Work packages can also be sent via Drag and drop move. The new start date is automatically entered in the work planning adopted.
During the Day view you can also plan your construction sites by the hour. To do this, click on the desired date in the calendar or activate it in the menu group Advertising the entry Tags.

Via the menu group Raster Determine whether you want to plan your construction sites by the hour, in 30-minute or 15-minute units.

Alternatively, you can press and hold the construction site for planning in 15-minute units Ctrl-Button Drag to the desired time.
You can also specify the time period for your construction site in a dialog Edit construction site establish. This is particularly recommended for construction sites that extend over a longer period of time.
First open the dialog by double-clicking the construction site or right-clicking the context menu and selecting the entry Edit.
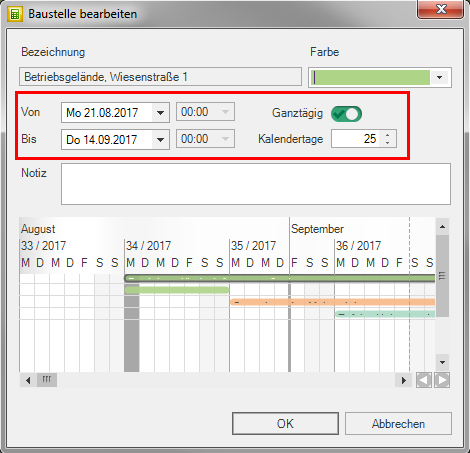
Activate the entry full-timewhen your job sites on a daily basis want to plan. Use the fields to determine From, Bis and Calendar days the planned period of the construction site.
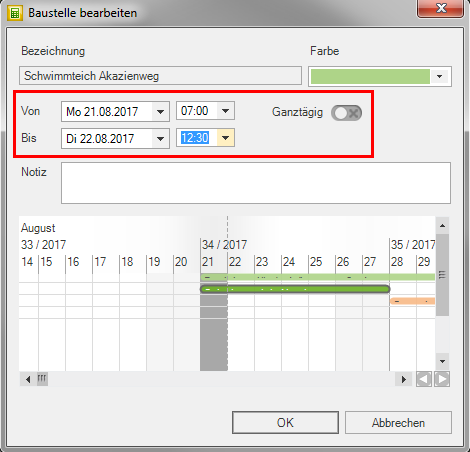
Deactivate the entry full-timewhen your job sites by the hour want to plan. Use the fields to determine From, Bis as well as the specification of the desired Time of day the planned period of the construction site.
Set interruptions
The function is available to you to map times when the construction site is idle Interruptions to disposal. Open the dialog Edit construction site double-click on the construction site or right-click in the context menu and select the entry Edit.
By going to the Interruptions click in the top line to create a new interruption. Select the period of interruption and, if necessary, add a description and note to your entries. Confirm your entries with Tab.
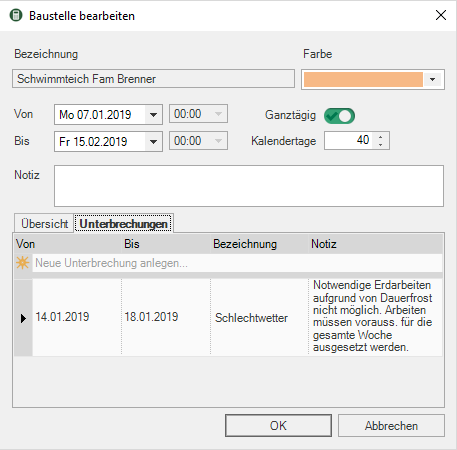
Sections in which the construction site is interrupted are displayed in white-transparent within the construction site bar.
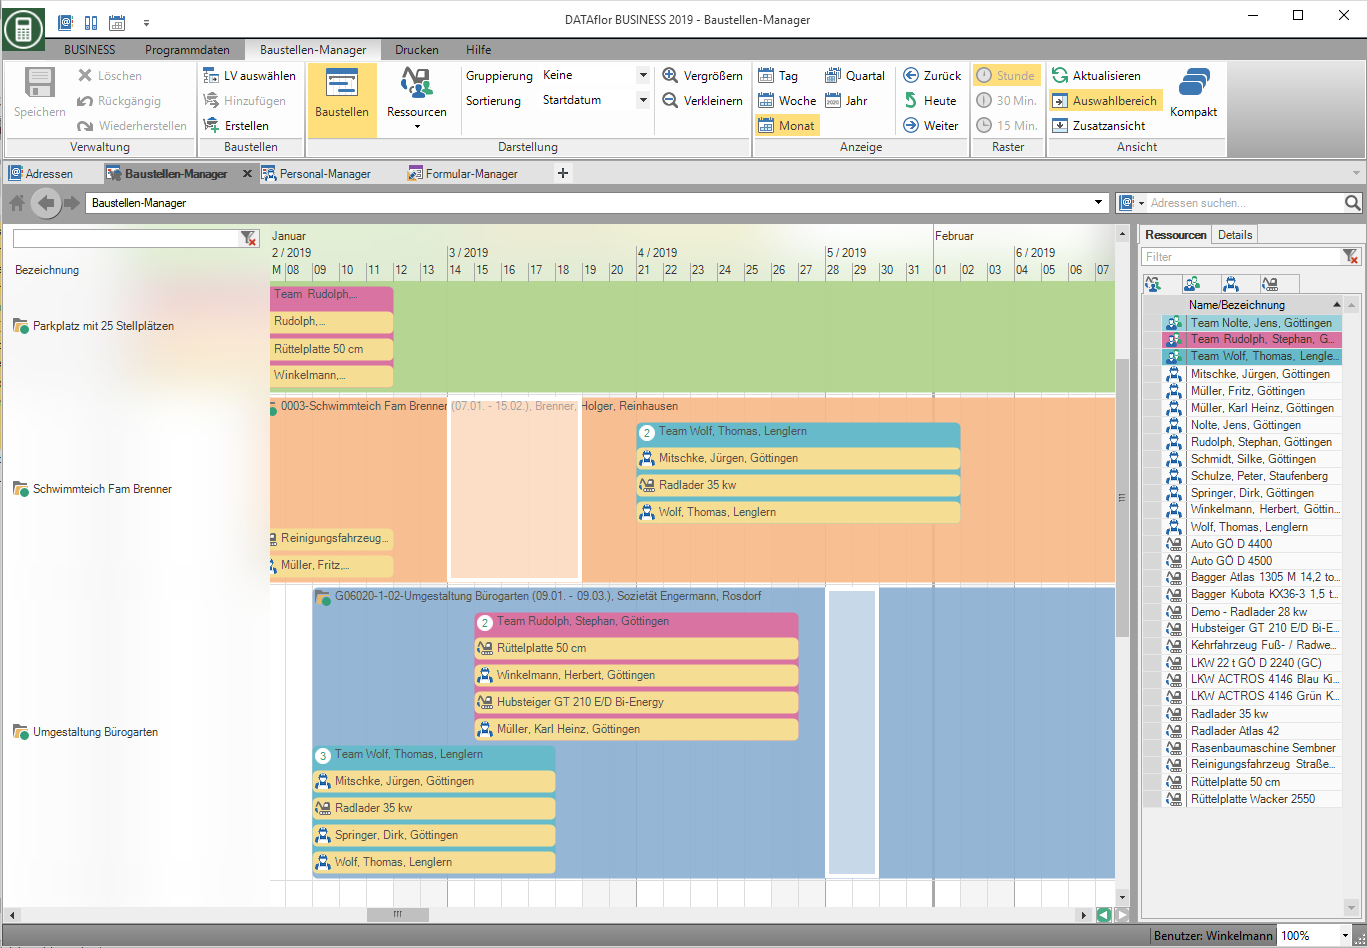
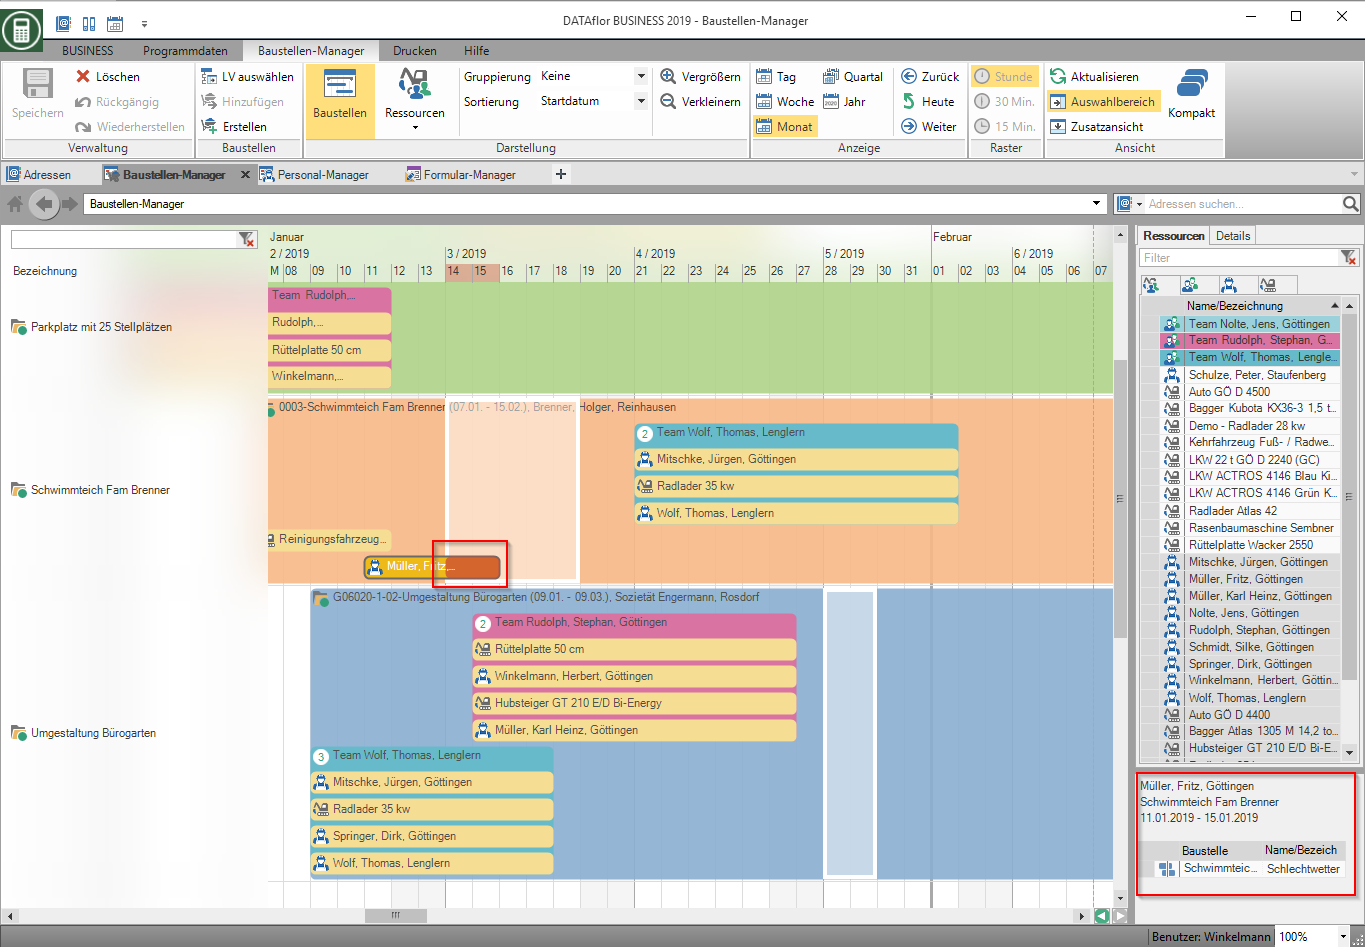
Resources that were scheduled during an interruption period are presented to you as Konflikt displayed.
Set colors
In dialogue Edit construction site you can also assign a different color to your construction site. Open the color selection and choose your individual color.
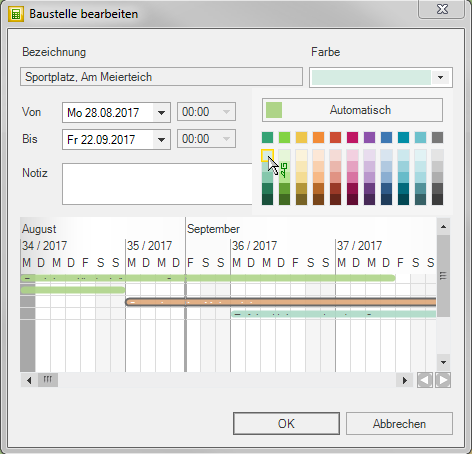
With the selection Automatically reset your construction site to the standard green color.
Create notes
Also in dialogue Edit construction site you have the option to save notes on your construction site.

Your notes are displayed in a tooltip as soon as you move the mouse over the construction site.

You can also save your notes on the Print out details for the construction site, the site manager and those responsible.

