Table of Contents
Batch printing invoices
Description
The batch print generates for all LVs for which one or more in a selected period Settlement dates are stored, automatically individual invoices. The selection of the course is also available via the Main identifiersthat you have assigned to the course are available.
Application
Select the in the project tree Project management the entry Management, in order to take into account all recorded LV for the batch printing. For example, if you mark a client, only LV from this client will be considered. Then open the menu Print and choose in the group Batch prints the entry Invoices.

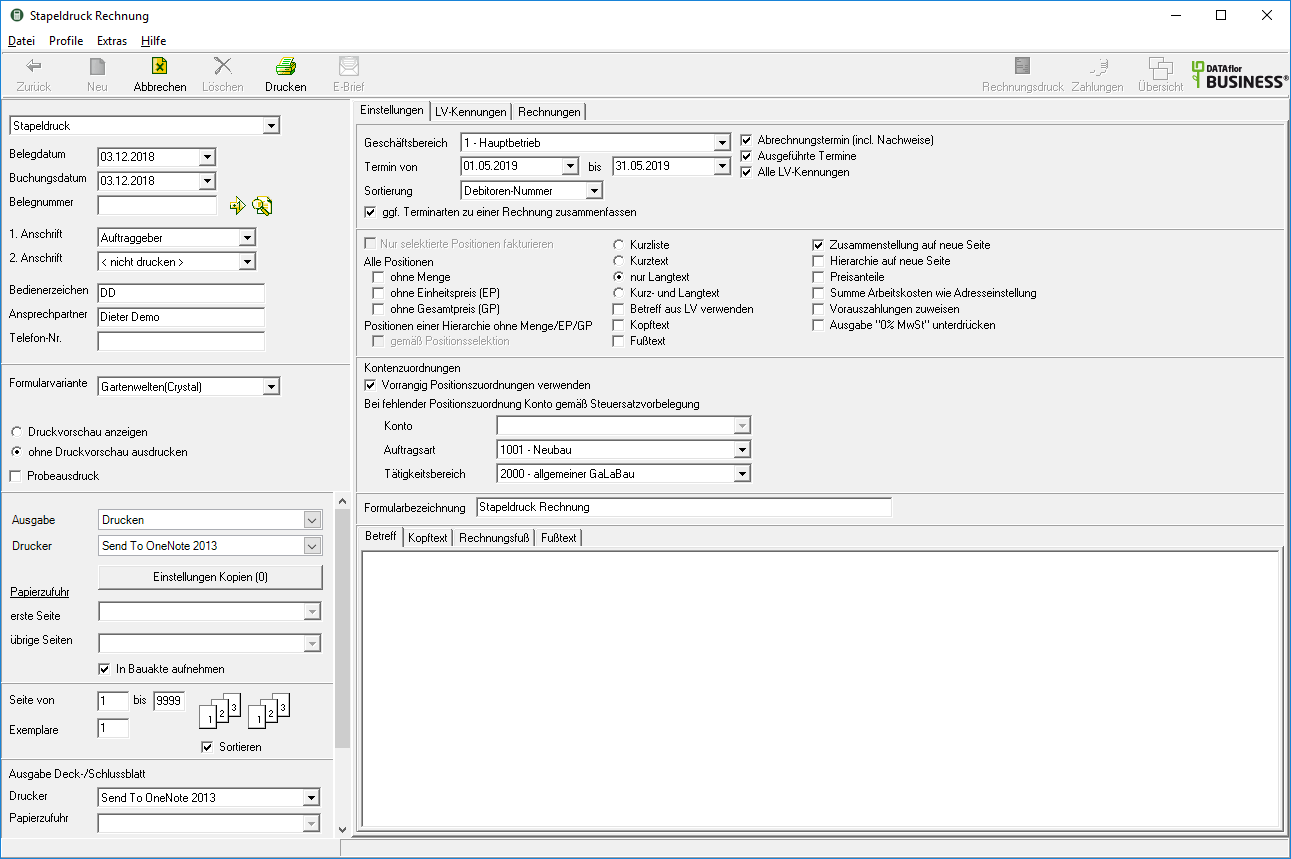
The following print menu opens.

Print settings
Make the following settings:
Document date
Enter the date or choose over  the date which will be printed on the invoices. The current system date is preset by default.
Posting date
Enter the date or choose over  the date that is assigned for the invoices in the financial accounting. The current system date is preset by default.
Document number
Apply the next free number in the number range by clicking on  or enter the document number that will be used for the first batch print invoice. The following invoices will continue to be numbered accordingly.
1. Address
Select the address to which the invoices are sent. The entry Clients is preset by default.
2. Address
If you would like to print another address on the invoices, select this by clicking on  out. The default entry is preset.
Operator sign, contact person, operator sign
The data of the logged in user that you entered in the Address manager in the user data.
Form variant
For each form you can use the designer to create different Print variants shape. When opening the print menu for the first time, the variant that you used for Form Batch printing invoices have set. By clicking  select the variant that you want to use for the printout.
Show print preview / print out without print preview
In the program parameter 70.30.100 Display of print preview in batch printing of invoices specify which of the two options is preset by default.
Sample printout
This option enables you to print out information about the invoices. There are no entries in the construction site account or entries in the finance manager. The test invoices are marked as a test print in the form description. Proofs are not included in the DATAflor Construction file filed.
output
It is displayed that the invoices are being printed in batch on the set printer.
printer
By clicking  choose the printer you want to use for printing. Only printers installed under Windows are available for selection. The default setting is the printer that you selected for the selected Pressure variant have deposited.
Settings copies
For printing out several copies on different printers or on different paper, use the here Advanced print settings in front. The settings that you made in the form manager for Form Batch printing invoices have deposited. The number in brackets on the switch [Copy Settings] shows the number of copies defined.
Paper feed
If your printer offers multiple paper trays, select by clicking on  the slot from which the paper is used for printing. By default, the shaft selection that you have selected is set Pressure variant have deposited.
Include in building file
Have a license for the module DATAflor Construction file, you can save the invoices, including the cover and final sheet, as documents.
Page from ... to ...
Here you can specify the pages to be printed out. If you want to print the invoices completely, do not make any changes.
Copies
If you need several copies of the invoices, please enter the desired number here.
Sort by
The output of the individual pages of several copies can be done either separately (111, 222, 333) or sorted (123, 123, 123).
Output cover / final sheet
Select the printer and paper tray that will be used for printing the cover sheet and the tail sheet.
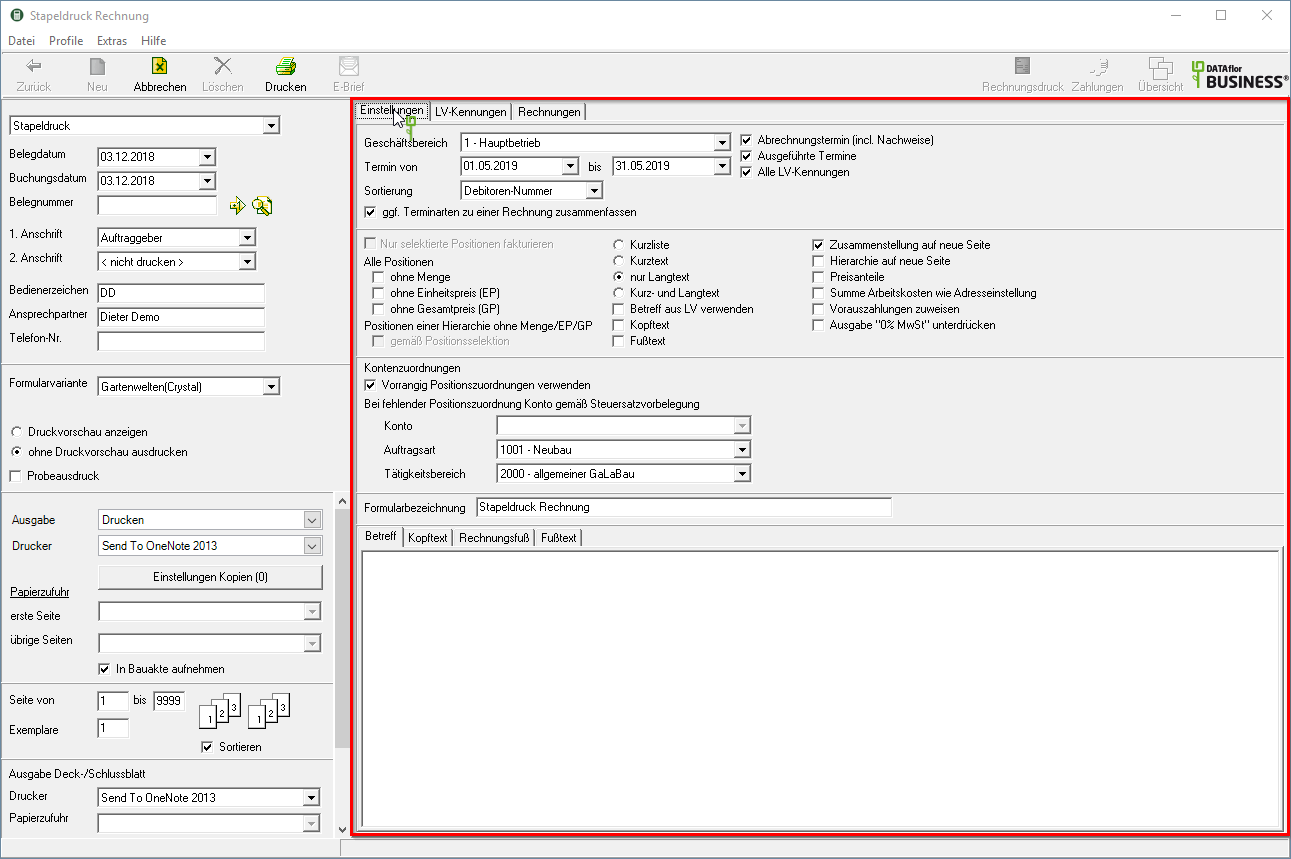
Settings tab
Activate the respective option by ticking the box  .
.

In the upper area you make the settings for the selection of the maintenance specification for the batch print:
business
If you have assigned your maintenance specifications to different business areas, select here by clicking on  the business area for which you want to print care invoices.
Appointment from ... to ...
The positions are billed whose Settlement dates or Executed appointments are in the selected period. The billing date stored in the item controls that the item not before calculated on the selected date.
Billing dates (including evidence)
Prints all items for which a settlement date is stored in this period If there are two or more billing dates in the period, these will be listed separately on the invoice. Executed appointments are printed as evidence if this is preset for the positions and the appointments have been recorded.
Executed appointments
If there are no billing dates for a position, all executed dates that fall within the period will be billed. If there are also billing dates, the items are billed whose billing date and execution date fall within the period.
LV identifiers
Enable  If you choose the option, all LV identifiers are taken into account. To narrow the selection, open the tab Identifiers and mark with
  which LV IDs you want to take into account.
Combine different types of appointments on account
Enable  You have the option to be able to use different billing procedures for billing a maintenance LV.
However, also note the option individual invoice for each appointment item in the Settings for the printout to the LV.
In the lower part of the tab Settings choose what information will be printed on the invoices:
Without quantity, without unit price, without total price
Enable  If you select the respective option, all items in the LV are printed without quantity, unit price or total price.
Short list, only short text, only long text, short and long text
You can enter short and long text independently of each other. The short list only prints the first line of the short text. Select with  which texts are printed for the positions.
Im Program parameters Copy number of lines of long text into short text Specify how many lines of the long text are automatically copied into the short text if only long text is available for the item.
Use subject from LV
By default, the text that you entered on the tab is printed on all invoices Subject (e.g. winter service for the 2015/16 season). Activate  If you choose the option, the subjects from the respective LV are used.
Header text / footer text
The on the tab Header text and Footer text entered texts are printed on all invoices.
You are responsible for the text design Editor as well as numerous Text variablesthat are automatically filled by the program.
Compilation on a new page
The summary of the hierarchy totals is printed on a separate page.
Im Program parameters Always print the compilation on a new page you can set this option to be the default when you open the print menu.
Hierarchy on a new page
For visual reasons, a new page can be started when changing the title.
Price shares
Enable  If you have the option, the price shares of the items are printed on the invoices according to the settings in the LVs.
Total labor costs such as address setting
Enable  If you have the option, the labor costs will be shown on the invoices according to the settings for the clients in the address manager in net, gross or not. Deactivate
  If you choose the option will not be printed on any batch printing invoice.
Assign prepayments
Enable  If you choose the option, a dialog with all prepayments available for the LV is displayed before the print preview or printing process is opened. Select there which advance payments will be offset against the new payment request.
Suppress output "0% VAT"
For invoices according to §13b UStG you can output the line VAT 0,00% suppress.
Form name
Here you enter a name for your invoice form (e.g. service invoice). By default, the form name that is used in the form manager for Form Batch printing invoice is deposited.
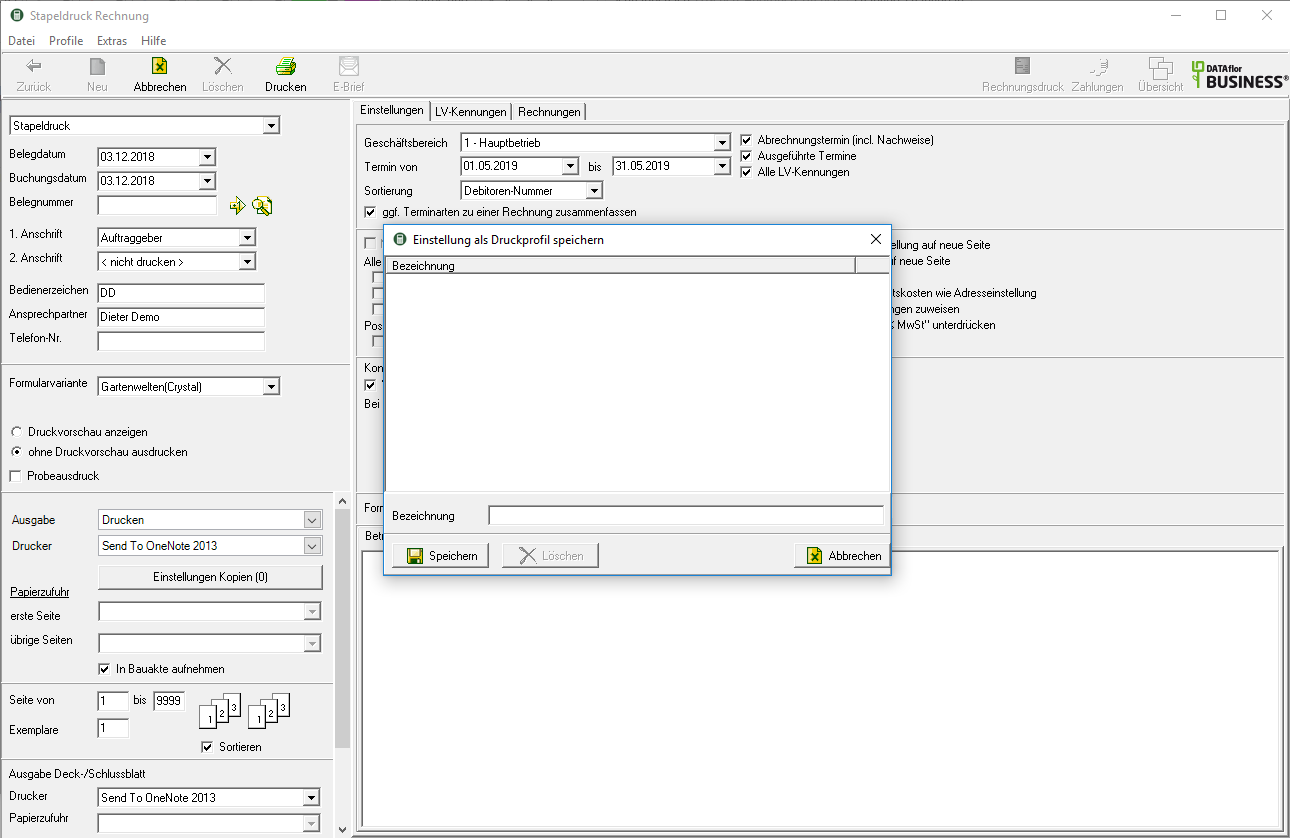
Save settings
You can save the settings in the print menu as profiles in order to automatically use the same settings for the next batch print.
To do this, open the selection in the menu bar Profile and select the entry save profile.

Assign a unique name to the print profile and confirm with [To save].

To load a pressure profile, open the selection in the menu bar Profile and select the entry Load profile.
